KARA_SRM_EN_1-0
w w w . l - a c o u s t i c s . c o m
13
1313
13
4. Attach a KARA-MINIBU to KARA#1 as follows:
a. Remove the four R-BLP from the KARA-MINIBU.
b. Turn the KARA-MINIBU so that the text of the identification plate is readable and the laser plate is placed at
the front (towards audience).
c. While keeping this orientation, align the four link points of KARA-MINIBU with the four arms of KARA#1 and
secure each pair together by re-inserting the four R-BLP into the same holes (insert both rear R-BLP first).
Note: If KARA-MINIBUEX extension accessories are already mounted to the KARA-MINIBU (see [6.2.2, step 1]),
it is not necessary to remove them: the KARA-MINIBU/KARA-MINIBUEX rigging structure can also be used in
place of the KARA-MINIBU.
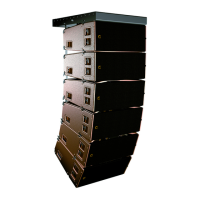
Figure 9: Attaching KARA-MINIBU to ARRAY#1
5. Attach the shackle(s) to the KARA-MINIBU [9.4] according to the chosen configuration [9.2]. Note: If the array is
intended to be flown in pullback configuration, attach a single shackle to the rear pullback hole [5.1].
6. Place ARRAY#1 beneath the rigging points and attach the motor hook(s) or stinger(s) to the shackle(s).
7. Raise the array to a height for which the angle arms of ARRAY#1 are within comfortable reach and remove the
flight-case from the rigging location.
 Loading...