25
Step 3
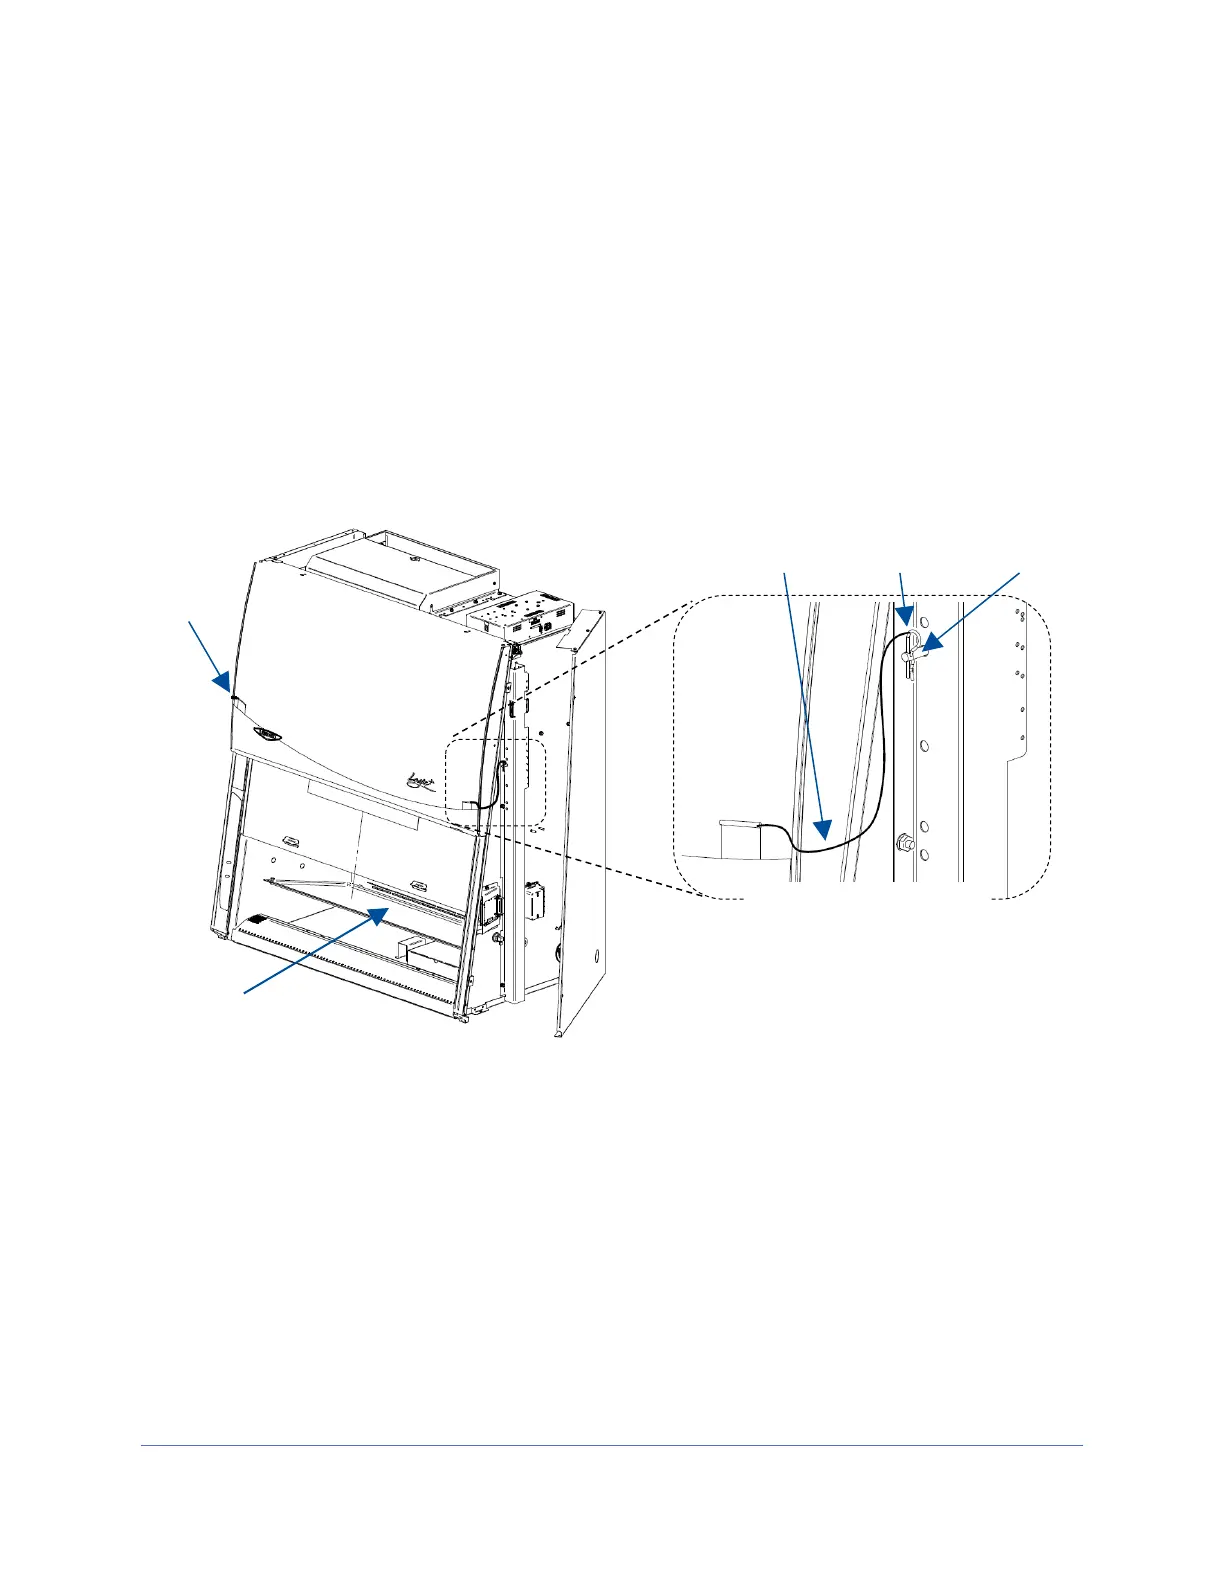
The front sash will not slide open yet. The sash counterweights are pinned for
shipment. The Side Panels must still be removed or hinged open for this step. Locate
the Support Pin and Clevis Pin on each sash counterweight. See Figure 4-3. For
convenience a yellow tag and string are provided. Locate each yellow tag on the front
of the product, and follow the yellow string to each Clevis Pin. Remove the Clevis Pin
(also referred to as a Cotter Pin), then pull the Support Pin toward the rear of the
product until it is free. You will hear the counterweight drop a short distance when the
Support Pin is removed. Discard the Tags, String, and Pins.
Replace or close each Side Panel and secure the panels with two screws per panel.
Raise the front sash. Locate and retrieve the Parts Box taped to the work surface. See
Figure 4-3. The following items are located inside this box.
User’s manual thumb drive
Drain valve assembly and fasteners
Power cord
Vacu-Pass
TM
accessory plug (if option package ordered)

 Loading...