11
6. Route the appropriate tubing from the remote pump deck
outlet to the carbonated water inlet at the unit.
7. Install a shut-off valve in the water line feeding the remote
pump deck as well as the water line feeding the plain water
inlet.
3. Route appropriate tubing from the water source to the water
inlet at the remote pump deck.
4. Install water booster (Lancer PN MC-163172) between water
supply and the remote pump deck.
5. Using tubing cutters, cut the water supply line and install
U-fitting. Route appropriate tubing from the U-fitting to the
plain water inlet at the unit.
A
C
D
A. Remote Pump Deck
B. Pump Inlet
C. Pump Outlet
D. Line to Carb Inlet
A
B
C
A. Line to Water Source
B. U-Fitting
C. Line to Remote Pump Deck
D. Line to Plain Water Inlet
D
B
Dispenser Installation
The installation or relocation must be carried out
by qualified personnel with up-to-date knowledge
and practical experience in accordance with current
regulations.
NOTE
Since this unit uses ice for cooling there is no risk of
water freezing within the tubes in the unit as long as
the unit is used indoors and not placed in extreme cold
environments.
NOTE
L’installation ou la réinstallation après un déplacement
doit être effectuée par un technicien qualifié
conformément aux codes en vigueur.
REMARQUE
Étant donné que ce distributeur de boissons utilise de
la glace pour le refroidissement, il n’y a aucun risque
de gel de l’eau à l’intérieur des tubes du distributeur de
boissons tant qu’il est utilisé à l’intérieur uniquement et
non placé dans des environnements extrêmement froids.
REMARQUE
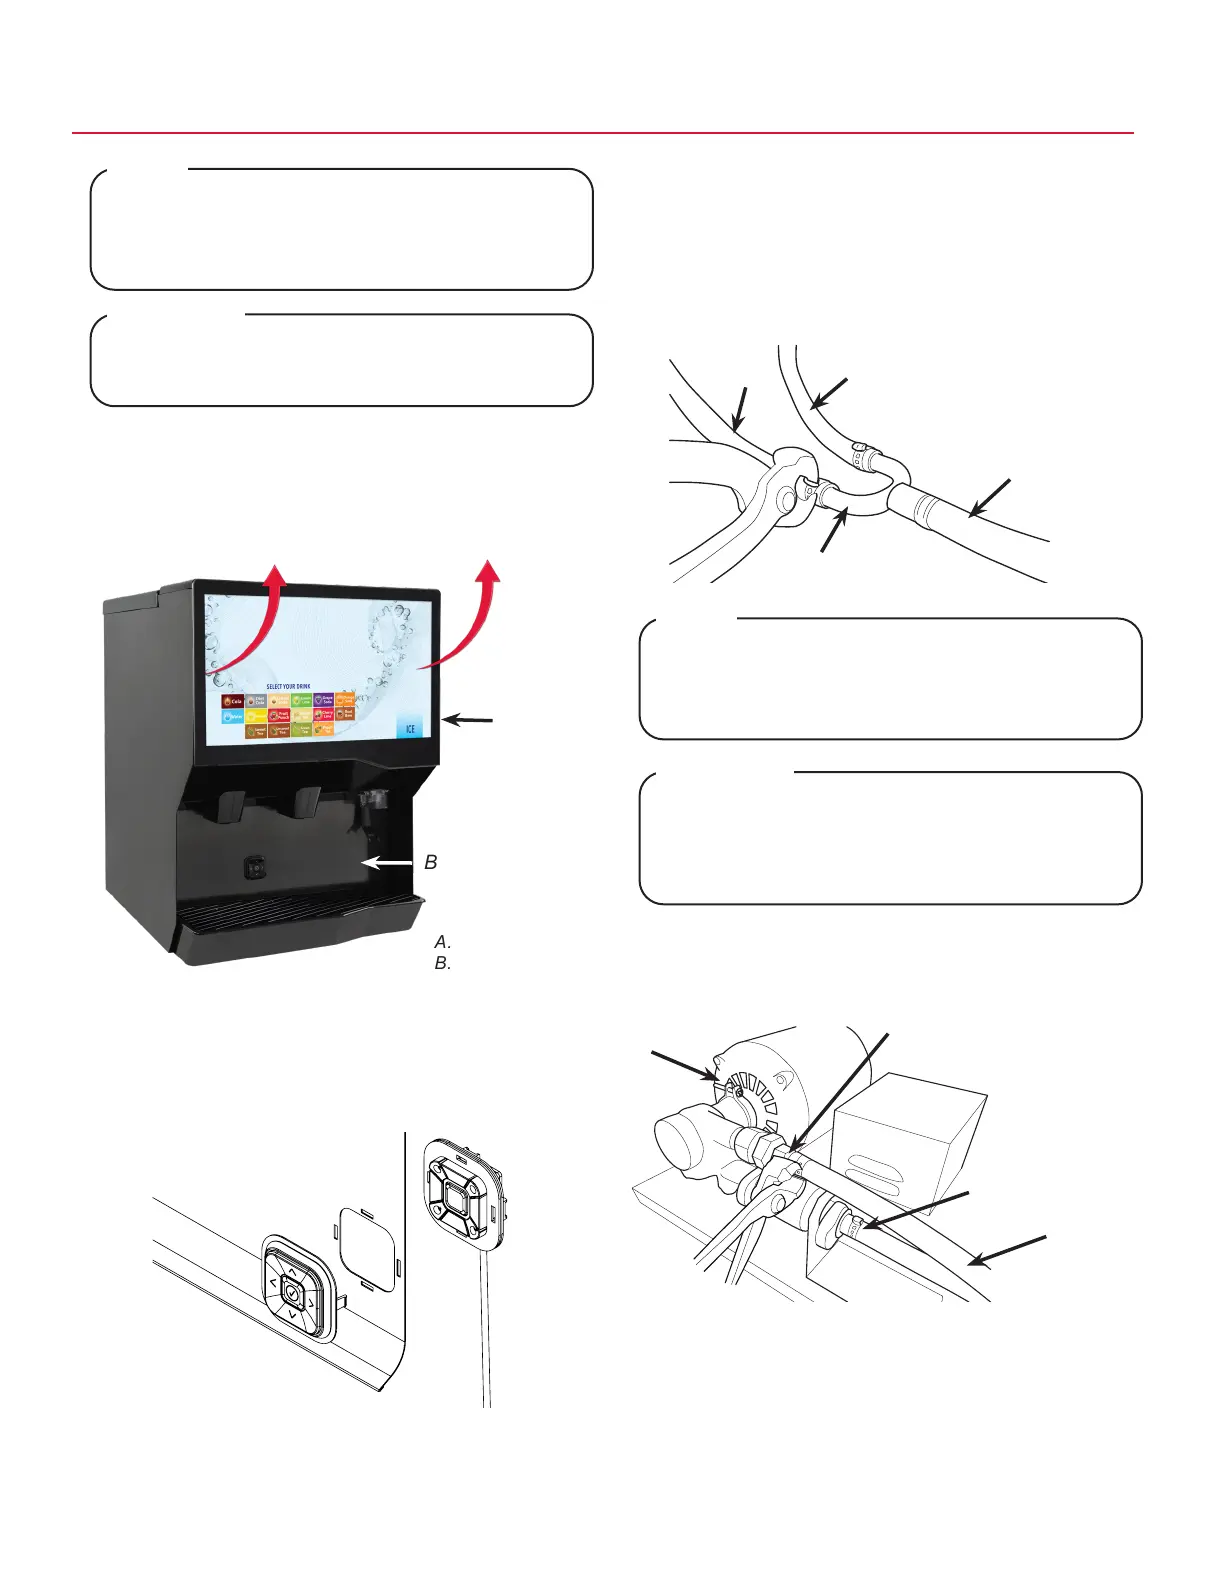
1. To access the valves behind the merchandiser for water
and syrup calibration (as shown under Service Menu
section), the merchandiser must be lifted out of the way.
Grab the sides of the screen and pull out and up.
A. Merchandiser
B. Splash Plate
A
B
2. To remove splash plate, remove cup rest, then remove
splash plate by pushing it up, bringing the bottom of it
forward and carefully pulling it out halfway to disconnect
the cable from the ADA kaypad. Once cable is
disconnected, pull out splash plate completely.