18
Valve Configuration - Adding Brand/Flavor Valves
1. In order to use a brand or flavor, the valve must first be
configured.
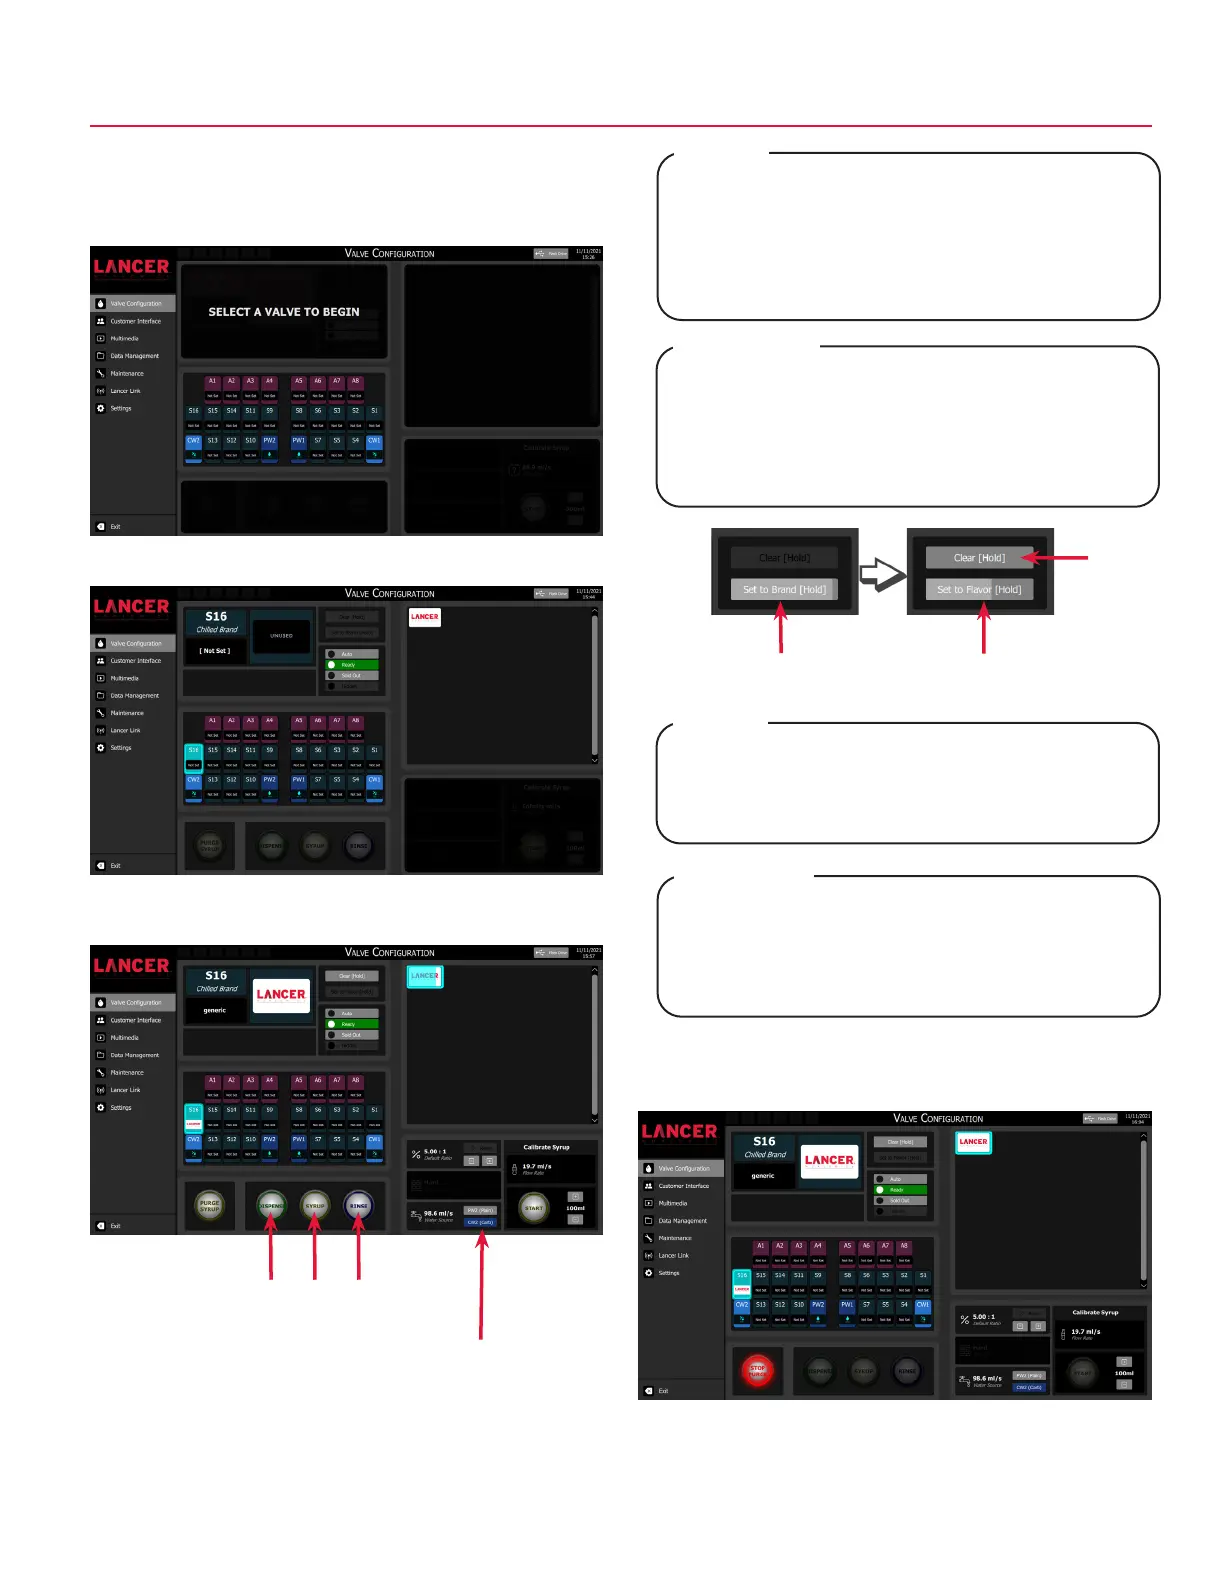
2. Tap Valve Configuration on the navigation menu.
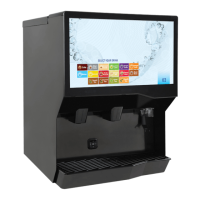
4. Press and hold the desired brand icon from the brand
selector pane to assign it to the selected valve.
Each brand has a predefined default water type and
ratio. The water source can be changed by tapping the
desired option from the Water pane. The ratio can be
adjusted by tapping the +/- buttons in the Ratio pane.
NOTE
Chaque marque a un type d’eau et un rapport
prédéfinis par défaut. La source d’eau peut être
modifiée en appuyant sur l’option souhaitée dans
le volet Water (Eau). Le ratio peut être ajusté en
appuyant sur les boutons +/- du volet Ratio.
REMARQUE
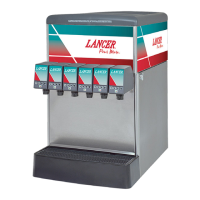
Ambient flavor valves (A1-A8) can be configured as
ambient brand valves by pressing and holding the Set
to Brand or Set to Flavor buttons.
Press and hold the Clear button to clear the
associated valve configuration.
NOTE
Les vannes de saveur ambiante (A1-A8) peuvent être
configurées en appuyant et en maintenant les boutons
“Set to Brand” ou “Set to Flavor”.
Appuyez sur le bouton Clear et maintenez-le enfoncé
pour effacer la configuration de la vanne associée.
REMARQUE
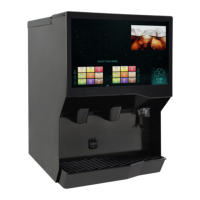
3. Tap the desired chilled or ambient valve to configure.
5. Tap the Purge Syrup button to activate purging. Once a
steady flow of syrup is achieved, press the Stop Purge
button to deactivate.
6. Repeat steps 3 - 5 for any other brand or flavor modules.
Clear
Setting
Dedicated Pour Buttons
Water Selector
Set to Brand Set to Flavor