PLMNL0199 REV. J Effective Date: 08/05/21 35 FiberCUT
®
ST Operation Manual
5.6.3 Extended Crash
When enabled, the CRASH output
actuates when the head is fully
extended.
1. Click the Settings button ( ) in
the toolbar and locate Extended
Crash.
When this feature is active, a
check mark appears.
2. Click Extended Crash to change
the state of the feature, as
desired.
5.6.4 Inverted Crash
When enabled, the CRASH output is
open when there is a crash and
closed when there is no crash.
1. Click on the Settings button
( ) in the toolbar and locate
Inverted Crash.
When this feature is active, a
check mark appears.
2. Click Inverted Crash to change
the state of the feature, as
desired.
5.6.5 Prog. Retract Positions
This allows the retract position to be
set through a combination of the
Height Select Bits and Center Of
Travel Bit (see Section 3.3.1 Height
Select Bits (HS1-HS3) for more
information).
1. Click on the Settings button
( ) in the toolbar and locate
Prog. Retract Positions.
When this feature is active, a
check mark appears.
2. Click Prog. Retract Positions to
change the state of the feature, as
desired.
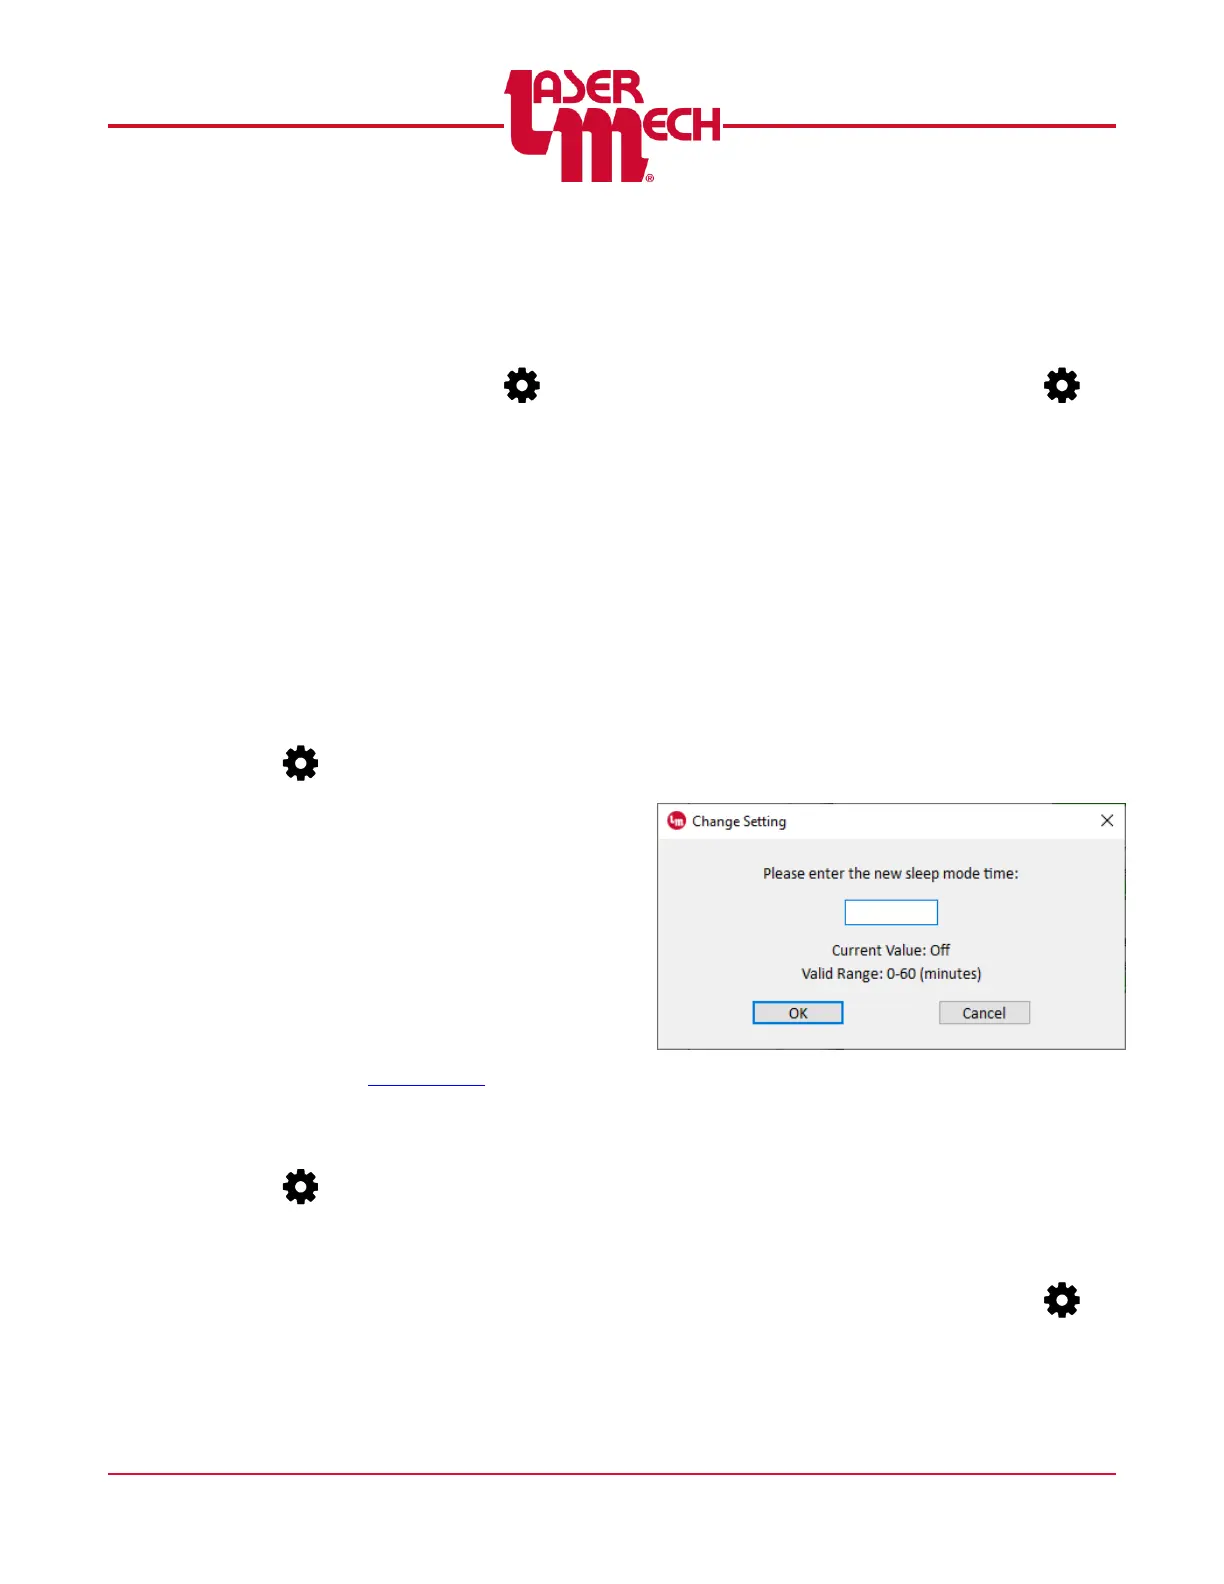
5.6.6 Sleep Mode
Sleep Mode causes the servo motor
to turn off and the head to fully extend
after a specified period of inactivity.
1. Click the Settings button ( ) in
the toolbar and select Sleep
Mode.
For steps 2 to 5, see Figure 40.
2. A dialog box will appear with a
field to enter the new time.
The current value and valid
range are also displayed.
3. Enter a valid new time value in the
provided field.
Entering 0 will disable this feature.
4. Click OK to store the value.
5. If necessary, click Cancel to exit
the screen.
Figure 40
5.6.7 Stand Off Compensation
Variations in tip geometry may cause
inaccuracy in stand off distance. If
necessary, adjust the Stand Off
Compensation value until the
indicated Stand Off Height matches
the physical stand off distance.
1. Click the Settings button ( ) in
the toolbar and select Stand Off
Compensation.