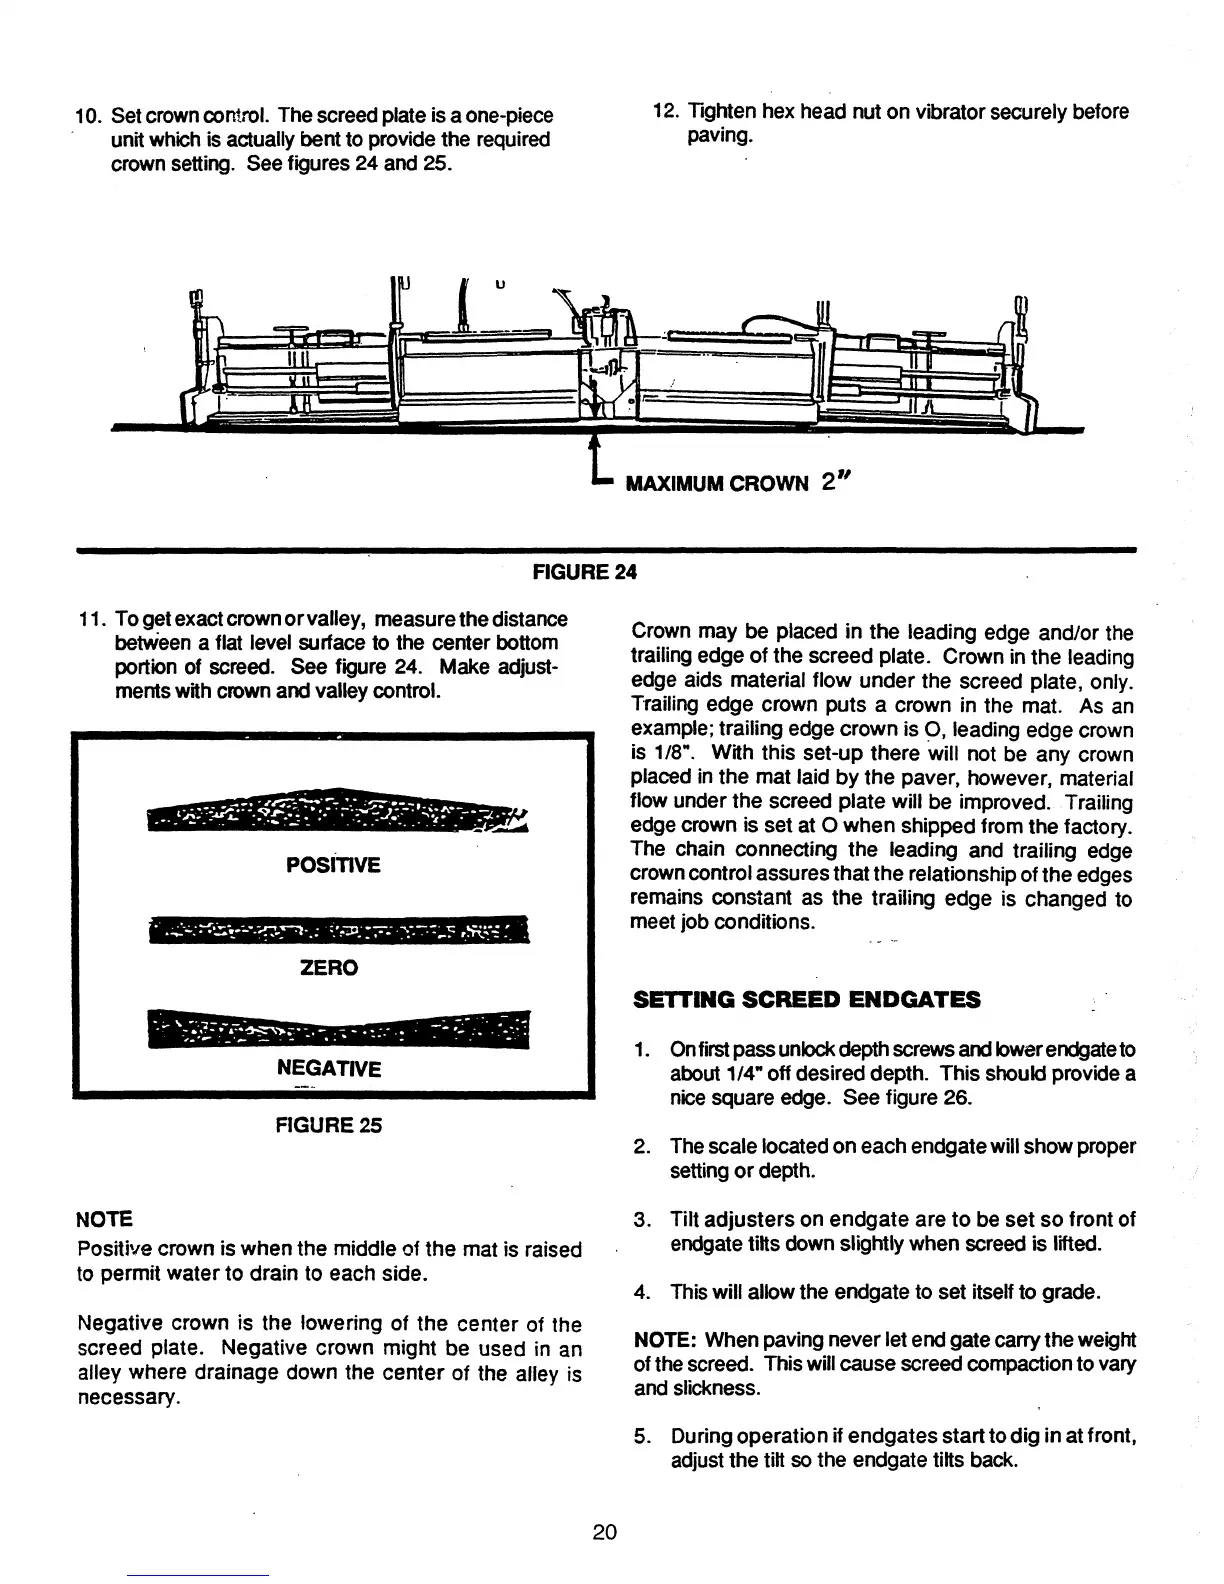
10. Set crown
control.
The screed plate is a one-piece
unit which is
adually
bent to provide the required
crown setting. See figures
24 and 25.
12. Tighten hex head nut on vibrator securely before
paving.
MAXIMUM CROWN
2"
FIGURE24
11. To get exactcrown
or
valley, measure
the
distance
betWeen a flat level surface to the center bottom
portion of screed.
See
figure 24. Make adjUst-
ments with crown and valley control.
posinVE
ZERO
NEGATIVE
FIGURE 25
NOTE
Positive
crown
is
when
the
middle
of
the
mat
is raised
to
permit
water
to
drain
to
each
side.
Negative
crown
is the
lowering
of
the
center
of
the
screed plate. Negative crown might be used in an
alley
where
drainage
down
the
center
of the alley is
necessary.
20
Crown
may
be placed in
the
leading edge
and/or
the
trailing
edge
of
the
screed
plate.
Crown
in
the
leading
edge aids material
flow
under
the
screed plate, only.
Trailing
edge
crown
puts
a crown in the mat. As an
example; trailing edge
crown
is 9, leading
edge
crown
is 1/8". With this
set-up
there
will
not be
any
crown
placed in
the
mat
laid by
the
paver, however, material
flow under
the
screed
plate
will be improved
..
Trailing
edge crown is
set
at 0
when
shipped from
the
factory.
The chain connecting
the
leading and trailing edge
crown control assures
that
the
relationship of
the
edges
remains
constant as the trailing edge is
changed
to
meet job conditions.
SETTING SCREED ENDGATES
1. Onfirstpass
unlock
depth
screws
and
lower
endgate to
about1/4"off desired depth.
This
should provide a
nice square edge.
See
figure 26.
2.
The scale located on
each
endgatewill
show
proper
setting
or
depth.
3.
Tilt
adjusters
on
endgate
are
to
be
set
so
front
of
endgate tilts down slightly
when
screed is lifted.
4. This will allowthe endgate to set itself to grade.
NOTE: When paving never let end gatecarry
the
weight
of the screed. This will
cause
screed compaction to vary
and slickness.
5. During
operation
if
endgates
start
to
dig
in at front,
adjust the tilt so the endgate tilts back.