-~
...........
i
\
I
I.
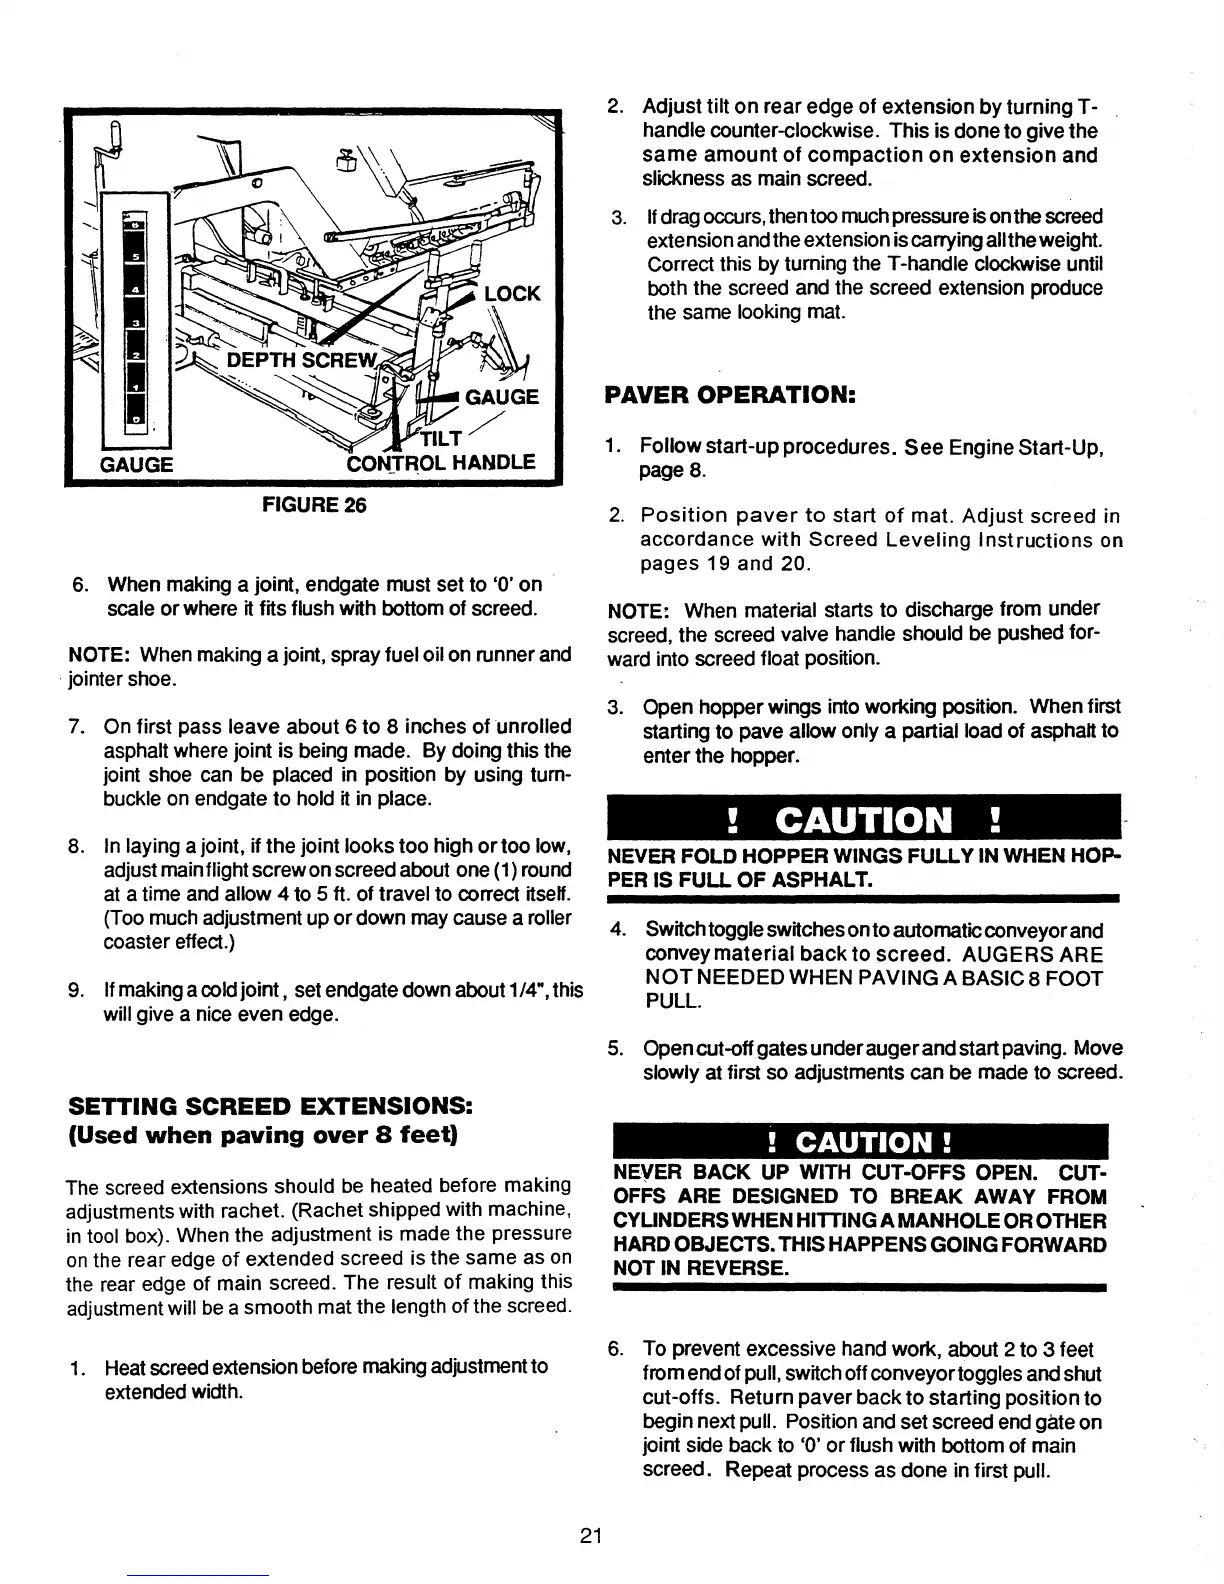
GAUGE
GAUGE
TILT/
CON-T~OL
HANDLE
2.
Adjust
tilt
on
rear
edge
of
extension
by
turning
T-
handle
counter-clockwise.
This
is
done
to
give
the
same
amount
of
compaction
on
extension
and
slickness as main screed.
3. Ifdragoccurs, then too much pressureison the screed
extensionand the extensionis carryingall
the
weight.
Correct this
by turning the T-handle clockwise until
both
the
screed and the
screed
extension produce
the
same looking mat.
PAVER
OPERATION:
1.
Follow
start-up
procedures.
See
Engine
Start-Up,
page 8.
FIGURE
26
6.
When
making a joint,
endgate
must
set to '0'
on
.
scale
or
where it fits flush
with
bottom of screed.
NOTE: When making a joint,
spray
fuel
oil on runner and
. jointer shoe.
7. On
first
pass
leave
about
6 to 8
inches
of
'unrolled
asphalt where
joint
is being
made.
By
doing
this the
joint shoe can
be
placed in position by using turn-
buckle on endgate to hold it in place.
8. In
laying
a joint, if
the
joint
looks
too
high
ortoo
low,
adjustmain flight
screw
on
screed
about one (1) round
at a time and
allow
4 to 5 ft. of travel to correct itself.
(Too much adjustment
up
or
down
may cause a roller
coaster effect.)
9. If makinga cold
joint
, set endgate
down
about1/4",this
will give a nice
even
edge.
SETTING
SCREED
EXTENSIONS:
(Used
when
paving
over
8
feet)
The screed extensions should be heated before making
adjustments with rachet. (Rachet shipped with machine,
in tool box). When the adjustment is made the pressure
on the rear edge of extended screed is the same as on
the rear edge of main screed. The result of making this
adjustment will be a smooth mat the length of the screed.
1. Heat screed extension before making adjustmentto
extended width.
21
2.
Position
paver
to
start
of
mat.
Adjust
screed
in
accordance
with
Screed
Leveling
Instructions
on
pages
19 and 20.
NOTE:
When
material starts to discharge
from
under
screed,
the
screed valve handle
should
be pushed for-
ward into screed float position.
3.
Open
hopper
wings
into
working
position. When first
starting to
pave
allow
only
a partial load of asphalt to
enter
the
hopper.
!
CAUTION
!
NEVER
FOLD
HOPPER
WINGS
FULLY
IN
WHEN
HOP-
PER IS
FULL
OF
ASPHALT.
4.
Switch
toggleswitcheson to
automatic
conveyor
and
convey
material
back
to
screed.
AUGERS
ARE
NOTNEEDEDWHEN
PAVING A BASIC 8
FOOT
PULL.
5.
Open
cut-off
gates
under
auger
and
startpaving.
Move
slowly at first so
adjustments
can
be
made
to screed.
!
CAUTION!
NEYER
BACK
UP
WITH
CUT-OFFS
OPEN.
CUT-
OFFS
ARE
DESIGNED
TO
BREAK
AWAY
FROM
CYLINDERS
WHEN
HITTINGA
MANHOLE
OR
OTHER
HARD
OBJECTS.
THIS
HAPPENS
GOING
FORWARD
NOT
IN
REVERSE.
6. To prevent excessive hand
work,
about 2 to 3 feet
from
end of pull, switchoff
conveyor
toggles
and
shut
cut-offs.
Return
paver
back
to
starting
position
to
begin
next pull. Position and set
screed
end
gate
on
joint side
back
to '0'
or
flush
with
bottom
of
main
screed.
Repeat
process as
done
in first pull.