22
6. Assembling the Microscope
1
2
1
1
3
2
1
3
1
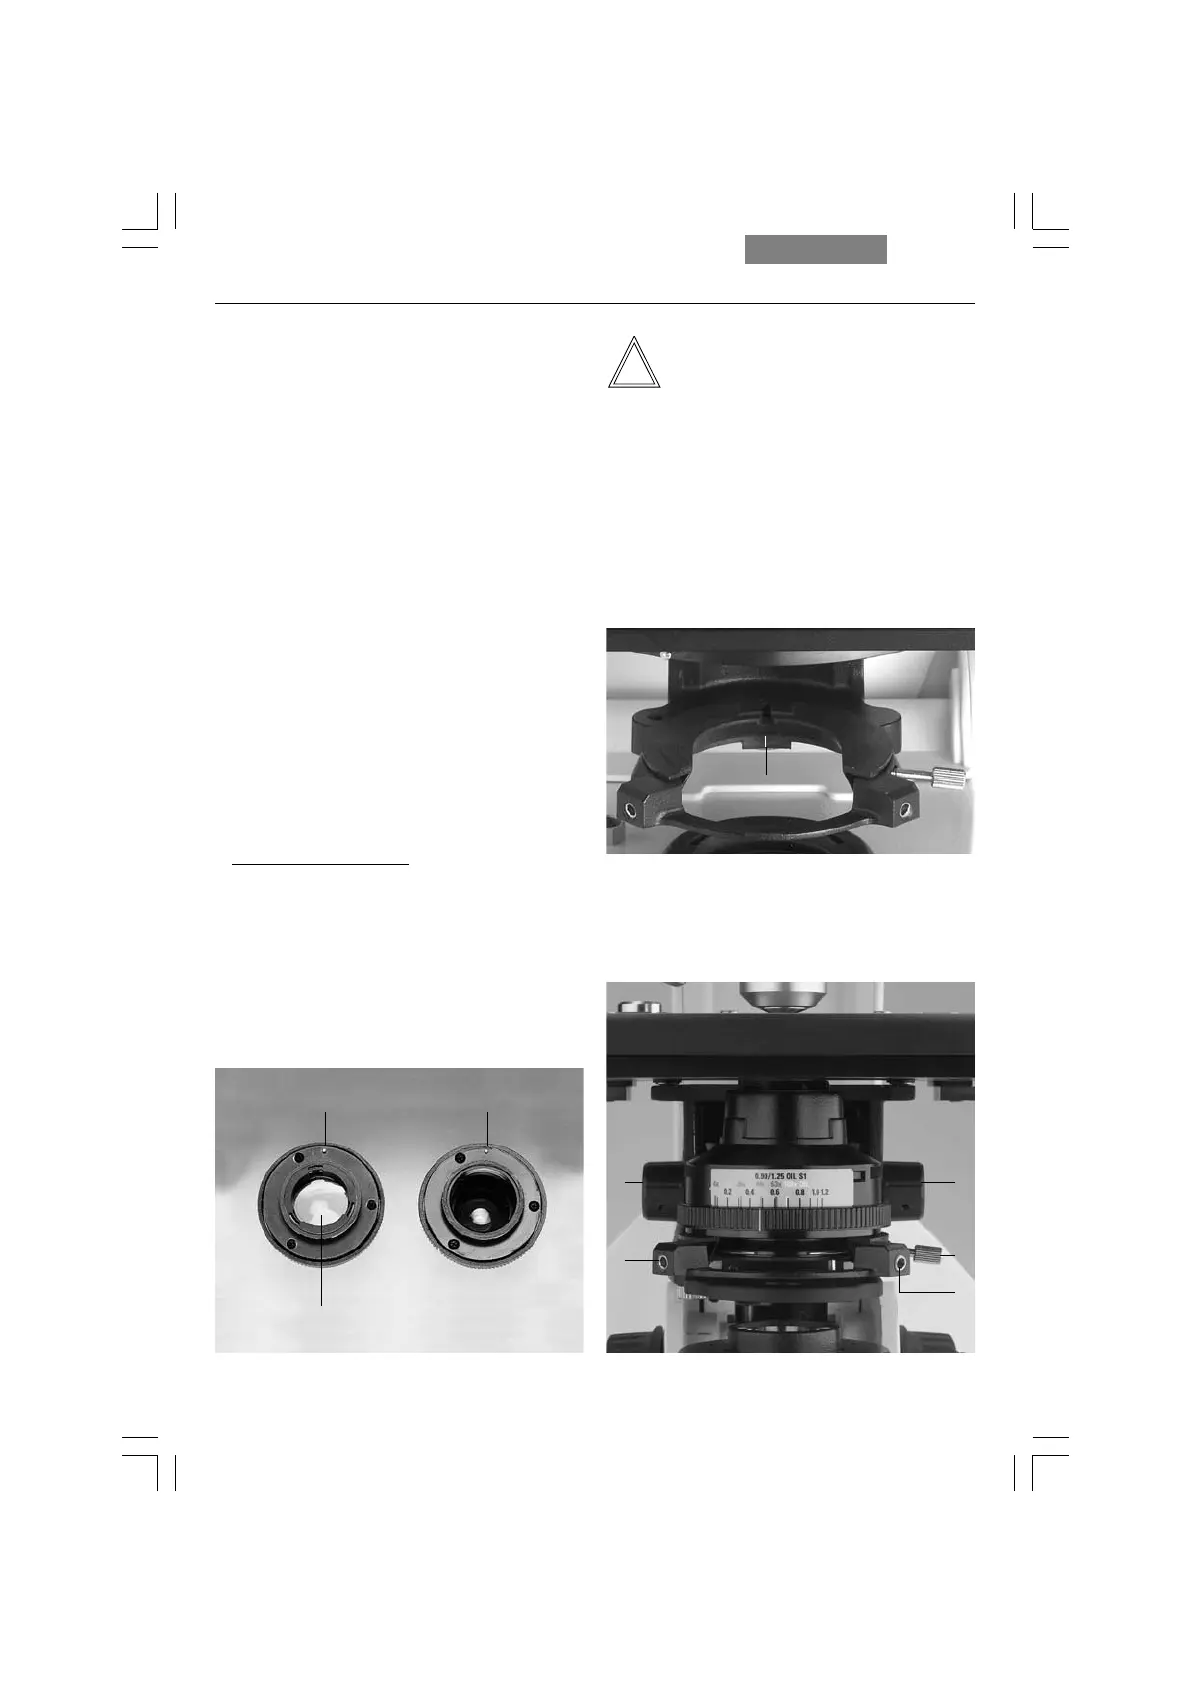
6.2 Condenser
• If present, screw the condenser head into the
condenser.
• Using the condenser height adjuster (10.3),
turn the condenser holder (fig. 9) completely
downward.
• Unscrew the clamping screw for the con-
denser (10.2) far enough so that the con-
denser can be inserted from the front.
• From the front, insert the condenser into the
condenser holder as far as it will go. On the
underside of the condenser, there is an orien-
tation pin (8.1), which must be located in the
guiding notch (9.1).
• Pull the condenser’s clamping screw (10.2) so
that the condenser is locked in place.
•
For Leica DM3000 only:
Connect the condenser cable when using the
motorized condenser.
Fig. 10 Condenser holder
1 Condenser centering
2 Clamping screw for condenser
3 Condenser height adjuster
Fig. 9 Condenser holder
1 Guiding notch
Note:
The condenser must be centered before using
the microscope.
→
Köhler illumination p. 34.
Fig. 8 Underside of condenser (example CL/PH)
1 Orientation pin
2 Auxiliary condenser lens LS (for Leica DM2000/3000)
 Loading...