Note:CarefullyhandletheM.2SSDbyitsedges.
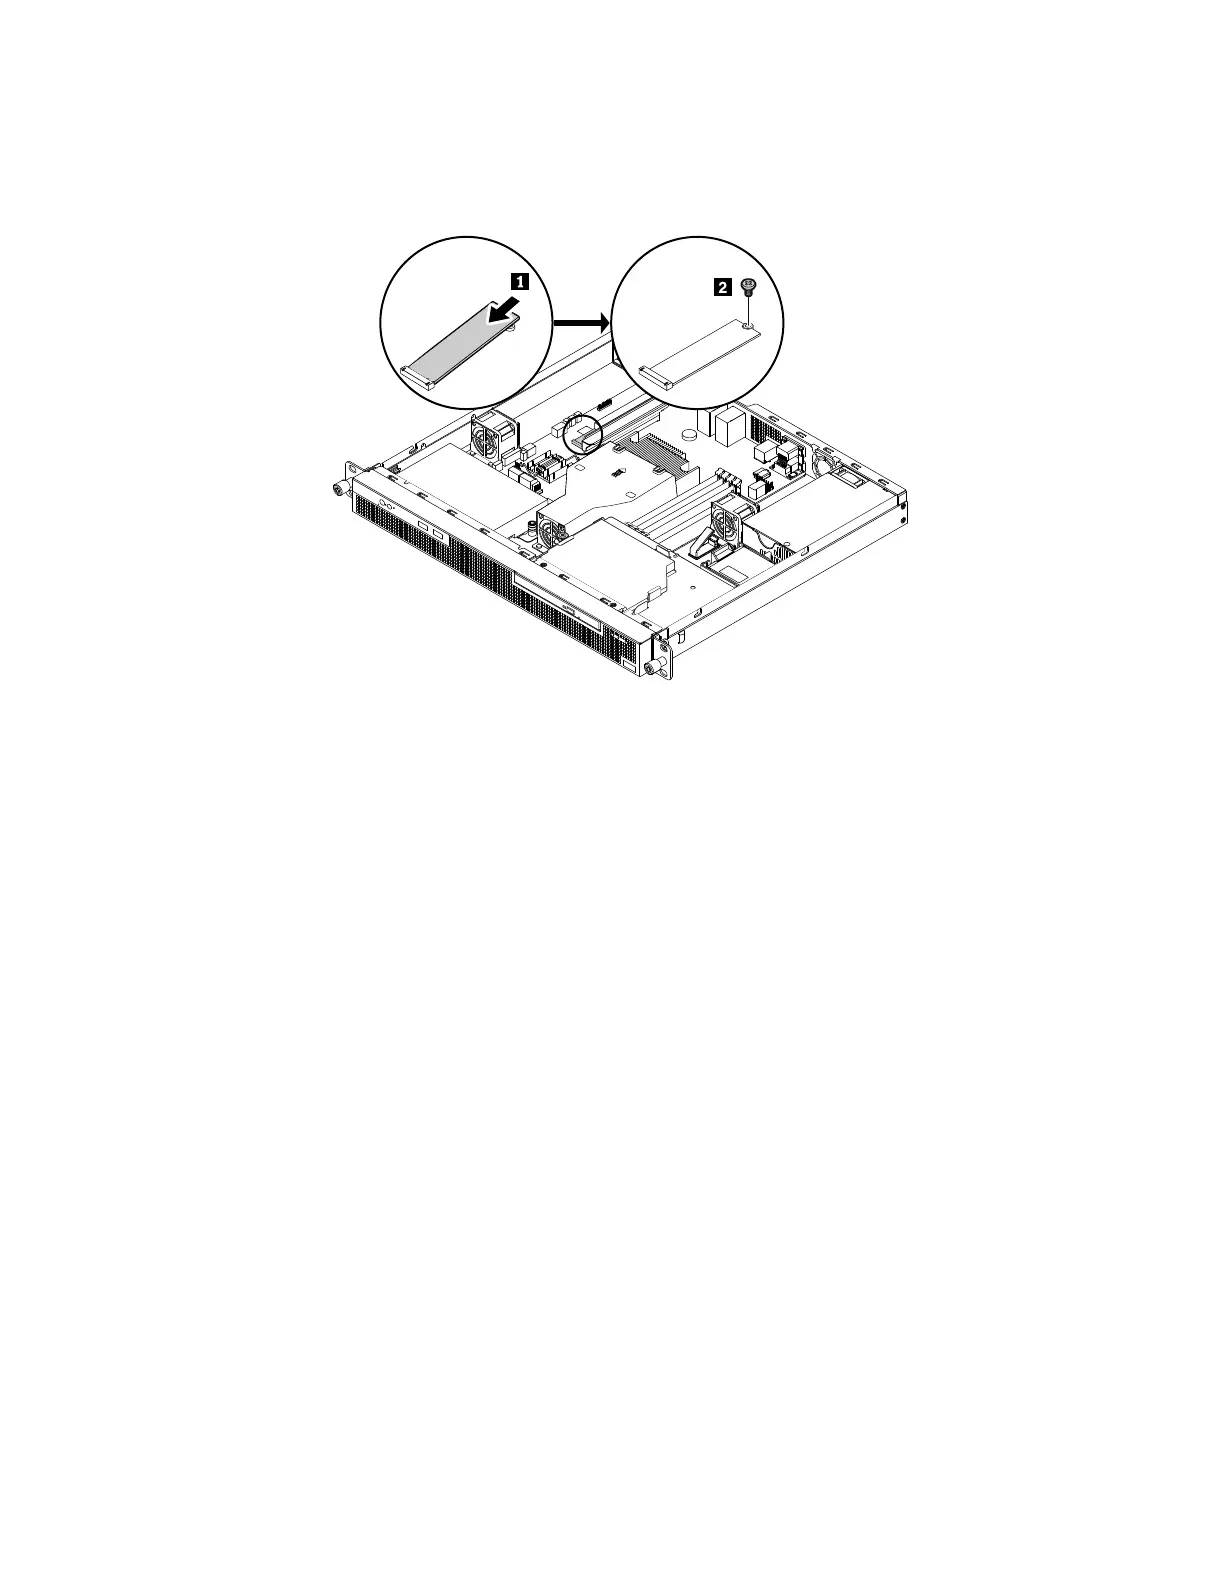
5.InsertthenotchedendoftheM.2SSDintothedriveslot.Then,installthescrewtosecuretheM.2SSD.
Figure42.InstallingtheM.2SSD
6.ReinstallthePCIecardifyouhaveremovedit.See“InstallingthePCIecard”onpage56.
Tocompletethepartsreplacement,goto“Completingthepartsreplacement”onpage95.
LenovoThinkServerRAID520iupgradekey
TheLenovoThinkServerRAID520iupgradekey(hereinafterreferredtoasRAID520ikey)activatestheRAID
5levelforadvancedSATAorSAShardwareRAID.IfyourserverhastheLenovoThinkServerRAID520iPCIe
Adapterinstalled,youcanpurchaseaRAID520ikeyandinstallittotheJ3connectorontheRAIDcard.For
informationaboutconnectorsontheRAIDcard,see“RAIDcard”onpage17
.
•“RemovingtheRAID520ikey”onpage66
•“InstallingtheRAID520ikey”onpage67
RemovingtheRAID520ikey
Notes:
•IfyouremovetheRAID520ikey,thehardwareRAID5willbedisabled.
•RemovingtheRAID520ikeymightimpactyourRAIDconfigurations.Backupyourdatabeforeyoubegin
toavoidanydatalossduetoaRAIDconfigurationchange.
ToremovetheRAID520ikey,dothefollowing:
1.Prepareyourserver.See“Preparingyourserverinadvance”onpage47.
2.RemovetheLenovoThinkServerRAID520iPCIeAdapter.See“RemovingthePCIecard”onpage56.
66ThinkServerRS160UserGuideandHardwareMaintenanceManual
 Loading...


