Step 3. Continue to install additional simple-swap drives if necessary.
After installing all simple-swap drives:
1. Reinstall the security bezel. See “Install the security bezel” on page 64.
2. Power on the server.
3. Use the Lenovo XClarity Provisioning Manager to configure the RAID if necessary. For more information,
see:
http://sysmgt.lenovofiles.com/help/topic/LXPM/RAID_setup.html
LOM adapter replacement
Use this information to remove and install the LOM adapter.
Remove the LOM adapter
Use this information to remove the LOM adapter.
“Read the
installation
Guidelines” on
page 49
“Power off
the server for
this task” on
page 14
“ATTENTION:
Static Sensitive Device
Ground package before opening”
on page 52
Before removing the LOM adapter:
1. Remove the top cover. See “Remove the top cover” on page 52.
2. If riser 1 assembly is installed, remove it to access the LOM adapter slot.
To remove the LOM adapter, complete the following steps:
Watch the procedure. A video of the removal process is available:
• Youtube:
https://www.youtube.com/playlist?list=PLYV5R7hVcs-CjaaAyvBOOZ749SC-2SK2C
• Youku: http://list.youku.com/albumlist/show/id_51276391
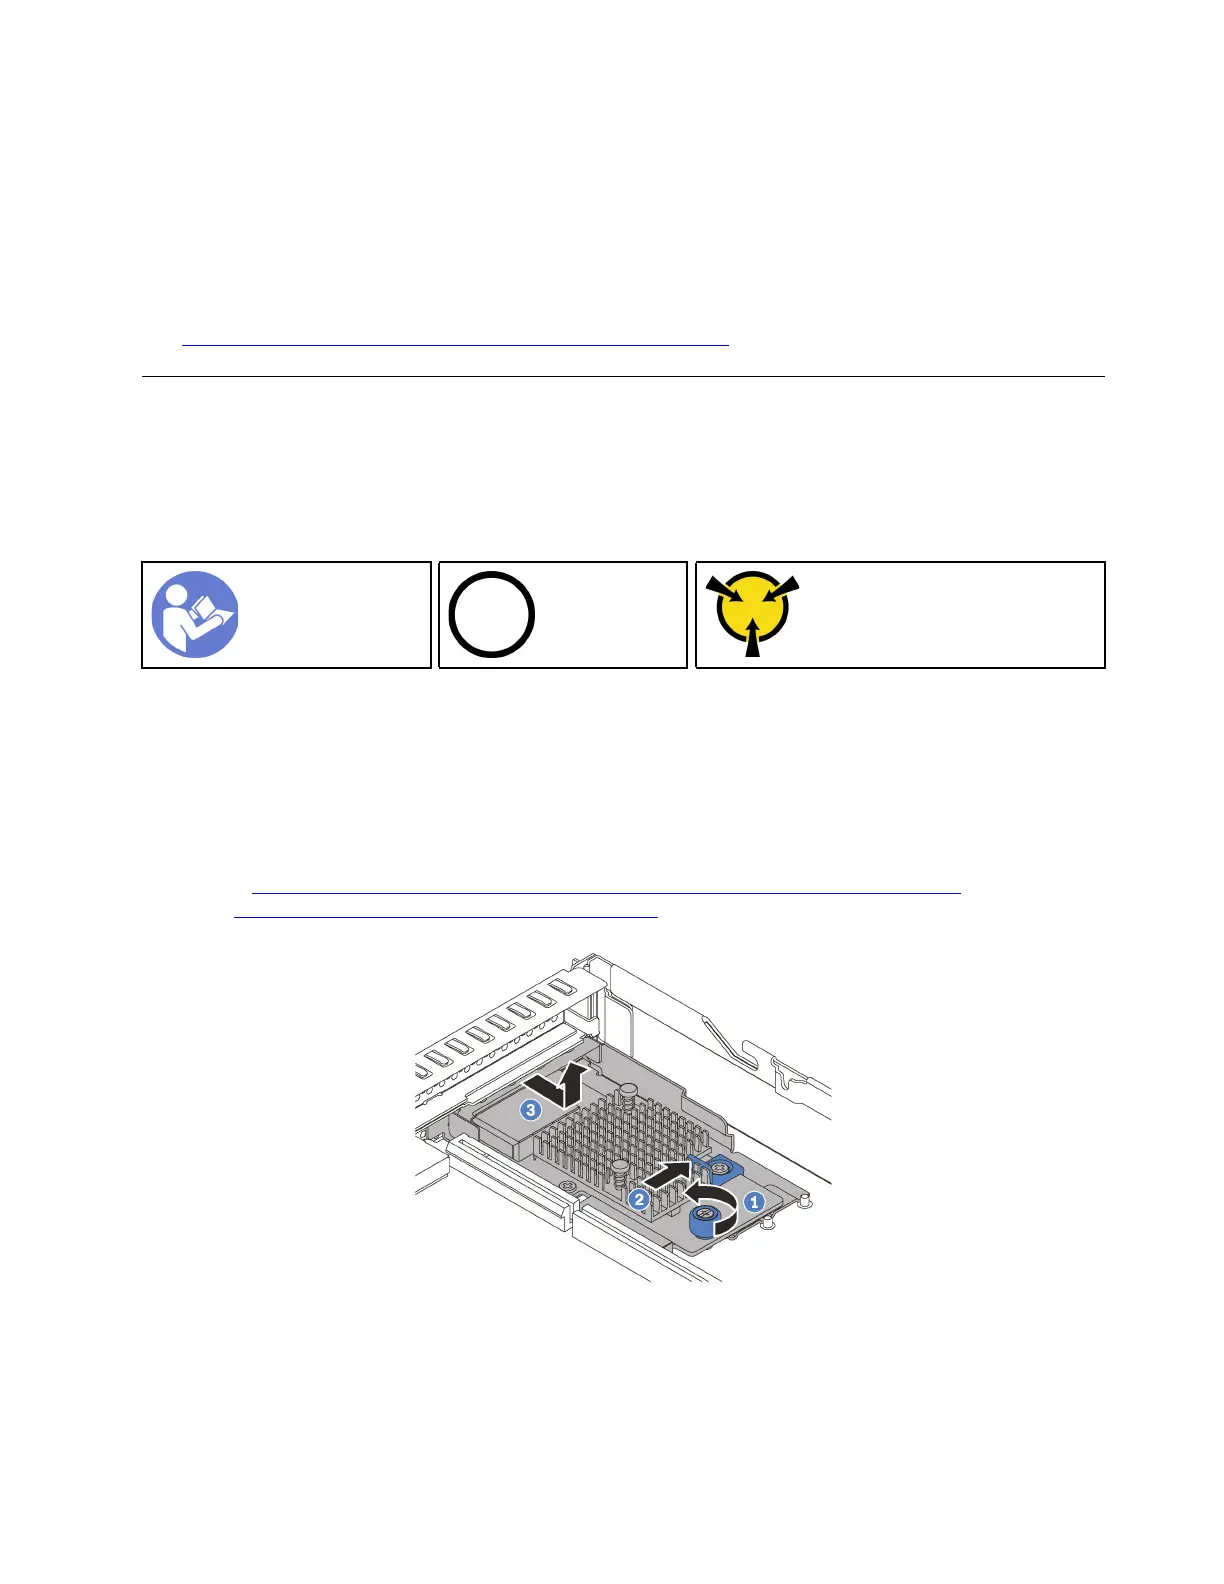
Figure 53. LOM adapter removal
Step 1. Loosen the thumbscrew that secures the LOM adapter.
Step 2. Push the LOM adapter out of the connector on the system board.
Step 3. Slide the LOM adapter as shown and lift the LOM adapter out of the chassis.
Chapter 3. Hardware replacement procedures 89
 Loading...