Repair information 4-31
Lexmark S400 Series
Carrier assembly removal
1. Remove the ADF/scanner assembly. See “ADF/scanner assembly removal” on page 4-3.
2. Remove the midframe. See “Midframe removal” on page 4-11.
3. Remove the operator panel. See “Operator panel removal” on page 4-18.
4. RFID card. See “RFID card removal” on page 4-27.
5. Remove the print engine. See “Print engine removal” on page 4-19.
6. Remove the system board. See “System board removal” on page 4-28.
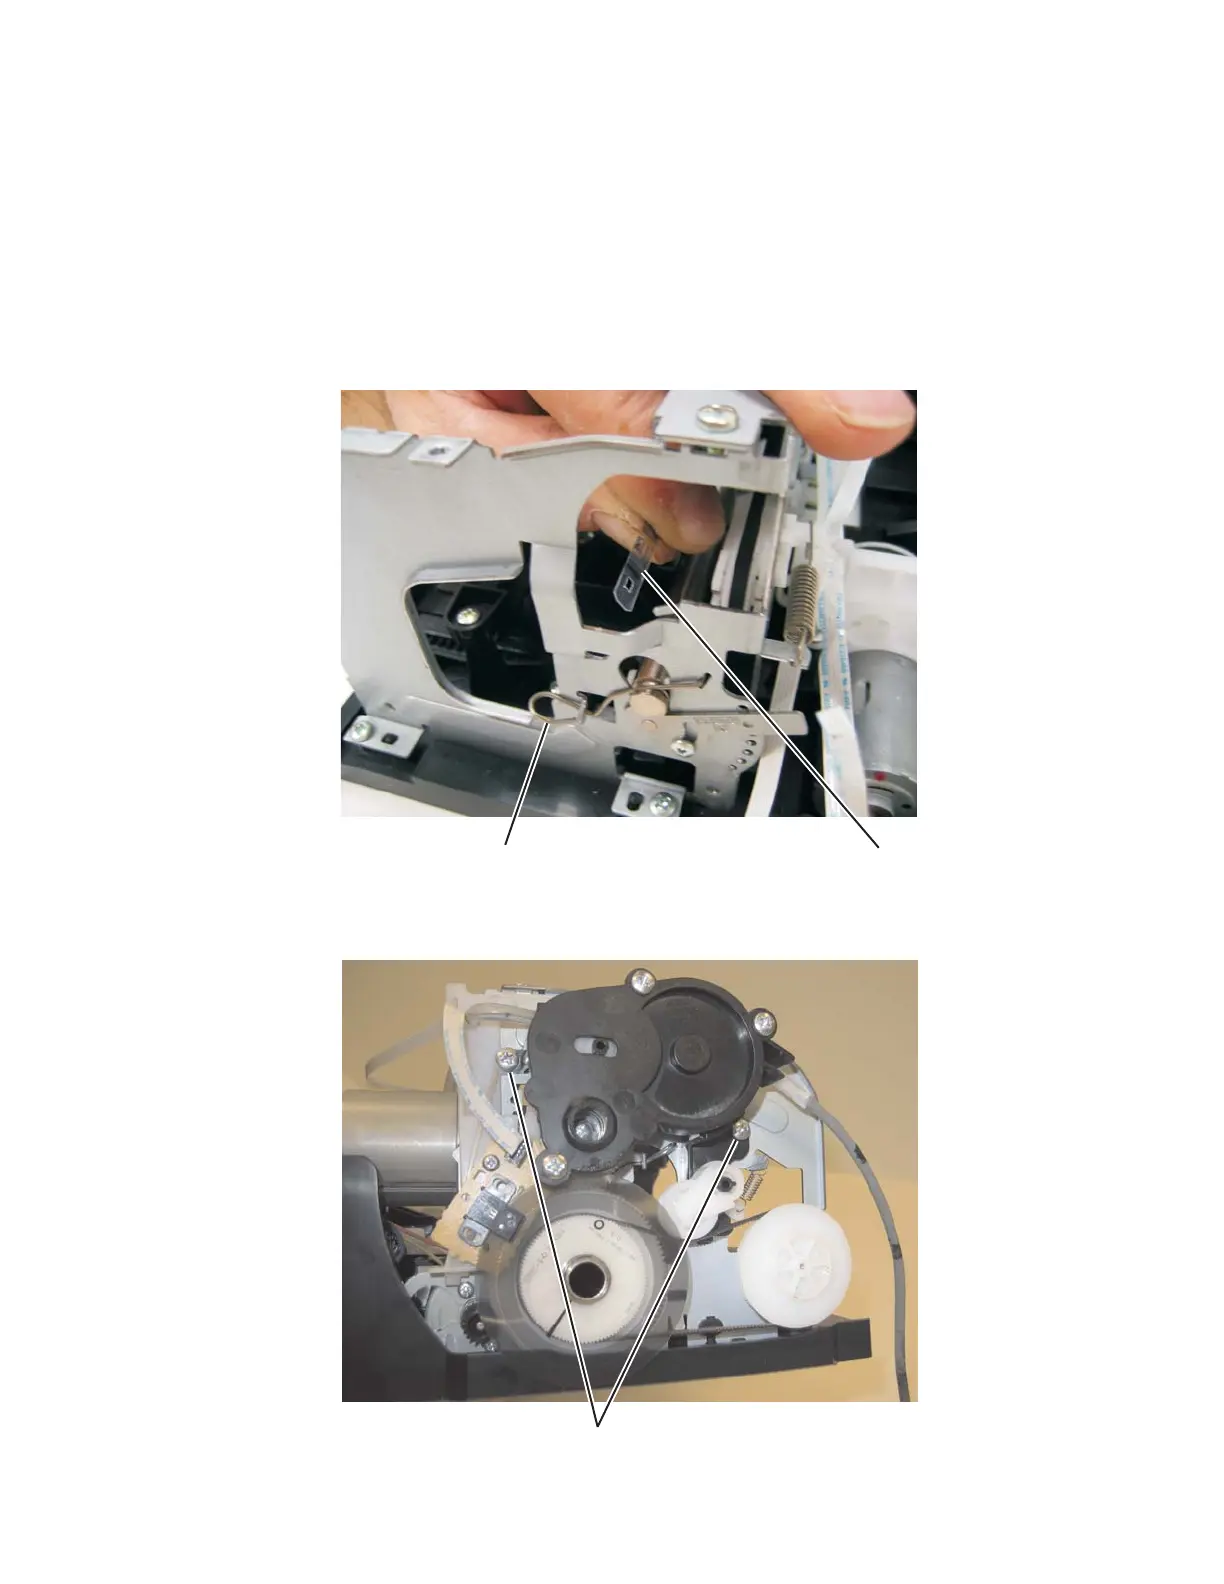
7. Disconnect the encoder strip (A), and the clip (B) from the right side of the carrier assembly.
Note: Pay close attention to the direction of the arrow on the encoder strip before removing. The arrow on the
encoder strip needs to point up when reinstalling.
8. Remove the two screws (C) from the purge pump.
AB
C
 Loading...