Repair information 4-15
7013-XXX
Door mount removal
1. Open the front cover.
2. Remove the lower access door assembly. See “Lower access door assembly removal” on page 4-37.
3. Remove the left side printer cover. See “Left side printer cover removal” on page 4-33.
4. Remove the right side cover. See “Right side printer cover removal” on page 4-73.
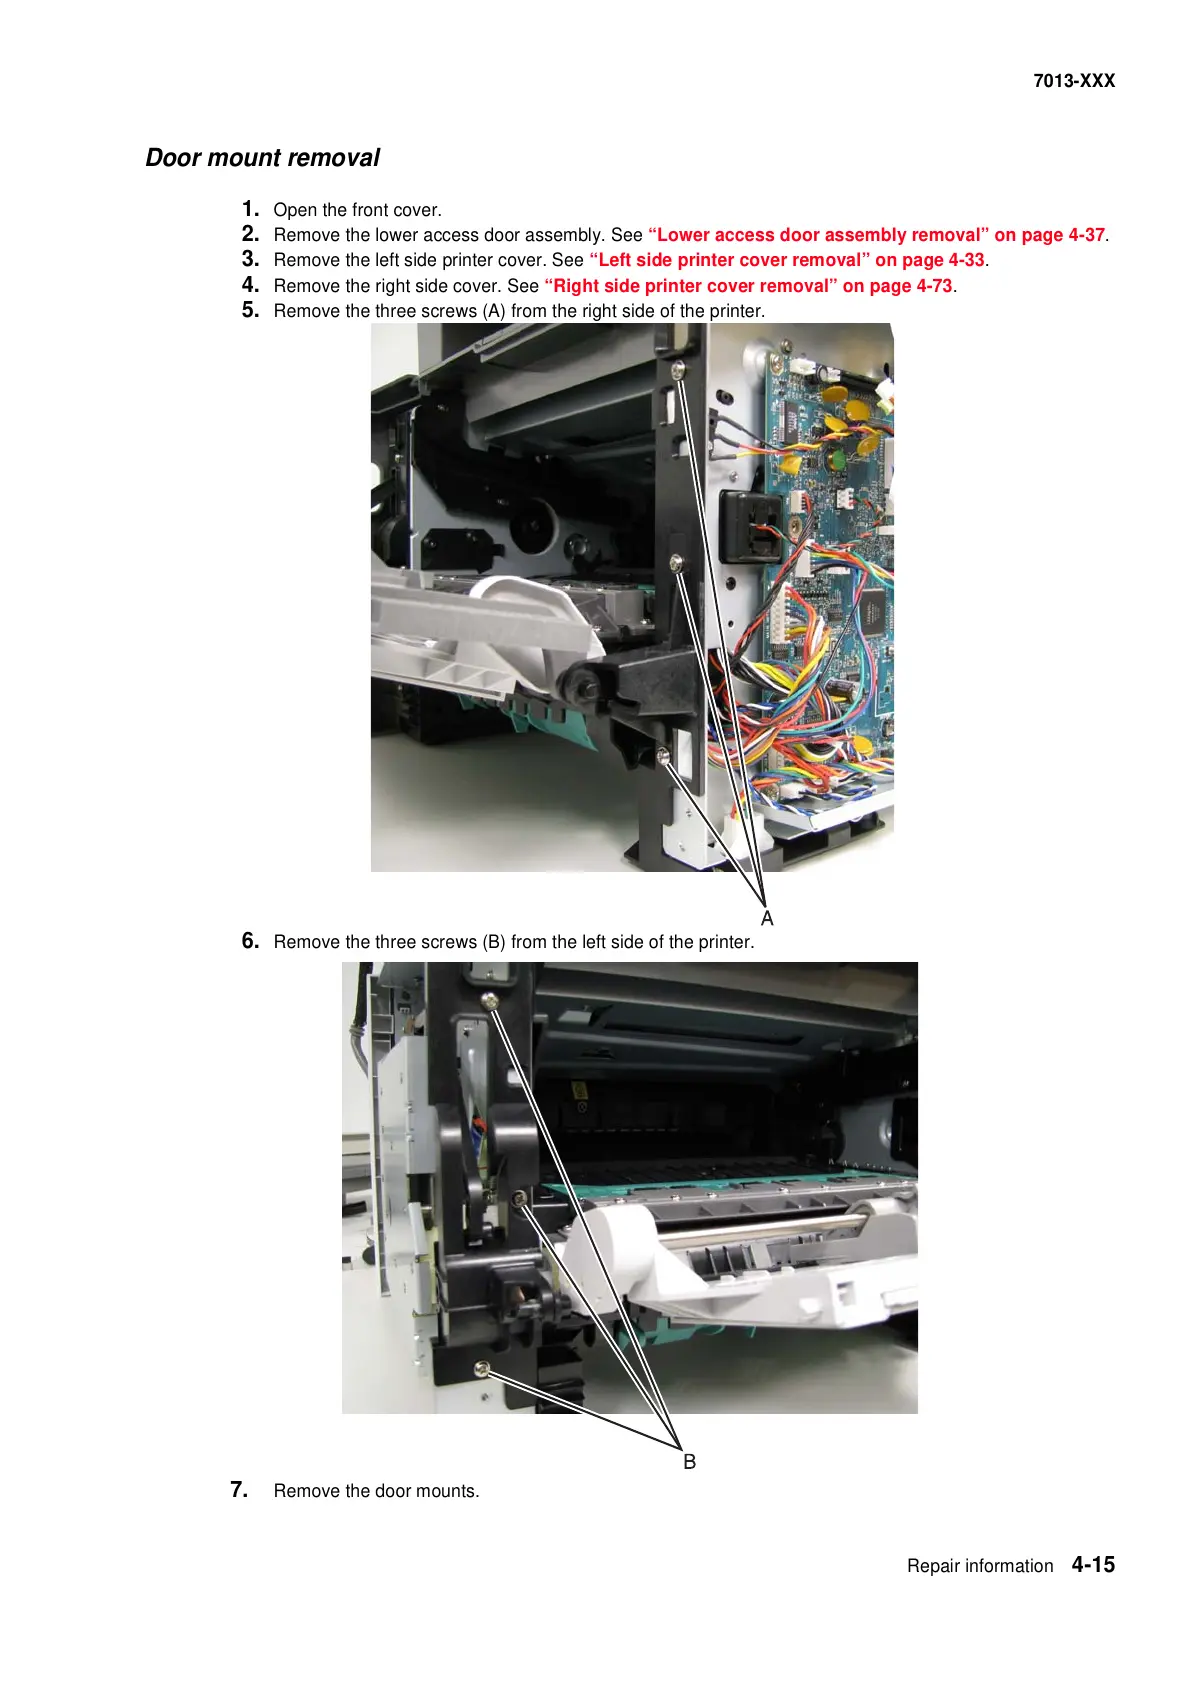
5. Remove the three screws (A) from the right side of the printer.
6. Remove the three screws (B) from the left side of the printer.
7. Remove the door mounts.
 Loading...