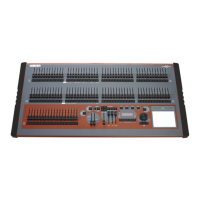
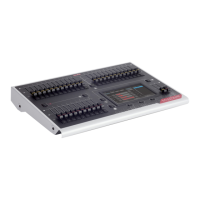
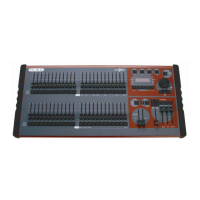
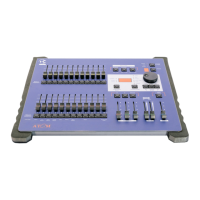
maXim Operator Manual Layout
LSC Lighting Systems (Aust) Pty. Ltd. Page 8 of 66
• Provide a NUMERIC SELECTION function. When the “number” of a channel, scene, stack,
chase, etc needs to be entered, the appropriate Flash/Assign button “number” is pressed. To
assist you in making a selection, valid buttons will flash when an entry is required.
• In conjunction with the FUNCTION button, select various secondary functions such as PATCH,
SETUP, etc as indicated below the F/A buttons.
• Provide alpha numeric entry when typing names.
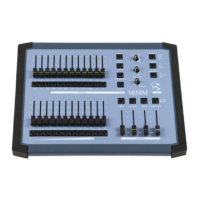
Button Numbering
Between each fader in the Yellow bank and its associated F/A button is a number that indicates the
channel that the fader and F/A button control. (Letters of the alphabet are also printed and are used
when entering names).
Between each fader in the Red bank and its associated F/A button are two numbers;
• The LARGER font indicates the channel number of the fader and F/A button when in PRESET
mode.
• The SMALLER font indicates the channel number of the fader and F/A button when in WIDE mode.
• The LARGER font also indicates the number of a particular SCENE, STACK or CHASE.
• The SMALLER font also indicates channel numbers when editing scenes or chase or stack steps,
when viewing channel levels on the FLASH/ASSIGN button LED indicators (refer below) or when
patching.
The LED indicators in each F/A button are also multi purpose.
R CHANNEL LEVEL INDICATORS
The brightness of each indicator is proportional to the level of its channel. The red bank indicates
the level of the channel numbers printed in the SMALLER font.
• In normal operation, they indicate the level of their particular channel at the output of the maXim.
• In edit mode they indicate the level of their particular channel in the Scene, Grab or Step of a
Chase or Stack that is being edited.
R VALID ENTRY BUTTON INDICATORS:
When you are required to make a numeric entry or Secondary Function selection, only valid buttons
will be active and their LED indicators will light to indicate to you that an entry is required.
R FADE IN PROGRESS INDICATORS:
The indicator for each Playback flashes slowly whilst a timed fade is in progress.
9. Masters flash/assign Buttons
Used to FLASH (bump) the contents of their particular master. (See also FLASH level and
ADD/SOLO button below). The brightness of their LED indicators shows the level of the master at
the output of the maXim. It also will flash slowly whilst a timed fade is in progress.
10. Grab Master (S and M only)
Controls the overall level of the contents of the Grab master. This may be a Grab, a Scene or a
Chase. The Grab master can also be used as a memory location for a stack.
11. Grab flash/assign Button (S and M)
Flash's (or bumps) the contents of the Grab master. (See also FLASH level and ADD/SOLO button
below). In conjunction with the RECORD SCENE button, it performs the “GRAB” function, or selects
the grab master when required for other various functions. The brightness of its LED indicator
shows the level of the Grab master at the output of the maXim. It also will flash slowly whilst a timed
fade is in progress.
12. IN and OUT Time Faders
Control the IN and OUT fade times of the masters. They may also be individually assigned to control
the IN or OUT fade times of any scene or step of a stack. The current time setting of each fader is
shown on the display when its fader is moved or presses of the FUNCTION button will toggle
through the two time settings.
13. Flash Level Control
Sets the level to which any Channels, Playbacks, or Masters will be flashed when their respective
Flash/Assign button is pressed.