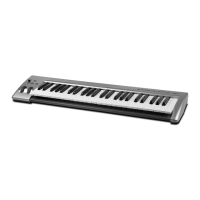
71
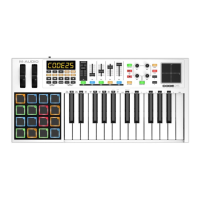
Pads
This chapter explains how to assign the pads to different commands. See the Editing
Assignments section to learn how to do this.
You can also shift the range of the pads by octave or semitones. See the Octaves and
Transposition section to learn about this.
Editing Assignments
You can set the channel of each pad. See Channel to learn how to do this.
To learn how to assign different types of messages to a pad, see the Messages section.
You can also set whether a pad is “momentary” (the default) or “latching” (also known as
“toggle”). See the Latching section to learn about this.
To learn how to set the pads’ response curve, see the Curve section.
While in MIDI Mode, you can customize the color of each pad. See Colors to learn how to do this.
Channel
By default, the pads are set to send MIDI notes on Channel 10, which is commonly reserved
for drums and percussion in the General MIDI (GM) specification. You can change this setting
if you want, though.
To set the MIDI channel for a pad:
1. Press Edit to enter Edit Mode. The Edit button will light up.
2. Press the desired pad. The pad’s number will appear in the display.
3. Press the Chan Assign key. The display will show CHN for 1 second and then show the
pad’s number and current MIDI channel or zone channel.
4. Use the numeric keys (0–9) or Preset Down/Up () buttons to enter the desired MIDI
channel (00 or 01–16) or zone channel (17–20).
Note: Values 00 and 01–16 correspond to Code 61’s global channel and the 16 available
MIDI channels. Values 17–20 correspond to channels used by Zones 1–4 (z1–z4).
5. Press the Enter key. The pad will be assigned to that channel, and you will exit Edit Mode.
To cancel your changes instead, press Edit. You will exit Edit Mode without saving anything.
Remember to store the preset if you want to save your changes in that preset.