Set-Up Procedures
The Mark 7® 650 Autodrive is manufactured with superior craftsmanship, quality
materials and is backed by a factory warranty.
WARNING – Only use Mark 7® accessories with the Mark 7® Autodrive. Mark 7®
equipment is prepared and tested by Mark 7® prior to delivery. To place the equipment
into service, please review the following instructions carefully. In order to ensure proper
operation and avoid damage to your press perform the pre-installation steps.
Prior to installation perform the following manual press checks and adjustments (see
Dillon Precision XL 650 Manual for location of some of the items below):
1. Ensure that the press/autodrive combination is on a very solid surface that does not
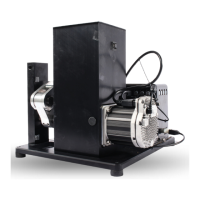
move. The Mark 7® autodrive is designed to sit on the 4 rubber feet in the corners, but it
can also be directly bolted to your work bench by removing the 4X rubber feet in the
corners. Use ¼-20 bolts to fasten the baseplate to the work surface from underneath.
Small vibrations can have an unpredictable impact on the operation of the machine.
Ensure that the machine does not move whatsoever when operating.
2. Always have your loader properly grounded to a high-quality grounding line.
3. Ensure that the press operates according to Dillon Precision specifications before you
install the autodrive. Any modifications to your machine outside of the Dillon
standard configuration and parameters will void the Mark 7® warranty. Ensure that
the shell plate retaining shoulder bolt is adjusted so that the shell plate turns freely but is
not too loose. Ensure that the index ring pawl enables the shell plate to move
completely from one index position to the next. Verify that the 650 shell plate is aligned
with the tool head using the 650 alignment pin.
4. Check that there is no powder or other debris under the shell plate. Lubricate the press
as described in the Dillon Precision user's manual. Keep the shell plate clean.
5. There will likely be three (3) cables coming from the machine: the power to the case
feeder, bullet feeder, and autodrive. For best performance we recommend to keep
the case feeder and Mr.Bulletfeeder cables separated from our system cables if
possible.