3-48 Masterflex REGLO Digital Pump Drive with Advanced Connectivity
Section 4: Service & Maintenance
Masterflex
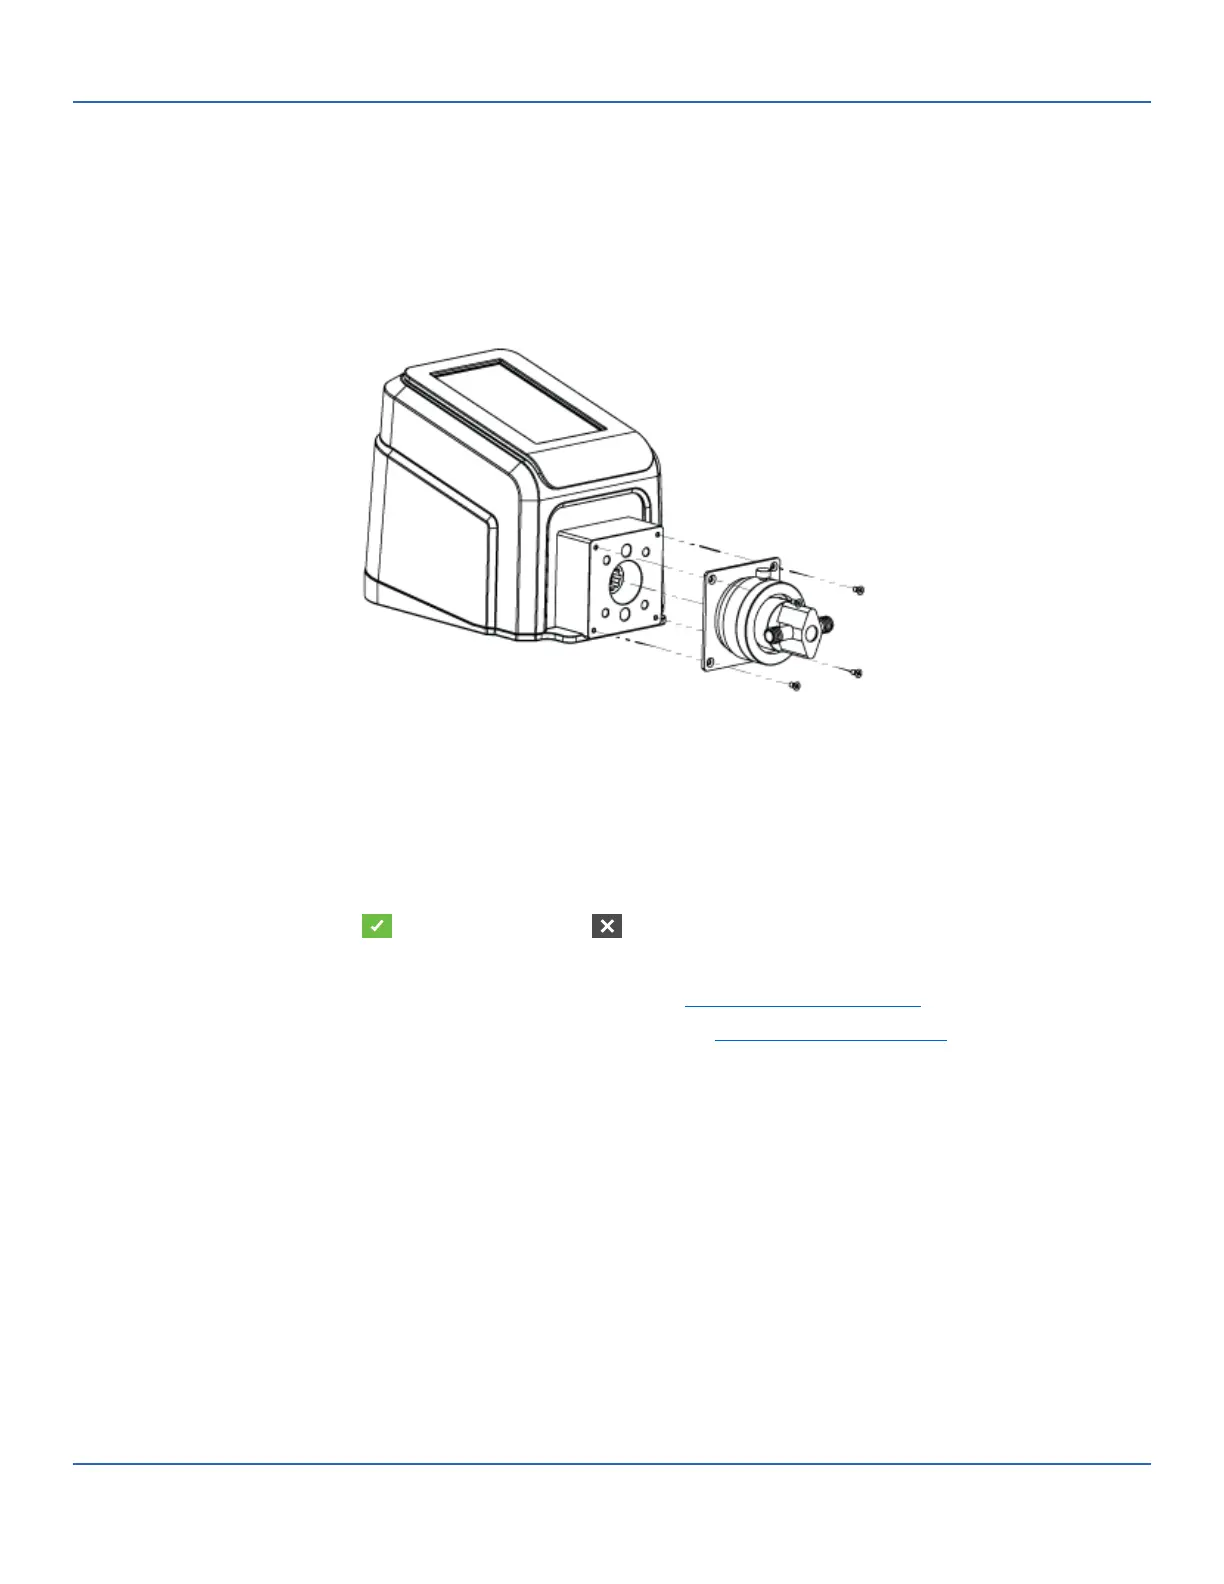
2. Mount the pump head (NOTE: e scale of the red ow control ring must be pointing upwards):
a. Hold the mounting plate (B) so that the screws are at the top and at the bottom.
b. Line up the couplings and insert the pump-head assembly. Push it on as far as it will go.
c. Drive in the at head screws (4).
d. Tighten the Allen screw using the 2.5 mm size Allen key (D).
3. Plug in the supplied desktop power supply.
4. Switch on the drive.
5. Navigate to the Continuous, Time or Volume Mode screens.
6. Tap HEAD OPTIONS. e Head Options Screen will be displayed.
a. Select the desired pump head size from the list of available options.
b. Tap CONFIRM to save or CANCEL to discard changes and return to the previous screen.
7. Adjust the pump head zero point (For further information consult the pump head user manual).
8. Prime the new pump head (for further information see "Priming the Piston Pump" on page 3-11).
9. Calibrate the new pump head (for further information see "Piston Pump Calibration" on page 3-14).
e new pump head is now ready for operation.
 Loading...