3-14 Masterflex REGLO Digital Pump Drive with Advanced Connectivity
Section 2: Basic Setup & Settings
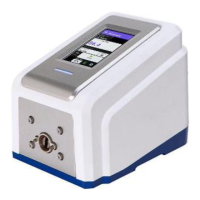
Masterflex
Piston Pump Calibration
General Preparation:
• Conrm the pump head is correctly mounted to the pump drive (for further information see "Pump
Head Replacement" on page 3-45).
• Conrm the appropriate transfer tubing has been attached to the pump head.
• Conrm all uids and containers are ready.
To calibrate the pump head:
1. Insert the tube inlet into the supply uid.
2. Insert the tube outlet into a suitable container. NOTE: e container should be graduated or placed on
a scale for increased accuracy. If using a scale, an acceptable weight to volume conversion for water is: 1
gram = 1 mL.
3. Switch the drive on using the power switch located at the rear of the drive. NOTE: If Manage User
is enabled you may be prompted for a Username and Password (for further information see "User
Management" on page 3-9).
4. Navigate to the Continuous, Time or Volume Mode screens.
5. Tap DIRECTION to select either clockwise or counterclockwise ow direction.
6. Press and hold PRIME to prime the pump. Priming will stop when PRIME is released.
7. Adjust the pump head zero point (For further information consult the pump head user manual).
8. Tap CALIBRATE from the Continuous Mode Screen or tap EDIT and then CALIBRATE
from either the Volume Mode Screen or the Time Mode Screen. e Pump Head Calibration Screen will
be displayed.
9. Tap HEAD SIZE. e Head Size Screen will be displayed.
a. Select the desired pump head size from the list of available options.
b. Tap CONFIRM to save or CANCEL to discard changes and return to the previous screen.
10. Tap CALIBRATION VOLUME. e Calibration Volume Screen will be displayed.
a. Enter the desired calibration volume using the onscreen keypad. NOTE: e default calibration vol-
ume settings or greater will ensure the best calibration.
b. Tap CONFIRM to save or CANCEL to discard changes and return to the previous screen.
11. Tap FLOW RATE. e Calibration Flow Rate Screen will be displayed.
a. Enter the desired ow rate using the onscreen keypad.
b. Tap CONFIRM to save or CANCEL to discard changes and return to the previous screen.
NOTE: e drive will adjust the displayed ow rate after calibration is complete.
12. Tap START to begin calibration. NOTE: Calibration progress will be displayed on the touchscreen.
13. When calibration is complete use the onscreen keypad to enter the measured volume of uid from the
tube outlet container.
14. Tap CONFIRM to complete calibration and return to the previous mode screen. Calibration
Complete should now be displayed to indicate that calibration has been completed for the current
pump head size, tube volume, and ow rate.
 Loading...