32 Matrox Extio 3 Series – User Guide
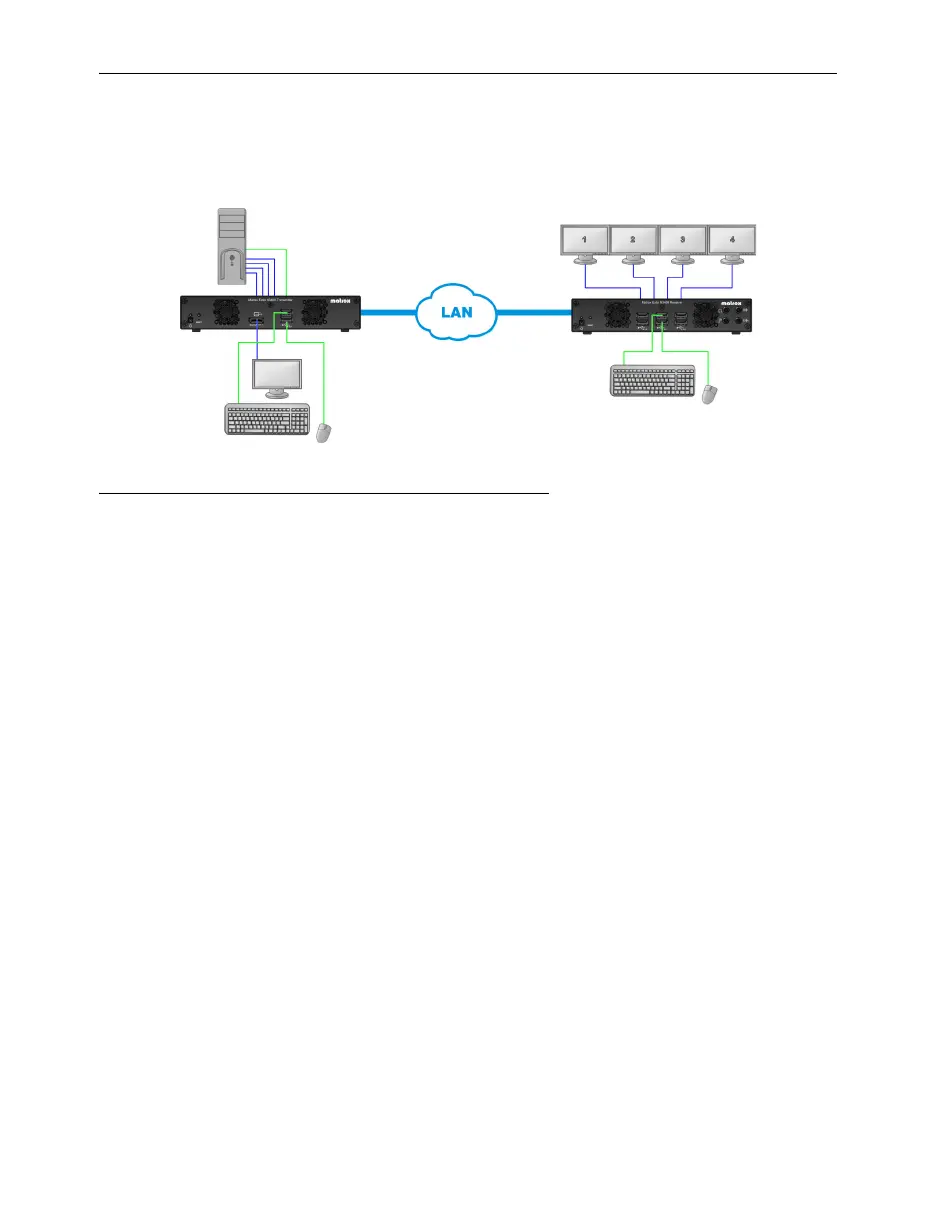
Setting up networked mode
Your Matrox Extio 3 product is an IP KVM extender. In networked mode, Extio 3 devices operate over
a copper-based or fiber-based Gigabit Ethernet network.
Before you begin
Whenever you change your connection setup, make sure you’re using the correct
connectors and that all connectors are properly fastened. Also, don’t change connections
while your Extio transmitter and receiver are turned on. For more information, see
“Connecting your Extio 3 devices”, page 14.
Make sure your Extio Central Manager software is installed on a separate system on your
network, and you’ve set the allowed connections between your Extio transmitter and
receiver devices. For more information, see your Matrox Extio Central Manager User
Guide.
Make sure all of your Extio 3 transmitter and receiver devices are using the latest version
of the Matrox Extio 3 firmware package. For more information, see “Updating your
Matrox Extio 3 firmware (networked mode)”, page 29).
Make sure all your Extio 3 devices are using the
same version
of the firmware package.
The version of your firmware package must also match the version of your Extio Central
Manager software package.
To assign an initial IP address to your devices, a DHCP (Dynamic Host Configuration
Protocol) server is required.
Windows Server 2016, Windows Server 2012 R2, and Windows Server 2008 R2
– Make
sure the SSDP Discovery service, network discovery, and file sharing options are enabled.
Review the safety information provided. For more information, see “Matrox safety
information”, page 5.