Page 94 P/N 03521015 Rev Q
Don Battery, Belt, Helmet and Hood
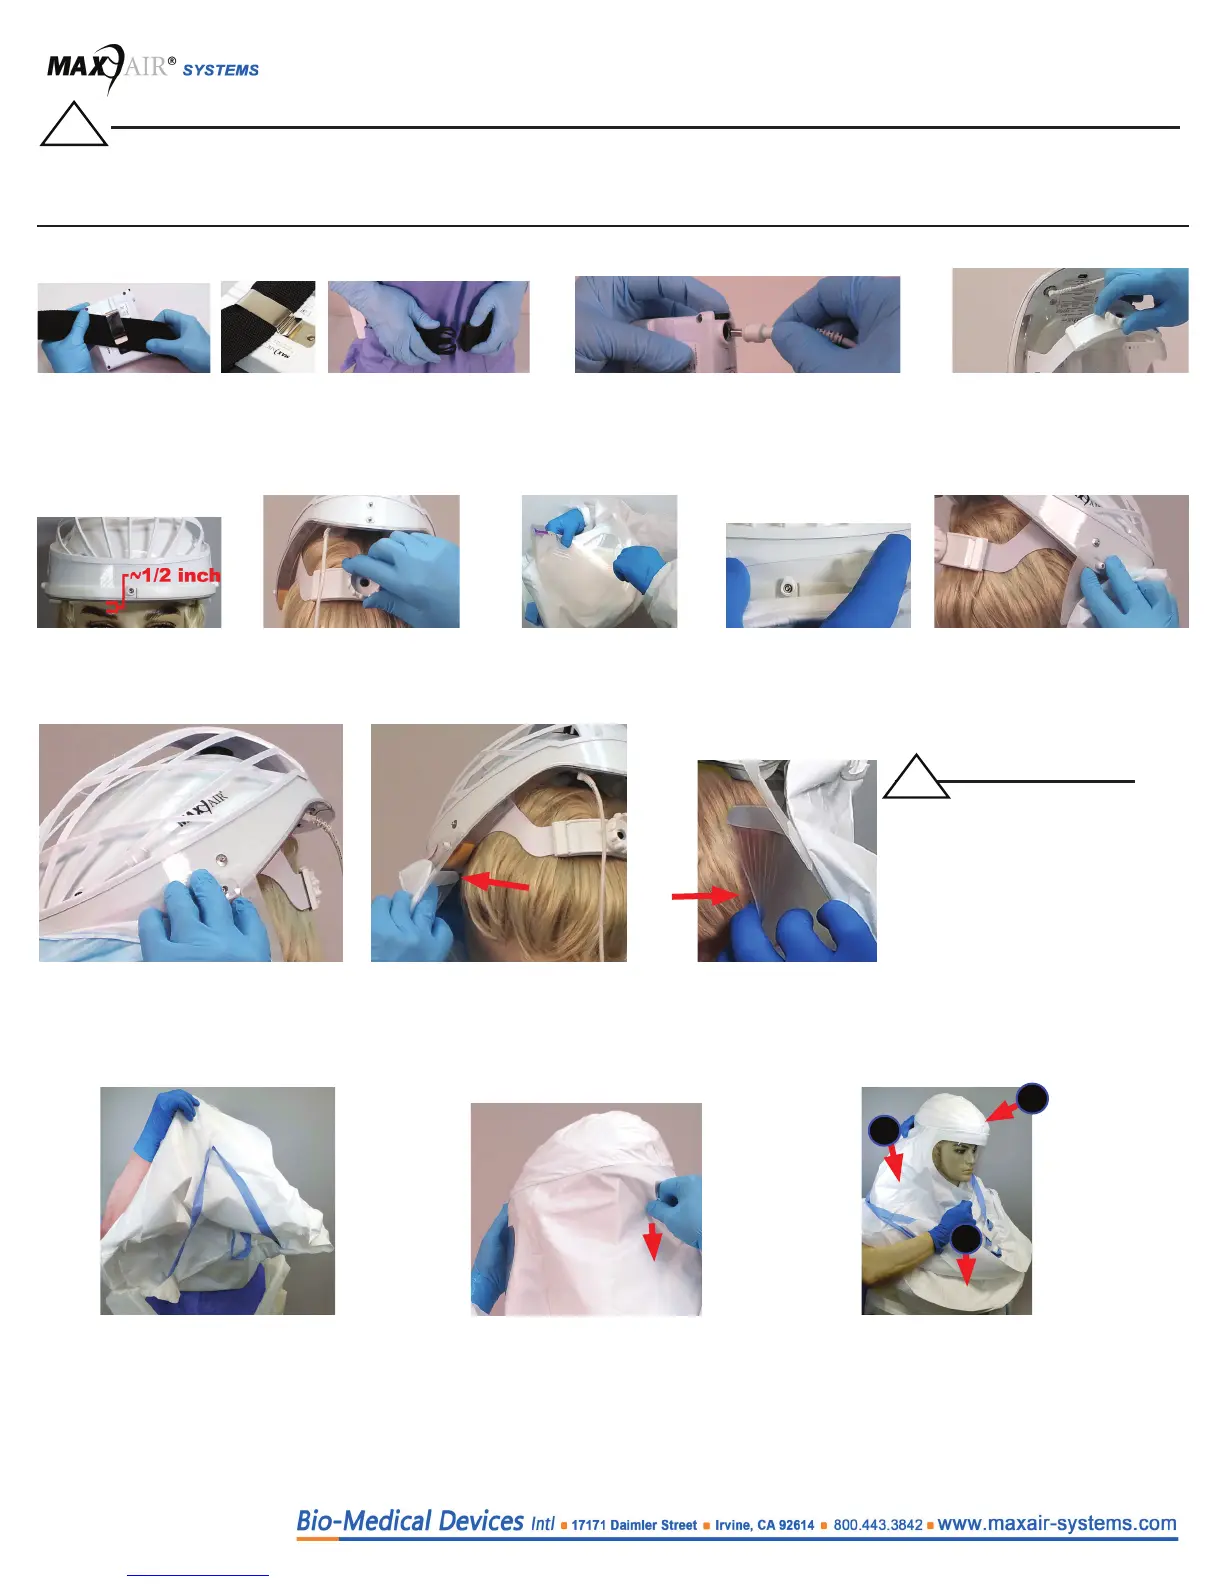
1. Remove all System Components from their packaging, ensure they are ready for use, and lay them on a clean counter with labels facing you.
4. Turn the Headband Ratchet
Knob counterclockwise to
loosen Headband for ease
of donning Helmet.
5. Position Helmet on
head with front
Headband within 1/2
inch of eyebrows.
6. Turn Ratchet Knob clock-
wise as tight as comfortable
to secure Helmet to Head
for all anticipated activities.
9. Attach (snap) one side
Hood-Lens mounting hole
to respective Helmet side
mounting post.
8. Attach (snap) center
Hood-Lens mounting
hole over Helmet cen-
ter mounting post.
10. Attach (snap) other Hood-Lens
mounting hole to other Helmet
side mounting post.
2. Assemble the Battery onto a double layer of Belt. Place the
top edge of the Belt under the Battery Clip, fully under and
up to the Clip top, so the Clip Detent rests on the Clip Base
and NOT the Belt. Place the belt comfortably around the
waist with the battery near the side-back of the right hip.
3. Connect the Helmet Power Cord to the
Battery. Push the Power Cord Connector
into the Battery Receptacle until the Secure
Lock audibly clicks. (Do NOT hold down the
Black Secure Lock Button.)
11. Pull Cu down and back under
chin, then insert ngers between
face and Cu and gently pull Cu
and Flapper so Flappers point
towards the temples (both sides).
12. Slide index or rst nger be-
tween Cu and face from chin
to the temples, both sides, to
check there is slight tension
between cu and face.
14. With outer gown open to allow later
tucking in inner Shroud, grasp back bot-
tom of both Shrouds and pull up, over,
and down below Helmet in back.
15. Continuing process of 14, pull
Hood all the way down so that
Hood Filter (top) is fully down on
Helmet.
CAUTION
If condition in 12. is
not achieved, switch
to the other size Hood
(SM version) before
proceeding.
16. Ensure all Filter (top) folds above front of
Lens (A) are removed by holding Hood body
in front below Lens (B) and in back below Filter
(C) and pulling down rmly in back.
A
C
B
13. Don the appropriate
body covering PPE for
your application per the
manufacturers’ instruc-
tions.
!
7. Gently pull Cu and
Flappers away from
Lens to ensure they are
not stuck together.
!
NOTE
All procedures are the same for the “PB” Hood as for the “PW” Hood; only the “PW” ML version is shown. The “PW”
Hood body material is essentially a heavier weight, non-breathable alternative to the “PB” version.