Page 99 P/N 03521015 Rev Q
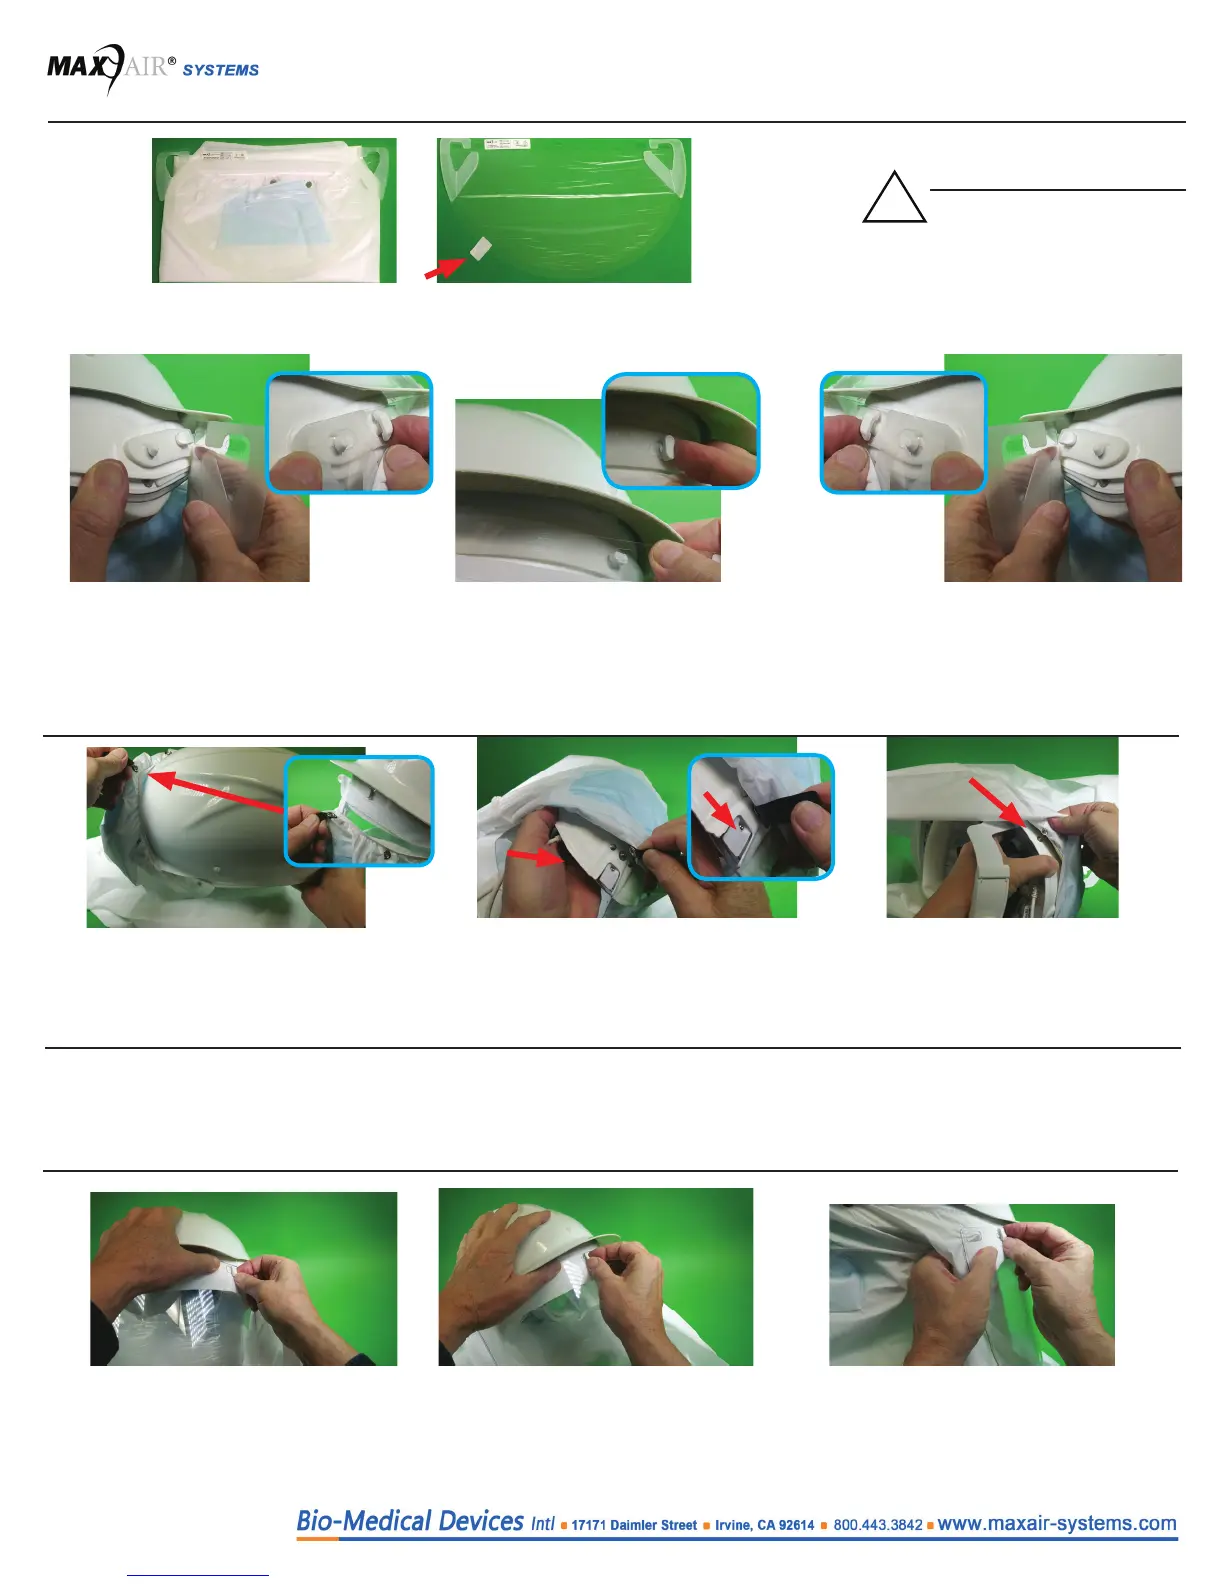
Assembly cont’d - SHROUD ONLY
5. Use the black pull tab to pull the Shroud up
over the Hard Hat front and back towards the
rear.
6. Continue pulling Shroud over and down
the back of the Hard Hat and snap to the
T-Tab Snap.
7. Attach one side-rear snap of the Shroud
to one side-rear snap on the Hard Hat,
then repeat for the other side. This step
completes the Shroud assembly.
Disassembly - Cu and Shroud
Disassembly of the DLC Cu is the reverse of Assembly steps 1-4, immediately preceding.
Disassembly of the Shroud is the reverse of Assembly steps 1-7, immediately preceding.
Assembly - ANSI Z87 Lens
1. Securely attach one set of side Lens
holes (2) over one side Hard Hat
Turn Clip and Mounting Post. Secure
Turn Clip vertically.
2. Securely attach the Lens center hole
over the Hard Hat center Turn Clip.
Secure Turn Clip vertically.
3. Securely attach other set of side Lens holes
(2) over other side Hard Hat Turn Clip and
Mounting Post. Secure Turn Clip vertically.
This step completes Lens Assembly.
Assembly - Face (DLC Cu) or Headcover (DLC Shroud) to Assembled Hard Hat Helmet
2. Securely attach one set of side Lens holes (2)
over one side Hard Hat Turn Clip and Mount-
ing Post. Secure Turn Clip vertically.
3. Securely attach the Lens center
hole over the Hard Hat center Turn
Clip.
Secure Turn Clip vertically.
4. Securely attach other set of side Lens holes
(2) over other side Hard Hat Turn Clip and
Mounting Post. Secure Turn Clip vertically.
This step completes Cu Assembly.
1. Remove Shroud/Cu from packaging and lay on a clean surface with label facing up.
!
CAUTION
Before use, using the peel
tab, be sure to remove the
lens protecting lm from the
DLC Cu Lens.
DLC Shroud
(Disposable
Lens-Cu
Shroud)
DLC Cu
(Disposable
Lens-Cu Cu)