EasyManuals Logo

Micromeritics SediGraph III 5120 Installation Instructions And Checklist

Micromeritics SediGraph III 5120
50 pages
To Next Page IconTo Next Page
To Previous Page IconTo Previous Page
Page #14 background imageLoading...
Page #14 background image
Attaching Tubes and Cables SediGraph III 5120 Installation
10 Mar 2010
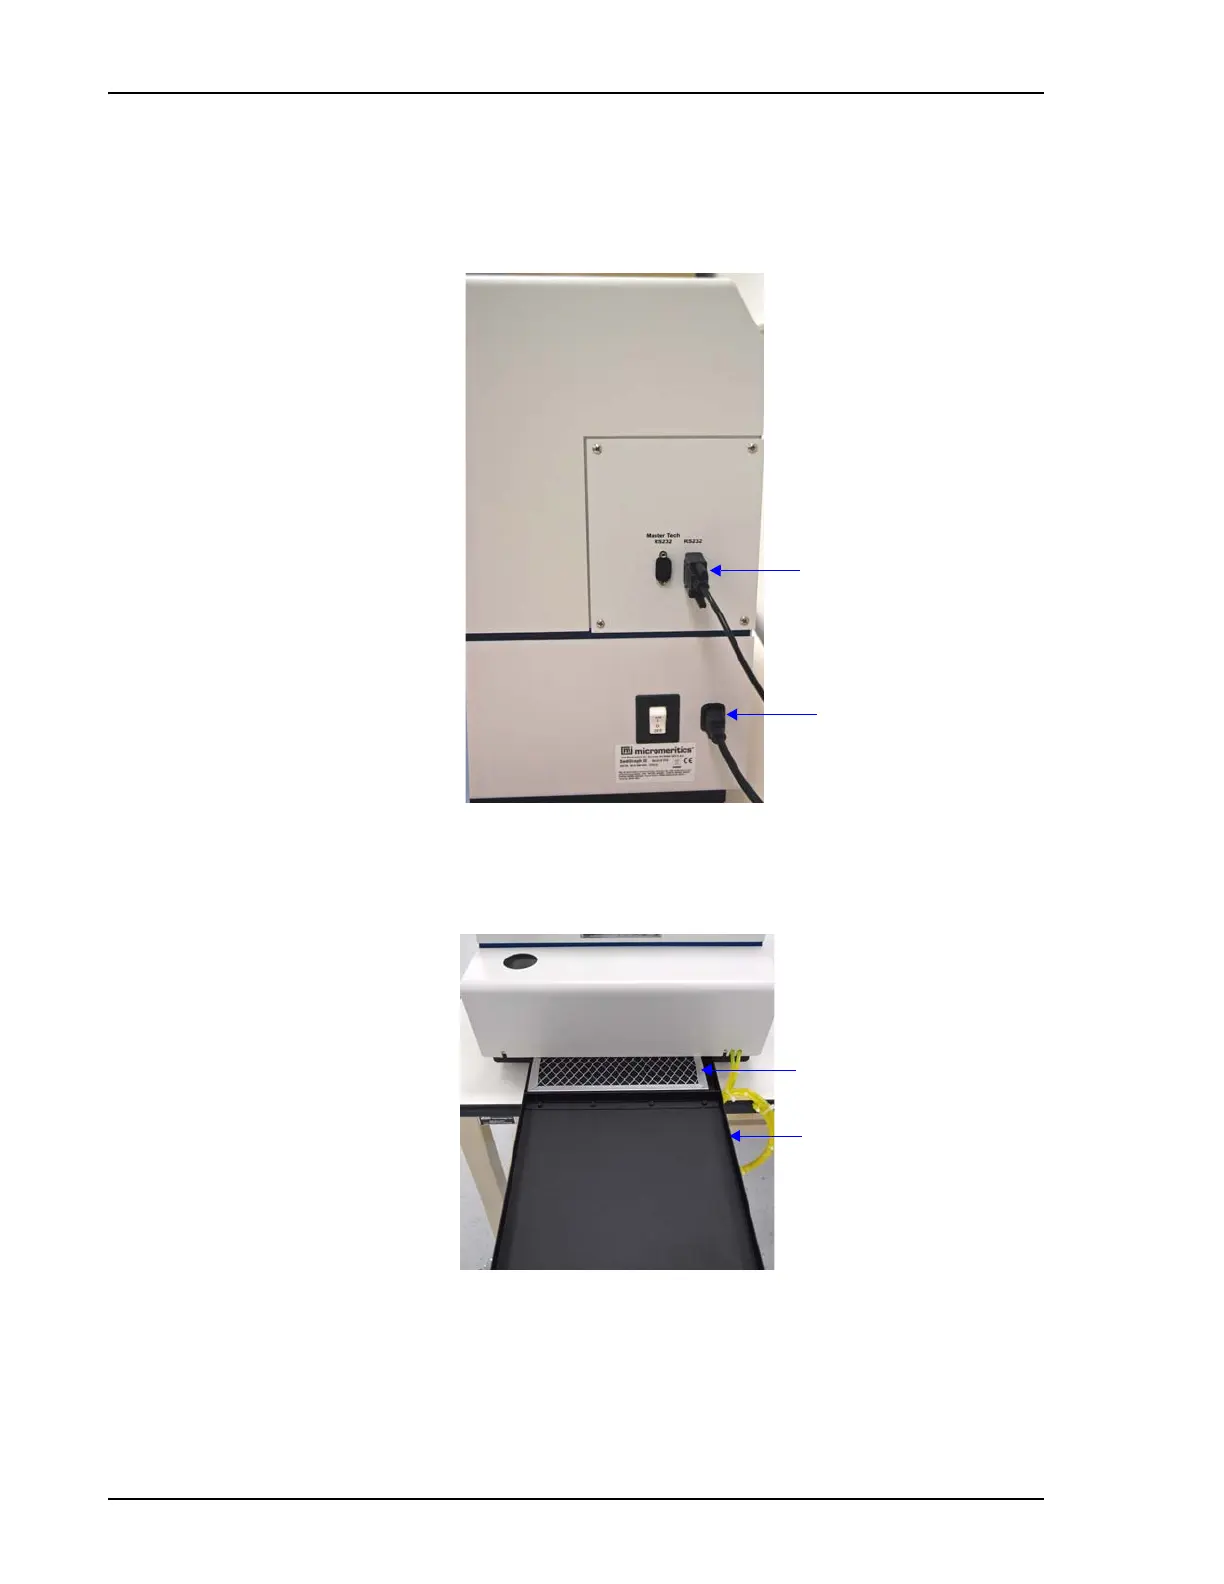
2. Connect an RS232 cable to the connector on the rear panel of the analyzer and to the
computer.
3. Connect the power cable to the connector on the rear panel of the analyzer and to a
power source.
4. Slide out the drip tray under the lower panel of the analyzer.
5. Insert the air filter in the slot provided at the rear of the tray.
6. Close the drip tray.
7. Open the analysis compartment door and locate the level indicator.
To computer
To power
source
Air filter
Drip tray

Other manuals for Micromeritics SediGraph III 5120

Questions and Answers:

Question and Answer IconNeed help?

Do you have a question about the Micromeritics SediGraph III 5120 and is the answer not in the manual?

Micromeritics SediGraph III 5120 Specifications

General IconGeneral
BrandMicromeritics
ModelSediGraph III 5120
CategoryMeasuring Instruments
LanguageEnglish

Related product manuals