SediGraph III 5120 Installation Installing the 5120 Analysis Program
Mar 2010 11
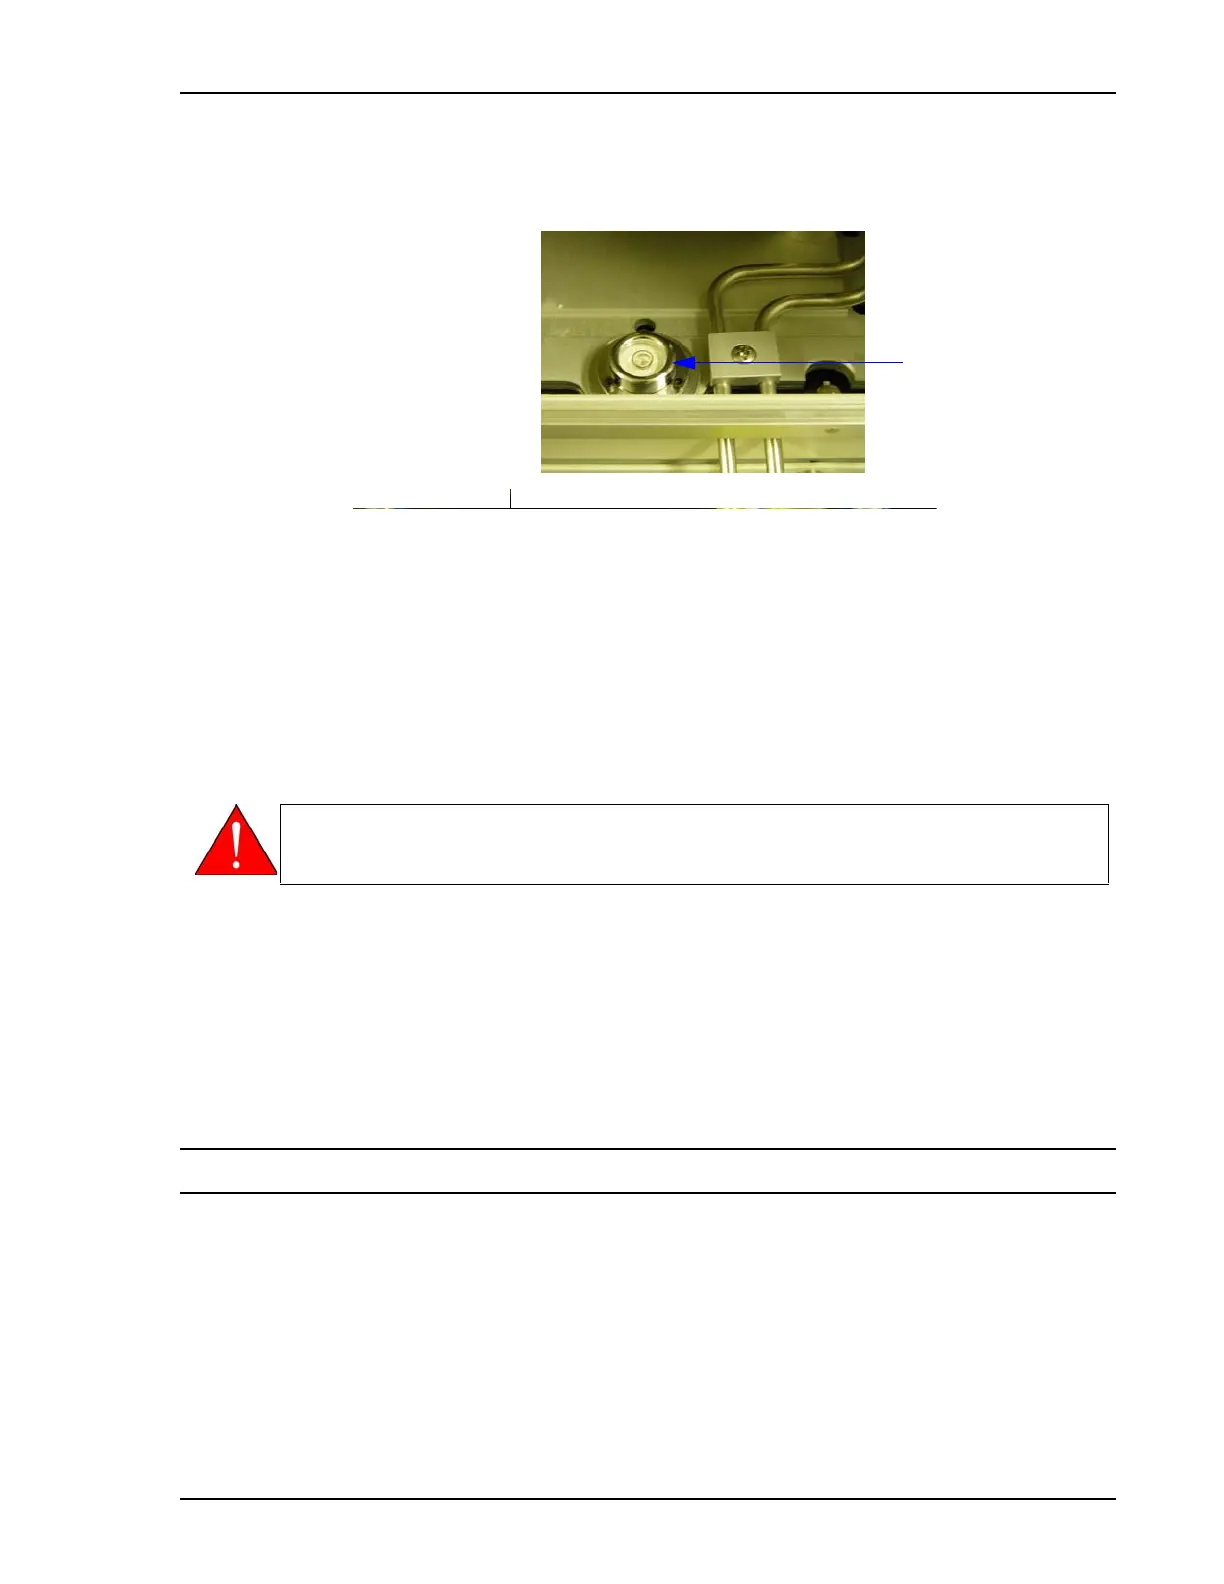
8. Look straight down at the indicator. The analyzer is level when the bubble is centered
inside the black circle on the level indicator.
If the analyzer is not level, lift the corner of the SediGraph, then turn the appropriate foot
counterclockwise to raise the unit or clockwise to lower the unit.
Set the analyzer back down and observe the indicator. The bubble should be centered
inside the black circle on the level indicator.
9. Place the PUMP CONTROL switch (on the front panel) in the AUTO position.
10. Place the SediGraph ON/OFF power switch (on the side panel) to the ON ( | ) position.
11. Turn on the computer, monitor and printer.
12. Turn the X-ray key to the X-ray ON position.
13. Make sure the green light on the front of the analyzer comes on.
14. Make sure the fans are running.
15. Give the 5120 at least 30 minutes to warm up before starting the Verification Procedure.
Installing the 5120 Analysis Program
The installation CD shipped with the analyzer contains the 5120 analysis software. To install
the software:
1. Insert the Micromeritics 5120 analysis software CD into your CD-ROM drive.
2. Select Start from the Status bar, then Run from the Start menu.
3. Enter the name of the drive designator, followed by setup. For example: e\:setup.
Level Indicator
Warning 13,600VDC is present on the X-ray tubes anode and X-rays are being
generated. Ensure all X-ray shields are in place and operational.

 Loading...


