SediGraph III 5120 Installation Verifying Operation
Mar 2010 21
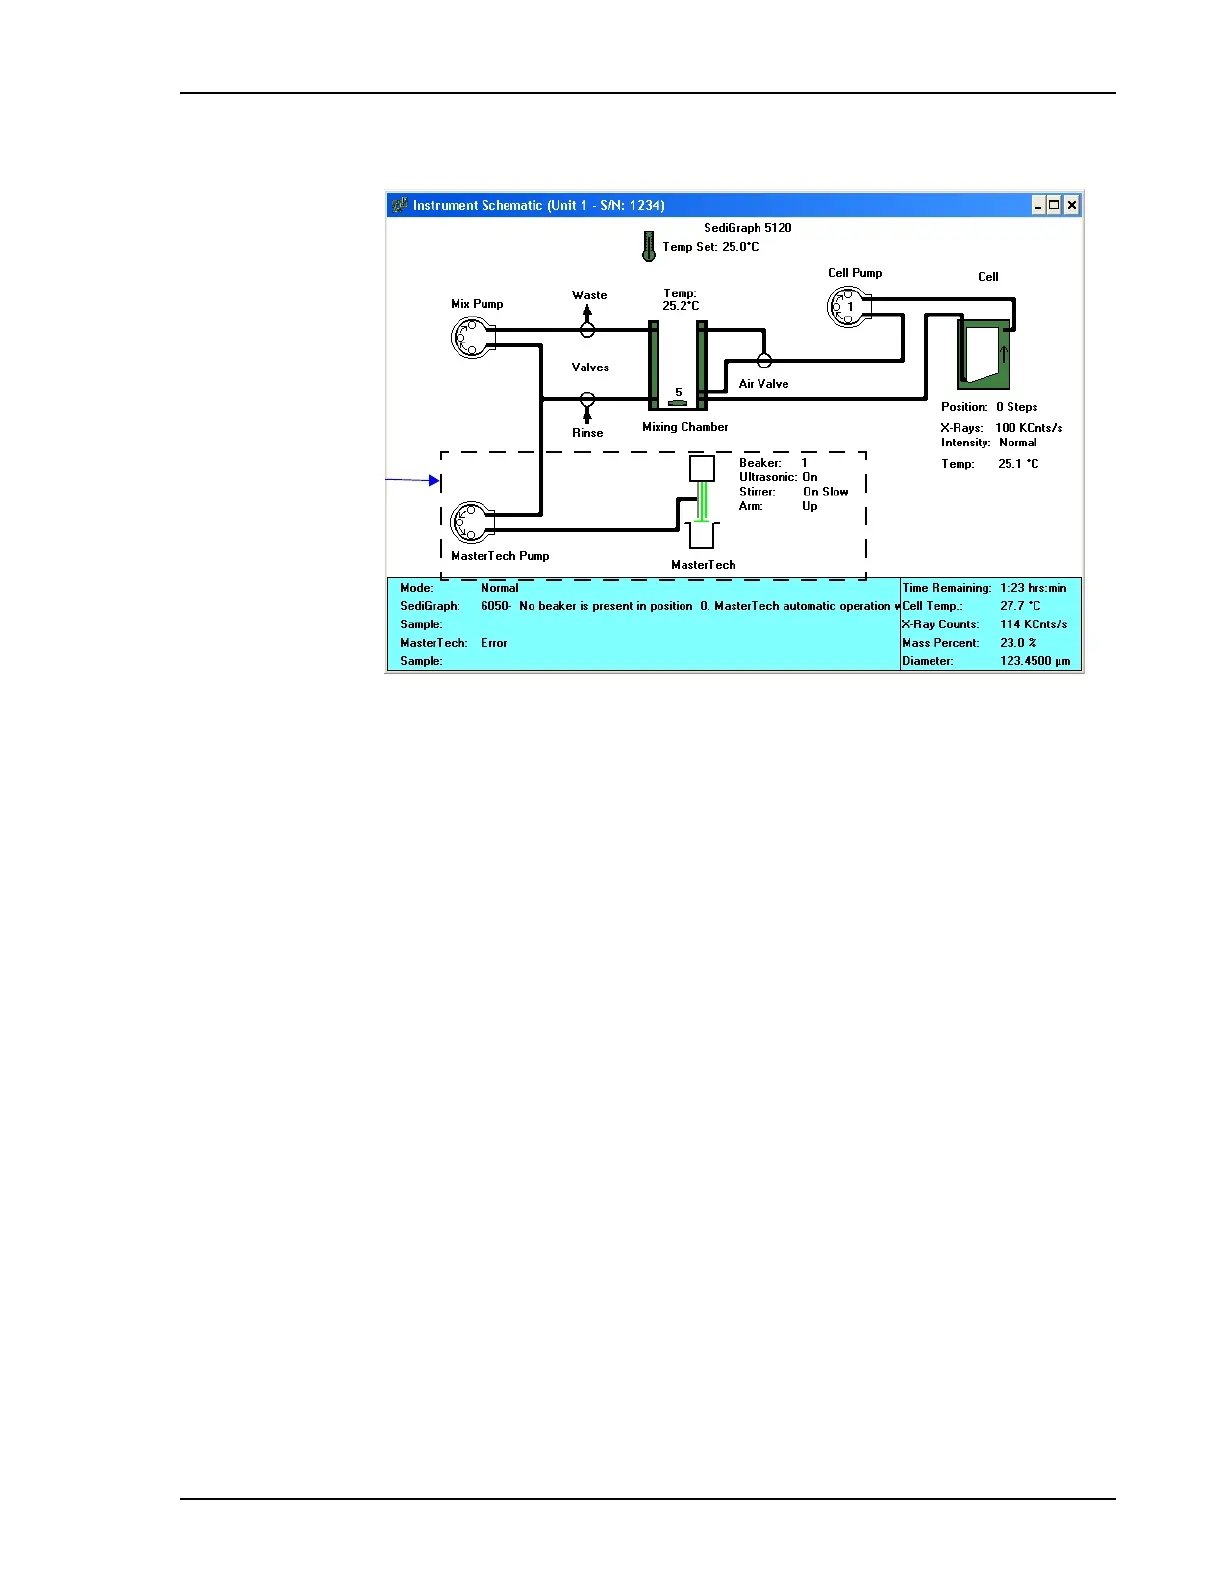
7. Make sure the schematic is displayed and manual mode is enabled.
8. If the arm is in the Load position, press the ARM AUTO/LOAD switch on the front panel
of the MasterTech to release it.
9. Select Unit [n] > Initialize MasterTech.
A message is displayed indicating that initialization is in process. The tray on the
MasterTech rotates in a counterclockwise direction for one position, and the arm lowers to
the Rinse position and returns.
The tray then continues to rotate until position 1 is reached. The beaker inserted in the tray
in Step 2 should now be directly under the head of the MasterTech. Make sure that the
beaker contains approximately 80 mL of water.
10. On the instrument schematic, for each of the following steps, right-click on the cell icon to
display the pop-up menu, then select:
a. Move Arm Down; then repeat the step.
b. Ultrasonic On; you will hear a high-pitched sound, indicating that the probe is
operational. Now select Ultrasonic Off.
c. Stirrer On; the stirrer begins to operate.
d. Speed.
e. Move Arm Up.
f. Stirrer Off.
g. Move Arm Up.
Shown only if
MasterTech is
installed

 Loading...


