www.roadwidener.com
288
Model SPD-6
10. Using a 26 mm 12-point socket, install coil nuts (B0026). Torque to 3.5 N•m [2.6 lbf•ft]. Do not
overtorque.
2 position control assembly
1/8 in
8 N•m [6 lbf•ft]
17 mm
25 N•m [19 lbf•ft]
C0060
C0060A
C0060A
C0060
E00T3
E00T2
C0020
C0030
1/4 in
40 N•m [30 lbf•ft]
C0050
C0050A
1/8 in 8 N•m [6 lbf•ft]
C0060
C0060A
3 mm
6 N•m
[4 lbf•ft]
1/8 in 8 N•m [6 lbf•ft]
C0060
C0070
C0080
C0050
C0050A
17 mm
C0090
M223
1/8 in
8 N•m [6 lbf•ft]
3 mm
6 N•m
[4 lbf•ft]
1/4 in
40 N•m [30 lbf•ft]
25 N•m
[18 lbf•ft]
B0028
B0022
B0024
B0032
B0028
B0022
B0024
B0032
B0034
17 mm
25 N•m [19 lbf•ft]
B0034
B0026
3.5 N•m
[2.6 lbf•ft]
B0026
3.5 N•m
[2.6 lbf•ft]
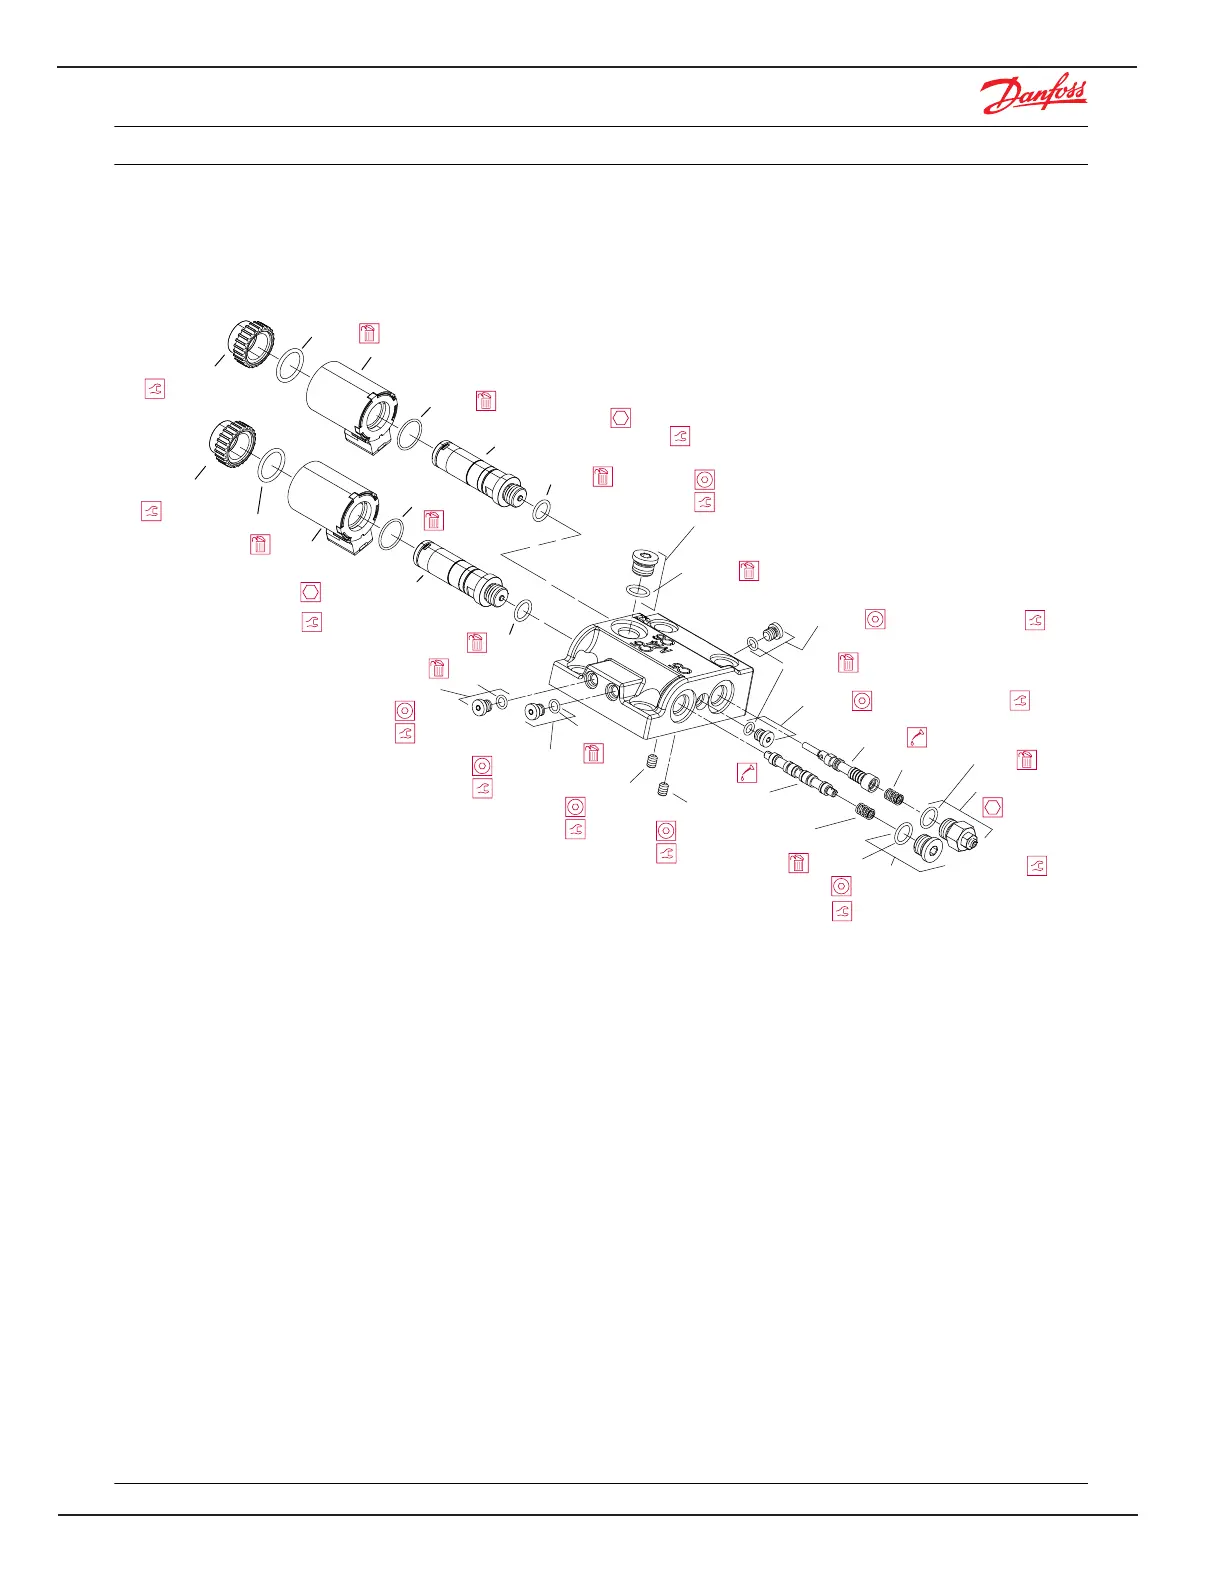
Hydraulic two-position control module
Disassembly
1. Using a 1/8 inch internal hex wrench, remove plug (C0160). Remove and discard O-ring (C0160A).
2. Using a 1/8 inch internal hex wrench, remove three plugs (C0060). Remove and discard O-rings
(C0060A).
3. Using a 1/4 inch internal hex wrench, remove two plugs (C0050). Remove and discard O-rings
(C0050A).
4. Use a 5mm internal hex wrench to remove the shuttle valve (C0025).
5. Using a 3/8 internal hex wrench, remove plug (C0140). Remove and discard O-ring (C0140A).
6. Remove spring (C0080). Remove spool (C0150).
7. If necessary, use a 3 mm internal hex wrench to remove orifices (E00T2) and (E00T3).
Inspection
Clean and inspect the machined surfaces on the control and the endcap. If any nicks or scratches are
found, replace the control/endcap assembly.
Assembly
1. Lubricate and install spool (C0150) and spring (C0080).
Service Manual H1B 060/080/110/160/250 Bent Axis Motors
Minor repair
52 11024924 • Rev CB • February 2015