Do you have a question about the Miller Auto-Line Invision 352 MPa and is the answer not in the manual?
Explanation of warning and safety symbols used throughout the manual for hazard identification.
Details potential hazards encountered during equipment maintenance and repair operations.
Provides legally required warnings about chemical exposure from the product.
Information regarding electric and magnetic fields and their potential impact on medical implants.
Defines safety symbols used by the manufacturer to indicate potential hazards.
Explains various symbols used in the manual that are not related to safety hazards.
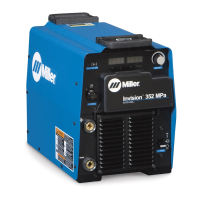
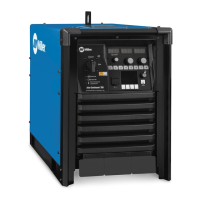
Highlights the key technologies and advantages of the welding power source.
Provides physical measurements and weight specifications for the unit.
Details the operating and storage temperature ranges for the equipment.
Explains duty cycle limitations and the unit's response to overheating conditions.
Describes the welding power source's output behavior under different welding processes.
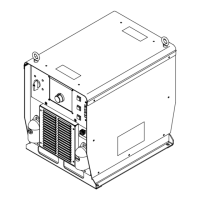
Guidelines for choosing an appropriate and safe location for the welding unit.
Recommendations for choosing appropriate weld cable sizes based on amperage and length.
Identifies and describes the positive and negative weld output terminals.
Details the pinout and function of the 14-pin remote control receptacle.
Information on the optional 115V AC receptacle and its protective devices.
Provides essential electrical service recommendations for safe and correct input power connection.
Description of the front panel controls, indicators, and displays for unit operation.
Instructions on how to access and customize machine features and settings.
Procedure to restore the welding unit's settings to their original factory defaults.
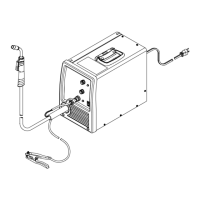
Illustrates the standard connection setup for remote feeder operation.
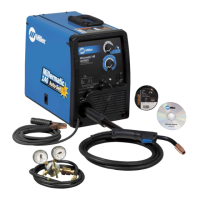
Details the operation and settings for MIG and FCAW welding modes.
Provides a table for selecting appropriate wire types and gas mixtures for MIG welding.
Explains the operation and settings specific to the Pulsed MIG welding mode.
Guides users in selecting wire and gas for Pulsed MIG welding applications.
Describes the feature allowing process switching between MIG and Pulsed MIG via wire feeder.
A step-by-step guide to diagnose and resolve common issues with the welding unit.
Essential pre-power checks to ensure safety and prevent damage before energizing the unit.
Procedure for safely measuring and discharging high voltage capacitors before servicing.
Information and inspection guidelines for the input pre-regulator module.
Specific test point values for diagnosing the input pre-regulator module.
Information and inspection guidelines for the inverter module.
Specific test point values for diagnosing the inverter module.
Information and inspection guidelines for the power interconnect board.
Specific test point values for diagnosing the power interconnect board.
Information and inspection guidelines for the control board.
Specific test point values for diagnosing the control board.
Procedure for testing the main power switch for proper operation.
Information and inspection for the output diodes.
Specific test point values for diagnosing the output diodes.
A table listing common problems, symptoms, and their corresponding remedies.
Explanation of the 'HELP' codes displayed by the unit to indicate malfunctions.
Step-by-step instructions to reset the unit's configuration to factory default settings.
A schematic diagram to aid in troubleshooting by illustrating circuit connections and test points.
Guidance for testing the control board PC1, referencing specific test point values.
Detailed test point values for the control board PC1 for diagnostic purposes.
Procedures for performing diagnostic checks on the control board PC1 when power is off.
Further power-off checks for the control board PC1, detailing component measurements.
Instructions for testing the power interconnect board PC2, referencing test point values.
Specific test point values for diagnosing the power interconnect board PC2.
Power-off checks for the power interconnect board PC2 for specific serial number ranges.
Continued power-off checks for PC2, detailing component tests for earlier models.
Power-off checks for PC2 relevant to units manufactured within a specific serial number range.
Further power-off checks for PC2 covering a specific serial number range.
Power-off checks for PC2 applicable to units manufactured from serial number MH474077U onwards.
Continued power-off checks for PC2 for units with serial numbers starting from MH474077U.
Information on testing the front panel/display board PC3, referencing test point values.
Specific test point values for diagnosing the front panel/display board PC3.
Procedures for verifying unit output and performance after maintenance or repair.
Guidelines for regular checks and upkeep tasks to ensure optimal unit performance.
Procedure for cleaning internal components by blowing out dust and debris.
Step-by-step instructions for safely removing and replacing the fan motor.
| Type | Inverter |
|---|---|
| Input Voltage | 208-575 V |
| Duty Cycle | 60% at 350 A |
| Input Phase | 3-Phase |
| Input Frequency | 50/60 Hz |
| Power Factor | 0.95 |
| Process | MIG, Pulsed MIG, Flux-Cored, Stick, TIG |
| Output Voltage Range | 10-38 V |