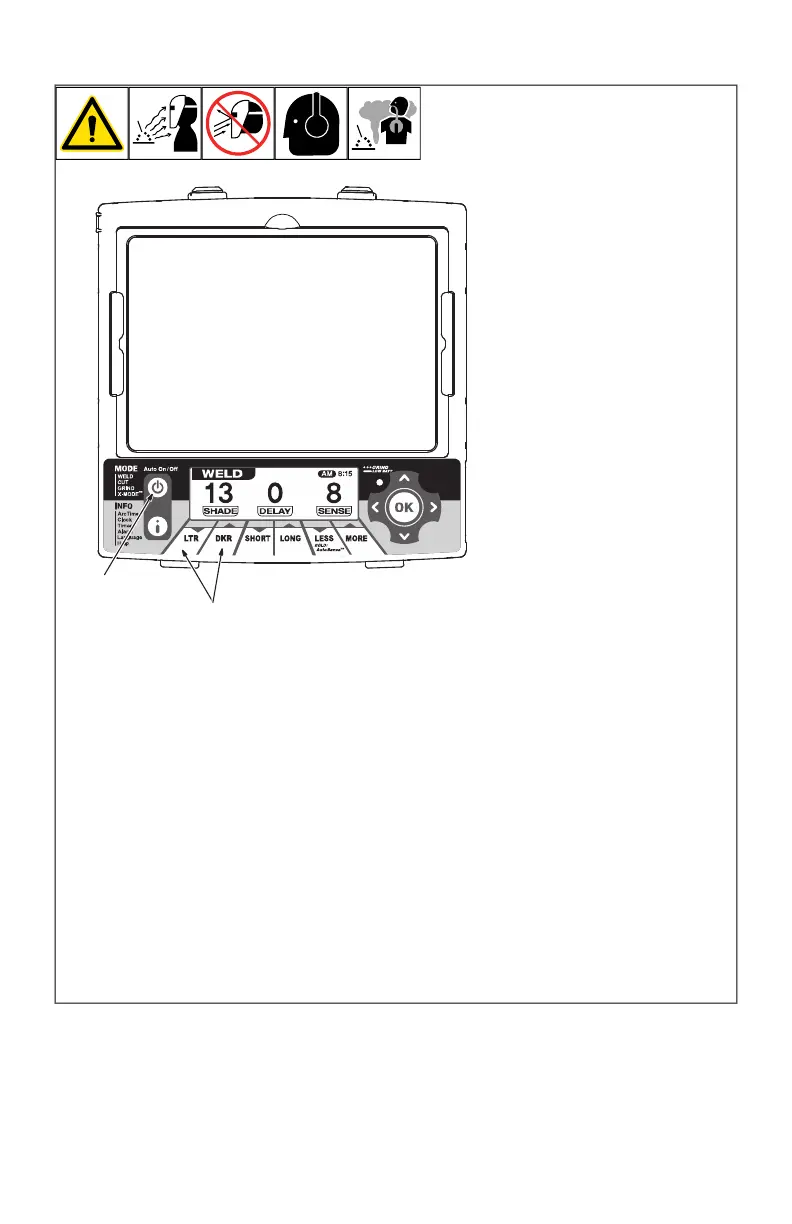
OM-269681 Page 10
4-4. Variable Shade Control
OM-269681 Page 1
1 Variable Shade
Adjustment Buttons
2 Mode Control Button
Use the LTR and DKR ad-
justment buttons to adjust
the lens shade in the dark-
ened state. Use the table in
Section NO TAG to select
proper shade control setting
based on your welding pro-
cess. The shade ranges for
each mode are as follows:
Weld No. 8 No. 13
Cut No. 5 No. 8
Grind No. 3 only
X Mode No. 8 No. 13
Start at the highest setting
and adjust lighter to suit the
application
and your person-
al preference.
Variable Shade Adjust-
ment Procedure
Press Auto On/Off but-
ton to turn lens On.
Press Mode Control
Button to select desired
function: Weld, Cut, or
X-Mode.
Use LTR and DKR ad-
justment buttons to se-
lect desired shade.
Begin welding or contin-
ue with other lens ad-
justments.
1
2
1 Variable Shade Adjust-
ment Buttons
2 Auto On/Off (Mode) Con-
trol Button
Use the LTR and DKR adjust-
ment buttons to adjust the
lens shade in the darkened
state. Use the table in Section
1-4 to select proper shade
control setting based on your
welding process. The shade
ranges for each mode are as
follows:
Weld - No. 8–No. 13
Cut - No. 5–No. 8
Grind - No. 3 only
X-Mode - No. 8–No. 13
Start at the highest setting
and adjust lighter to suit the
application and your personal
preference.
Variable Shade Adjustment
Procedure
l Press Auto On/Off
(Mode) button to turn lens
On.
l Press Auto On/Off
(Mode) button to select
desired function: Weld,
Cut, or X-Mode.
l Use LTR and DKR adjust-
ment buttons to select de-
sired shade.
l Begin welding or continue
with other lens
adjustments.