OM-269681 Page 21
SECTION 6 – REPLACING LENS COVERS
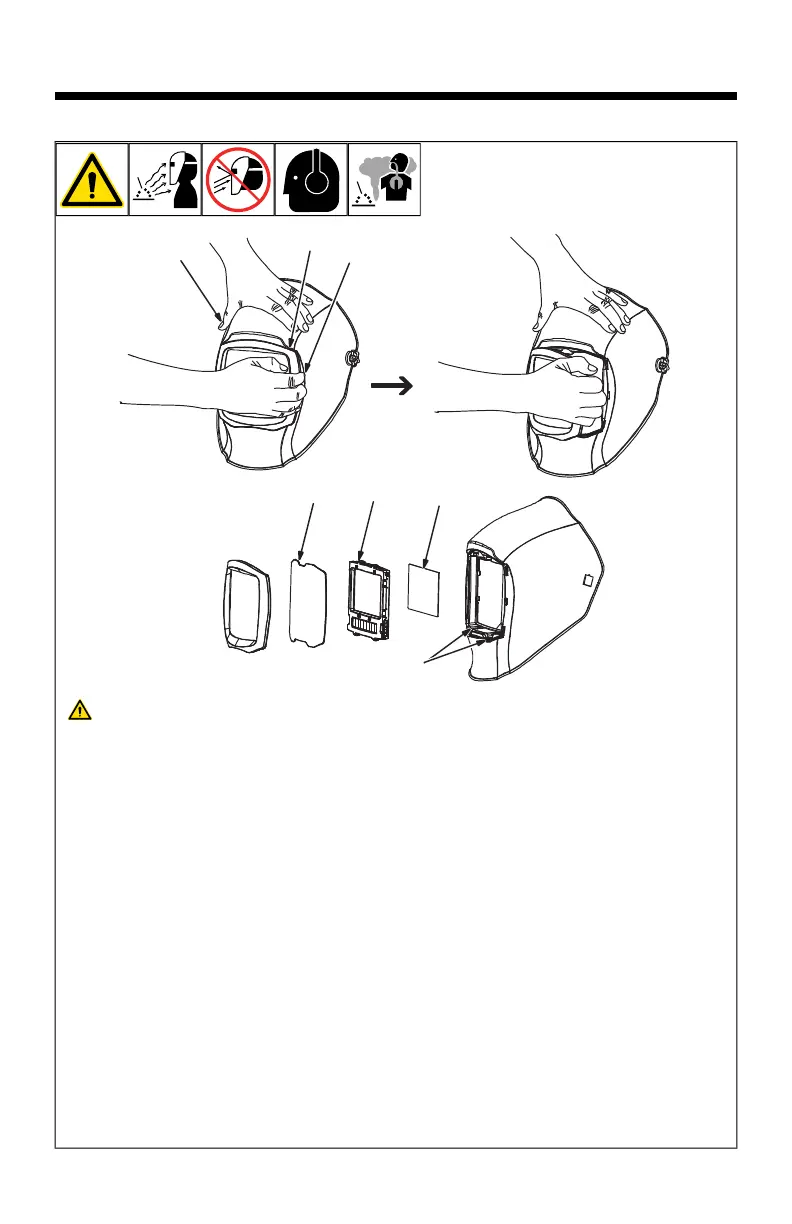
6-1. Replacing The Lens Covers
OM-269681 Page 1
804814 / 804816
1
2
2
3 4
5
6
Never use the auto-darkening lens
without the inside and outside lens
covers properly installed. Welding
spatter will damage the auto-darken-
ing lens and void the warranty.
Outside Lens Cover
1 Lens Holder
2 Lens Holder Release Points
3 Outside Lens Cover
Remove lens holder by pulling the holder
away from the helmet in either bottom
corner.
Remove lens cover from shell by pulling top
center of lens. Replace lens cover in lens
holder by placing one edge in place, bending
lens cover, and inserting opposite edge into
lens holder channel. Reinstall lens holder in
helmet.
Inside Lens Cover
4 Auto-Darkening Lens
5 Inside Lens Cover
Remove the inside lens cover by pulling top
center of lens cover from lens holding
channels.
Replace the lens cover by gently bowing it in
the center and inserting it, one end at a time,
into the lens holding channels.
F
Be sure the cover lens is seated prop-
erly to prevent fogging.
Auto-Darkening Lens
6 Lens Release Tabs
Remove lens holder and outside lens cover
using instructions above. Press down on
both lens release tabs and push auto-dark-
ening lens assembly from the inside to
remove.
Replace the lens by aligning it on the re-
lease tabs and pressing it in until it snaps in-
to place.