SpO
2
Measurements Operation
3 - 32 0070-10-0699-02 Accutorr V Operating Instructions
Two (2) sensors are available with DPM SpO
2
. They are an adult reusable finger sensor and
a reusable Y sensor for adult and pediatric patients.
The digital SpO
2
value displays on the SpO
2
LED (7), and the SpO
2
Pulse Rate displays on
the Pulse Rate LED (6).
CAUTION: When equipped with DPM SpO2, use only DPM oxygen
sensors and cables. Use of other oxygen sensors may cause
improper oximeter performance.
NOTE: Refer to instructions included with each SpO
2
sensor and
cable for proper placement and use.
1. Select an SpO
2
sensor that is appropriate for the patient size.
2. Attach the connector of the SpO
2
sensor to the SpO
2
extension cable.
3. Attach the SpO
2
sensor to the patient’s finger (or other appropriate site).
4. Align the key slot on the connector on the end of the SpO
2
extension cable with the
SpO
2
receptacle on the right side panel of the Accutorr V. Push the connector into the
SpO
2
receptacle until a “click” is heard. The SpO
2
measurement displays when the
Accutorr V detects that the sensor is connected to the patient. A plethysmogram displays
on the LCD.
NOTE: To disconnect the cable from the Accutorr V, pull straight out
on the collar of the connector marked with two arrows.
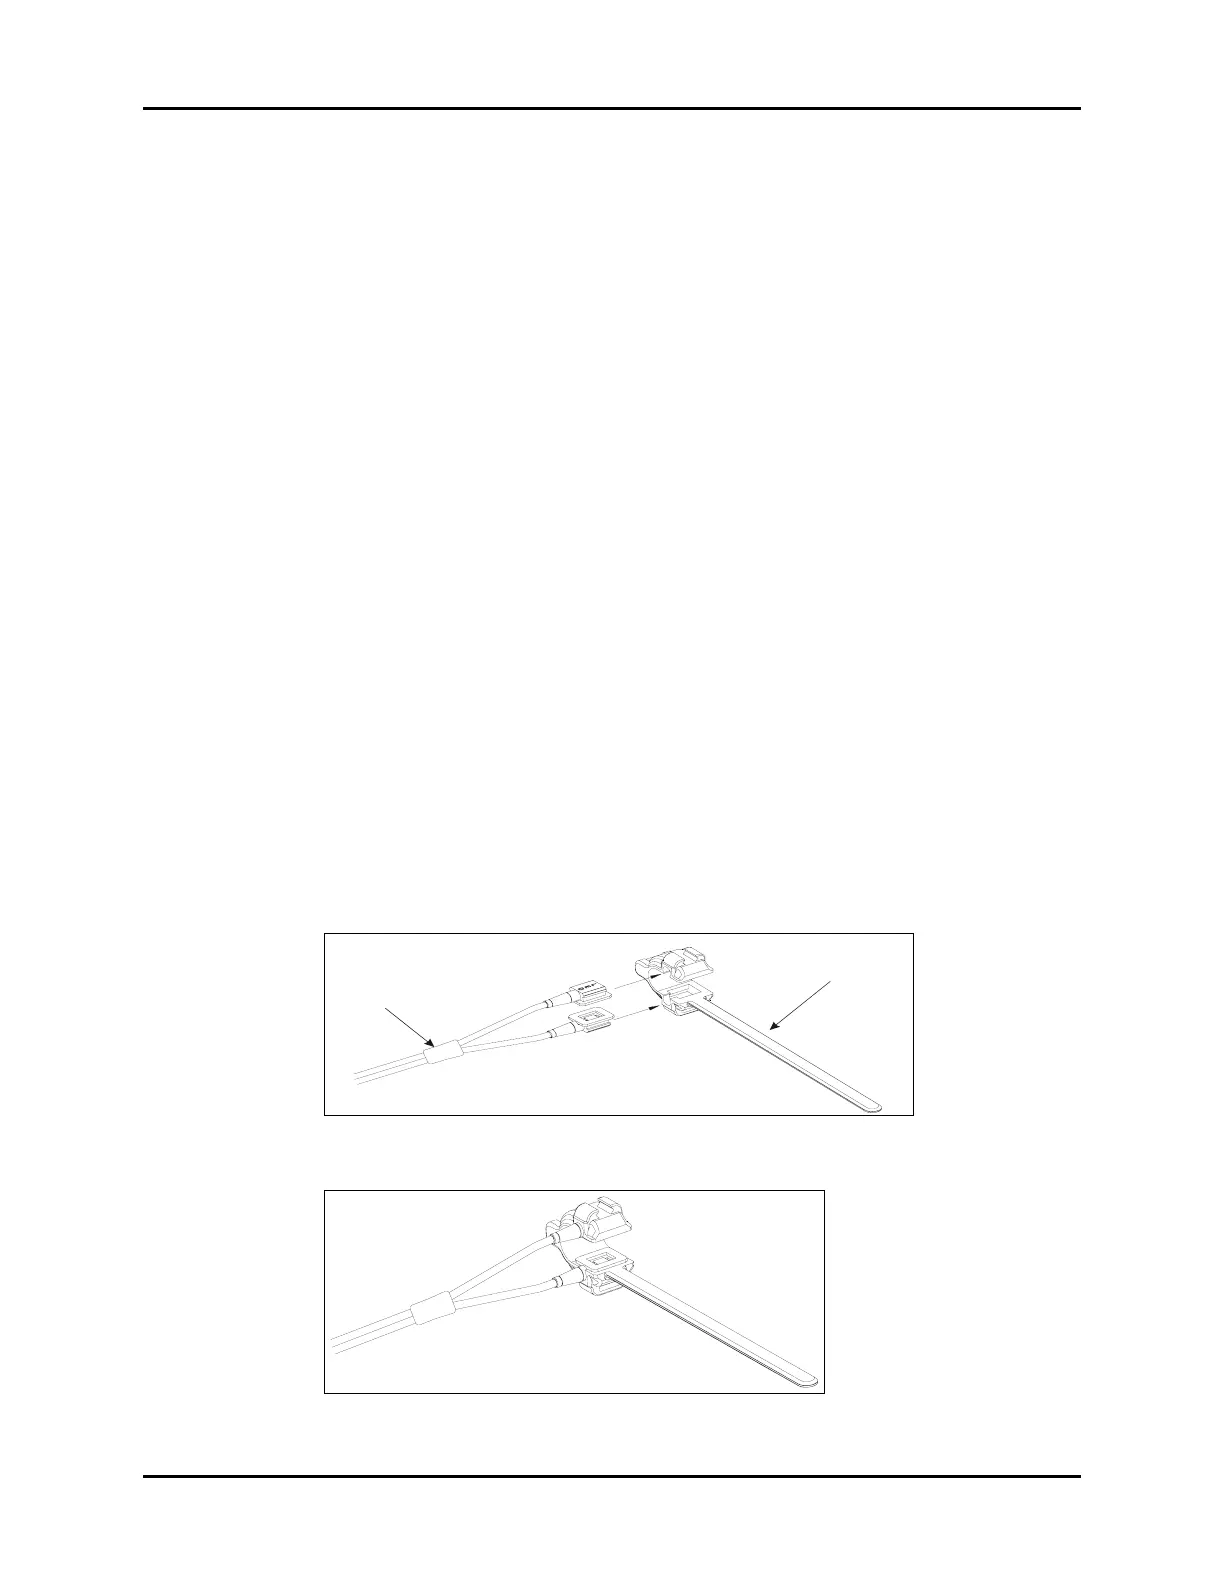
Monitoring with a Reusable Y Sensor (Adult and Pediatric)
The reusable Y SpO
2
sensor consists of the sensor and its sheath. One side of the sensor has
an LED with an infrared detector and the other side has a pulse detector.
1. Insert the LED and pulse detector ends of the Y SpO
2
sensor into the respective grooves
of the sheath (see FIGURE 3-17 and FIGURE 3-18).
FIGURE 3-17 Inserting the Y SpO
2
sensor into the sheath
FIGURE 3-18 The Y SpO
2
sensor inserted in the sheath
Y SpO
2
sensor
SpO
2
sensor sheath