2
26
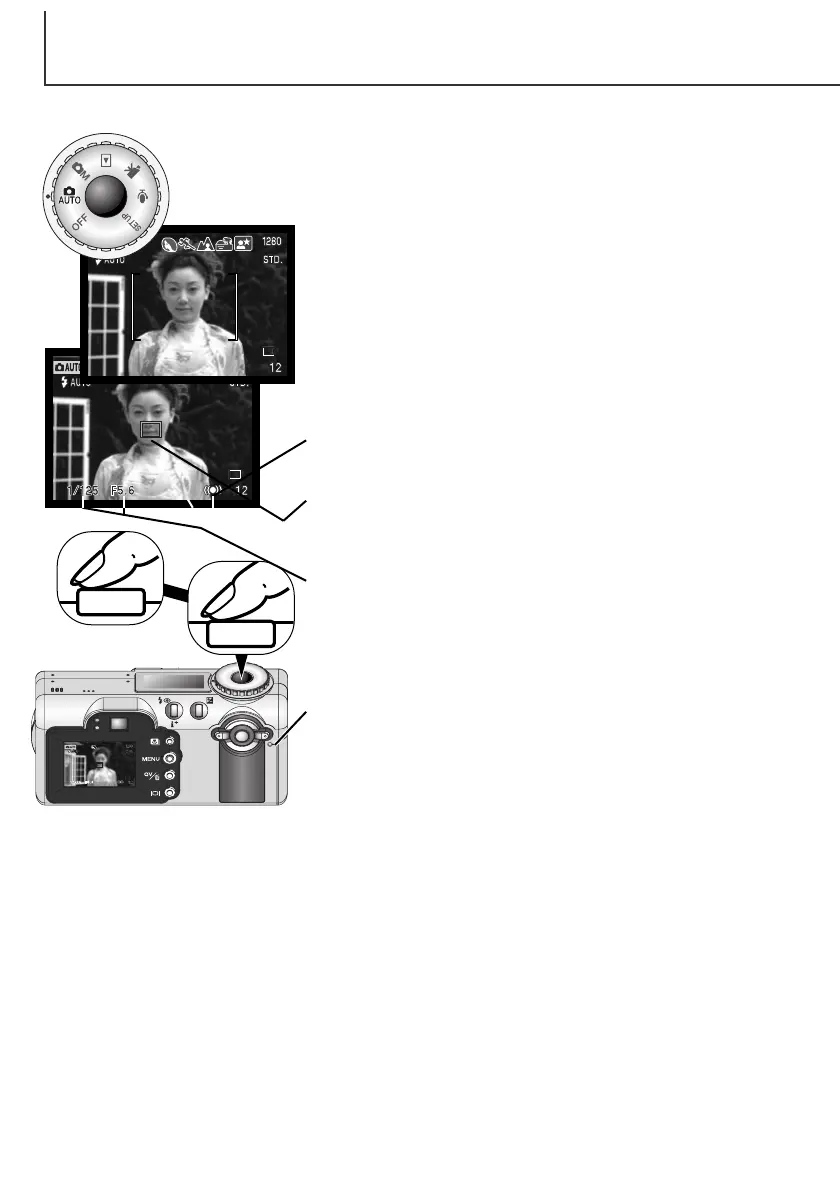
AUTO-RECORDING MODE
Press the shutter-release button all the way down (2) to take the
picture.
• The access lamp will turn red indicating image data is being
written to the memory card. Never remove a memory card while
data is being transferred.
With the mode dial set to auto recording, the camera will be on and the LCD
monitor will activate. Auto recording mode uses two advanced AF systems. Area
AF and Subject Tracking AF, to locate and track the subject in the the extra-wide
focus frames.
Place the subject anywhere within the focus frame.
• Make sure the subject is within the focus range of the lens:
0.5m - ∞ (1.6ft - ∞). For subjects closer than 0.5m, use the
macro function (p. 29).
• If the subject is closer than 1m at the wide-angle lens position
or 3m at the telephoto lens position, use the LCD monitor to
frame the subject.
Basic recording operation
Press the shutter-release button partway down (1) to lock the sub-
ject and exposure.
• The focus signals on the monitor will confirm subject lock. If the
focus signal is red, the camera was unable to locate the subject.
Repeat the previous steps until the signal is white.
• When the subject lock engages, an AF sensor will appear on
the live image to indicate the subject. If the subject moves within
the focus frames, the AF sensor will change to track the subject.
• The shutter speed and aperture will appear indicating the
exposure is locked.
1
 Loading...