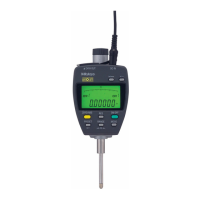
2 INSTALLING THE INSTRUMENT
2.1SecuringtheInstrumenttoaStandorFixture
•
Secure the instrument by its stem to a dial gage stand (sold separately) or similar
fixture.
• When securing the instrument to a fixture, fixing the stem using a slotted holder
with an indentation of ∅8G7(AGD:∅9.52)
+0.02
+0.005
mm. is recommended.
NOTE
To maintain smooth spindle movement, avoid fixing the stem directly using a lock
screw. If a lock screw is used, avoid using extreme force to fix the instrument.
Set up the instrument with the spindle perpendicular to the reference plane or the
measured surface. If the spindle axis is not perpendicular to the reference plane
(measured surface), measurement errors will result.
TIP
For example, if the spindle axis is inclined by an angle ψ from the perpendicular to
the reference plane, for a measured length of about 25 mm. the measurement error
δ, will be: ψ=1°:δ=0.004mm, ψ=2°:δ=0.014mm, ψ=3°:δ=0.032mm
-3-
2.2MountingtheLiftingLever
•
Fit the spindle into the groove on the
lifting lever (No. 137693/ standard
accessory), holding the spindle's other
end so that it doesn't bend.
2.3MountingtheRelease
•
Remove the release hole screw
(M2.6x4) with a Phillips screwdriver (#0)
and screw the release (No.540774/ sold
separately).
△
!
CAUTION
Pulling sharply on the release or knocking it may strip the thread.
Inserting objects other than the release into the release hole, or applying excessive
force to the hole may cause instrument failure.
When using the release, the amount of lift is about 10 mm. from the lower limit.
MANUAL No.99MAH001B2
 Loading...