10
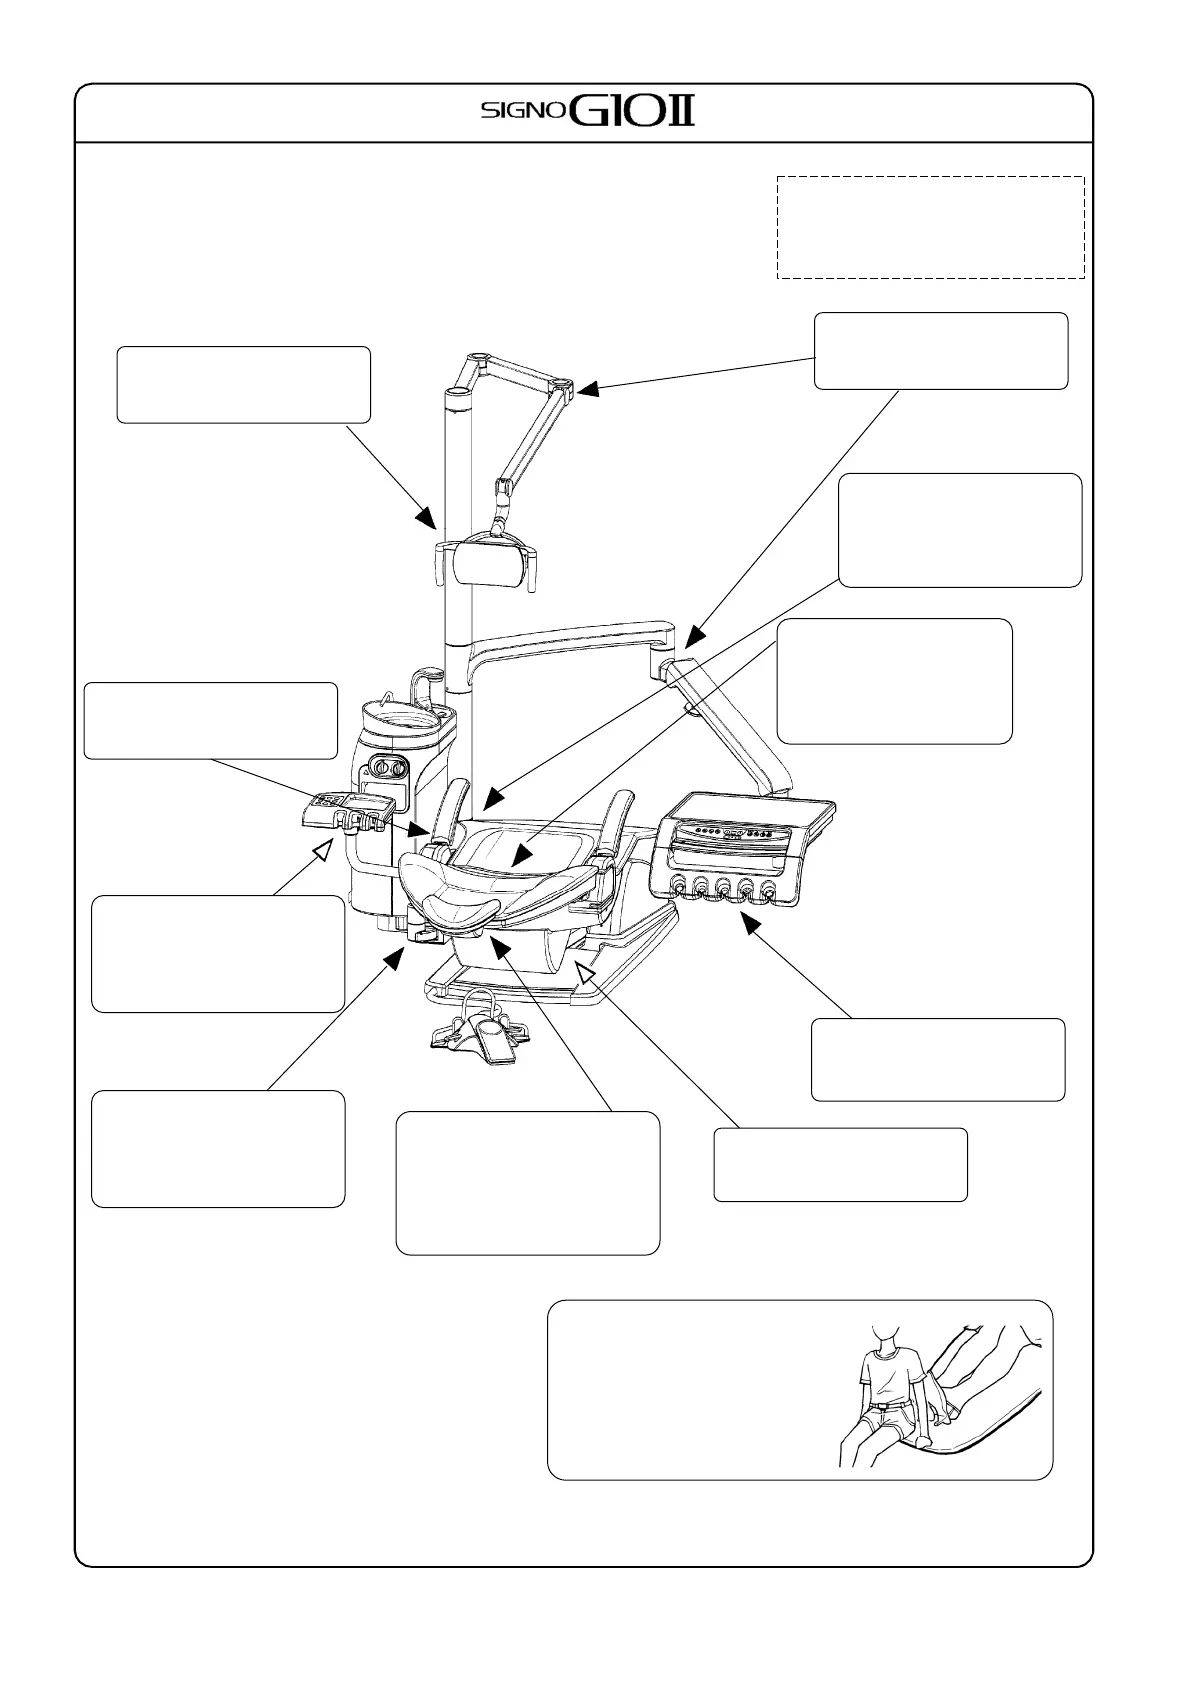
◆ Illustrated Guide to Cautionary Points
Always make sure it is safe before moving the chair manually or
with auto positioning. Especially pay attention to the points noted in
the illustration below so that the patient or other equipment is not
hit or pinched etc.
▲ : Watch out for moving or rotating
parts etc.
△ : Indicates an emergency stop is
re
uired
Seat
(Make sure abrupt operation is
not allowed.)
Headrest Movement Area
(Watch out for pinching.)
Release button
(Make sure abrupt operation
is not allowed.)
Underneath of unit and
plumbing pipes area
(Watch out for pinching.)
Table and Holder Position
(Make sure it is clear.)
Underneath of chair
(Watch out for pinching.)
Assistant’s Holder Area
(Make sure patient will not
fall or lean in this
direction.)
Operating light position
(Make sure it is clear.)
Unit
(Make sure it doesn’t lean.)
Arm joints
(Watch out for pinching etc.)
Joint between backrest
and seat
(Watch out for pinching.)
Area under seat
(Make sure patient’s leg is
clear and there are not
ob
ects or obstacles.
 Loading...