7
c
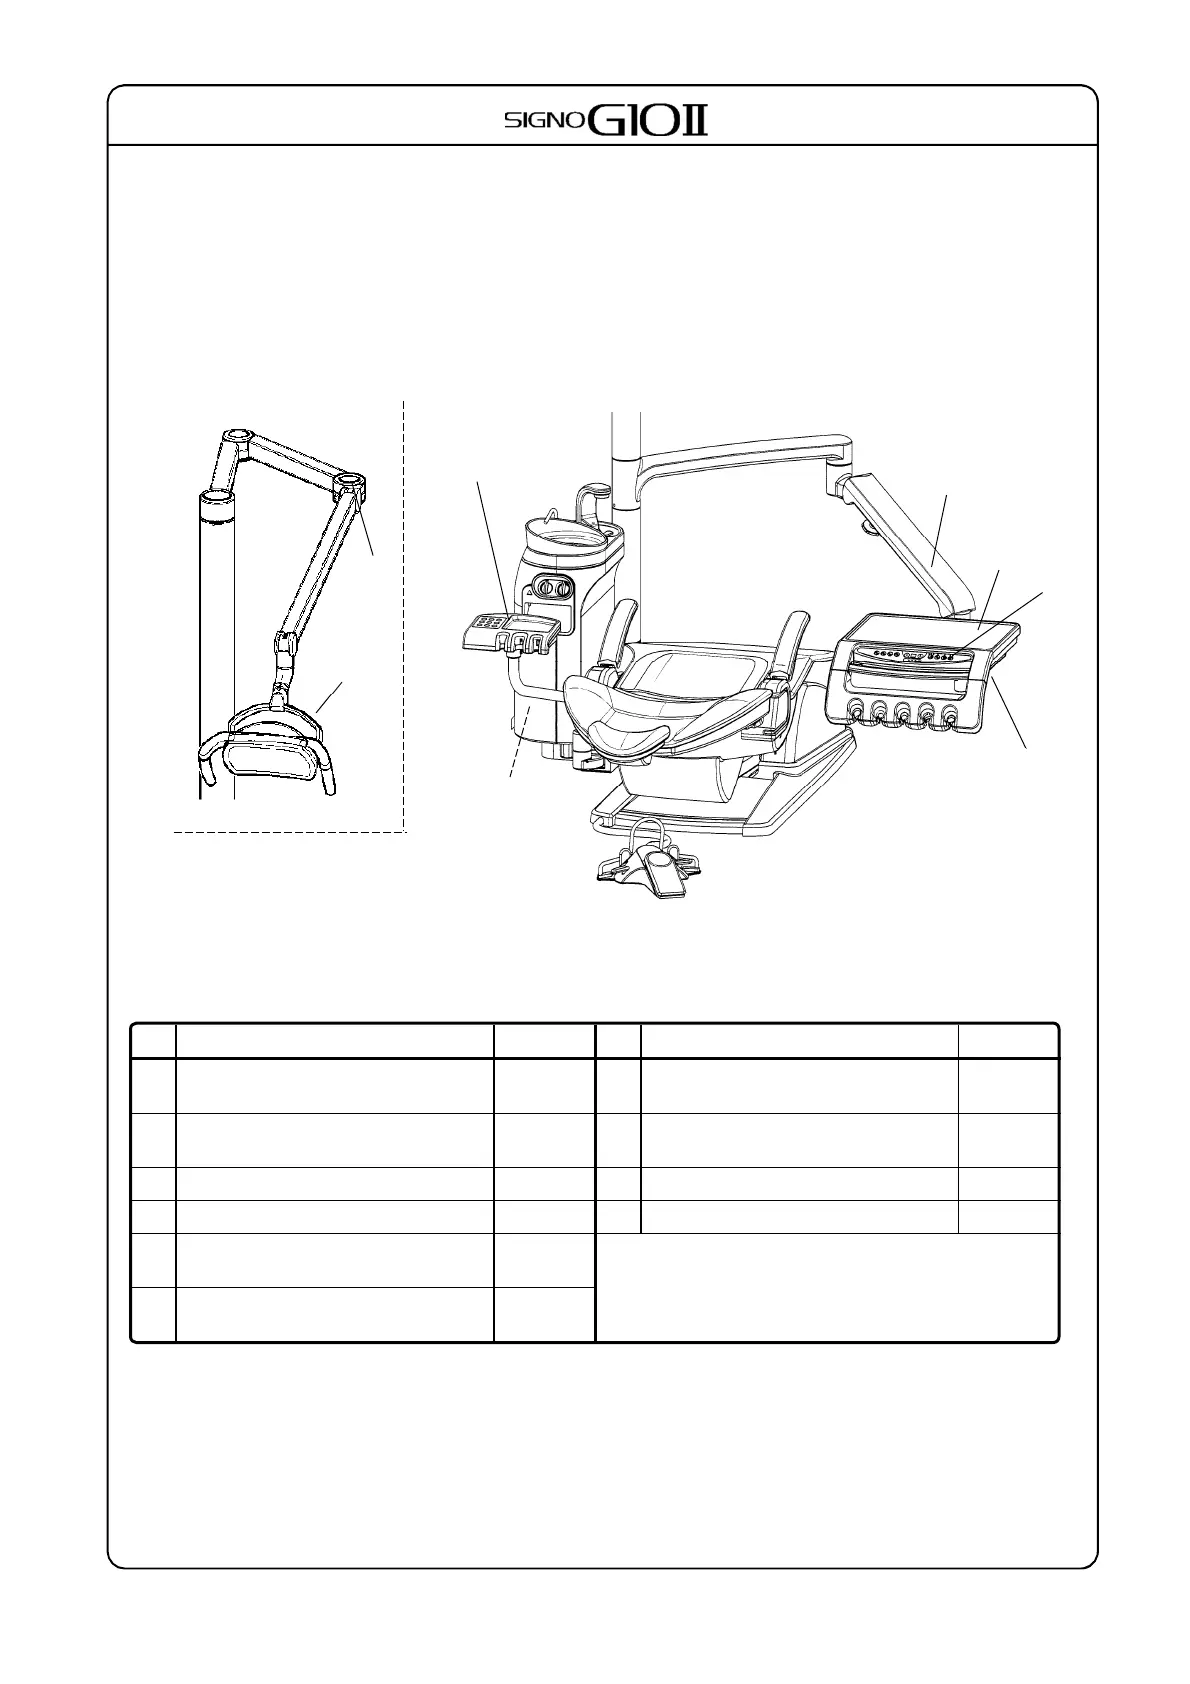
[4] Preliminary Adjustments and Connections
1.Various Adjustments and Settings
The items in the diagrams and chart below can be adjusted in various ways. To adjust an item,
refer to the chart and then consult the part of the 0peration section (5. Operation) of this manual
noted there or the installation manual. Contact your local dealer or J.Morita Corp. concerning
any points that are not clear, or items not appearing in the diagrams and chart below.
No. Item Reference No. Item Reference
1
Light Arm Movement Installation
Manual
7
Tray Arm Motion 9(1)
2
Light Movement Installation
Manual
8
Operator’s Tray Arm Angle Installation
Manual
3 Auto Filler Water Volume 8(1) 9 Auto Position 3(1)
4 Warmer Temperature 7(2) 10 Instrument Air and Spray Volume 6(10)
5
Water Volume for Snap-on
Connection
7(3)
6
Three-way Syringe Tube Heater
Temperature
6(4)
1
2
3・4・5
7
8
9
10
6
 Loading...