51
CHECK
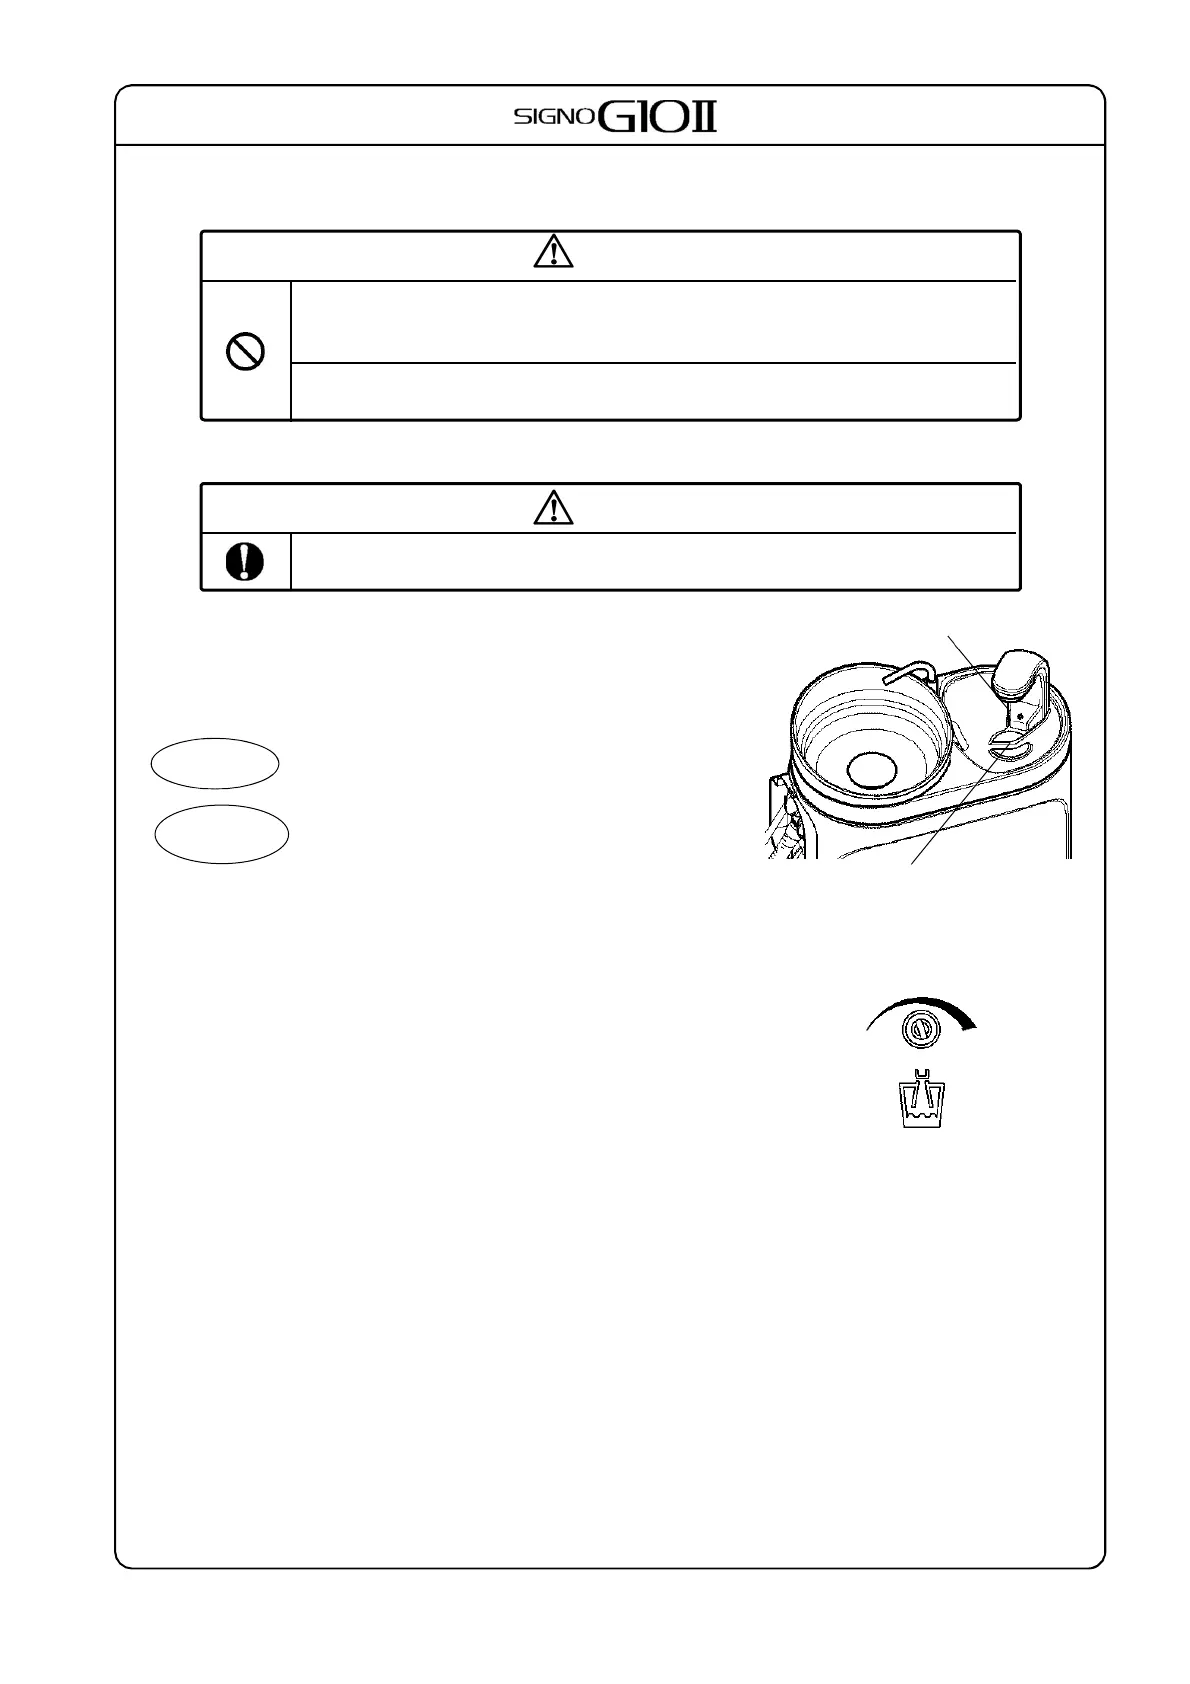
8. Water Fountain
CAUTION
Do not bump the fountain or expose it to other types of physical shocks or
excessive stress.
>>This could dama
e the fountain and cause it to stop workin
.
Never run water through the fountain if its nozzle has been removed.
>>This would result in water shootin
strai
ht up in the air.
(1) Auto Filler
CAUTION
If the sensor is dirty, wipe it carefully with a dry cloth.
>> Otherwise, the auto filler will not work ri
ht.
1) Auto Cup Filling
Place a cup on the stand. (The cup can be of any material,
paper, metal, etc.) The cup will be detected and filled to the
specified level. If the cup is already full when it is detected,
a little water will run and then stop.
Do not use transparent or semi-transparent cups.
They may not be detected by the sensor.
To prevent accidental activation, there is a 1 sec-
ond delay after the cup is set in place before the
water starts to run. Put the cup in place carefully.
2) Set Cup Water Level
This is set at the factory using the small dental cup as a
standard. It can be changed in the following way:
a) The adjustment screw is on the basin unit panel. Use a
small flat head screwdriver.
b) Follow the marking for the screw to adjust the level.
c) Put a cup in place and check the level.
Water Level
Low
High
Auto Filler
Water Adjustment
Sensor
Cup Stand
ADVICE
 Loading...