To avoid broadcast storms or loops in your network while configuring a trunk, first disable or disconnect all
ports that you want to add to the trunk or remove from the trunk. After you finish configuring the trunk, enable
or re-connect the ports.
If all ports on both switch units are configured as 100BaseTX and they are operating in full duplex mode, the
potential bandwidth of the connection will be up to 1.6 Gbps. This means that users can double, triple, or
quadruple the bandwidth of the connection by port trunking between two Moxa switches.
Each Moxa switch can set a maximum of 4 port trunking groups. When you activate port trunking, certain
settings on each port will be reset to factory default values or disabled:
• Communication redundancy will be reset
• 802.1Q VLAN will be reset
• Multicast Filtering will be reset
• Port Lock will be reset and disabled.
• Set Device IP will be reset
• Mirror will be reset
After port trunking has been activated, you can configure these items again for each trunking port.
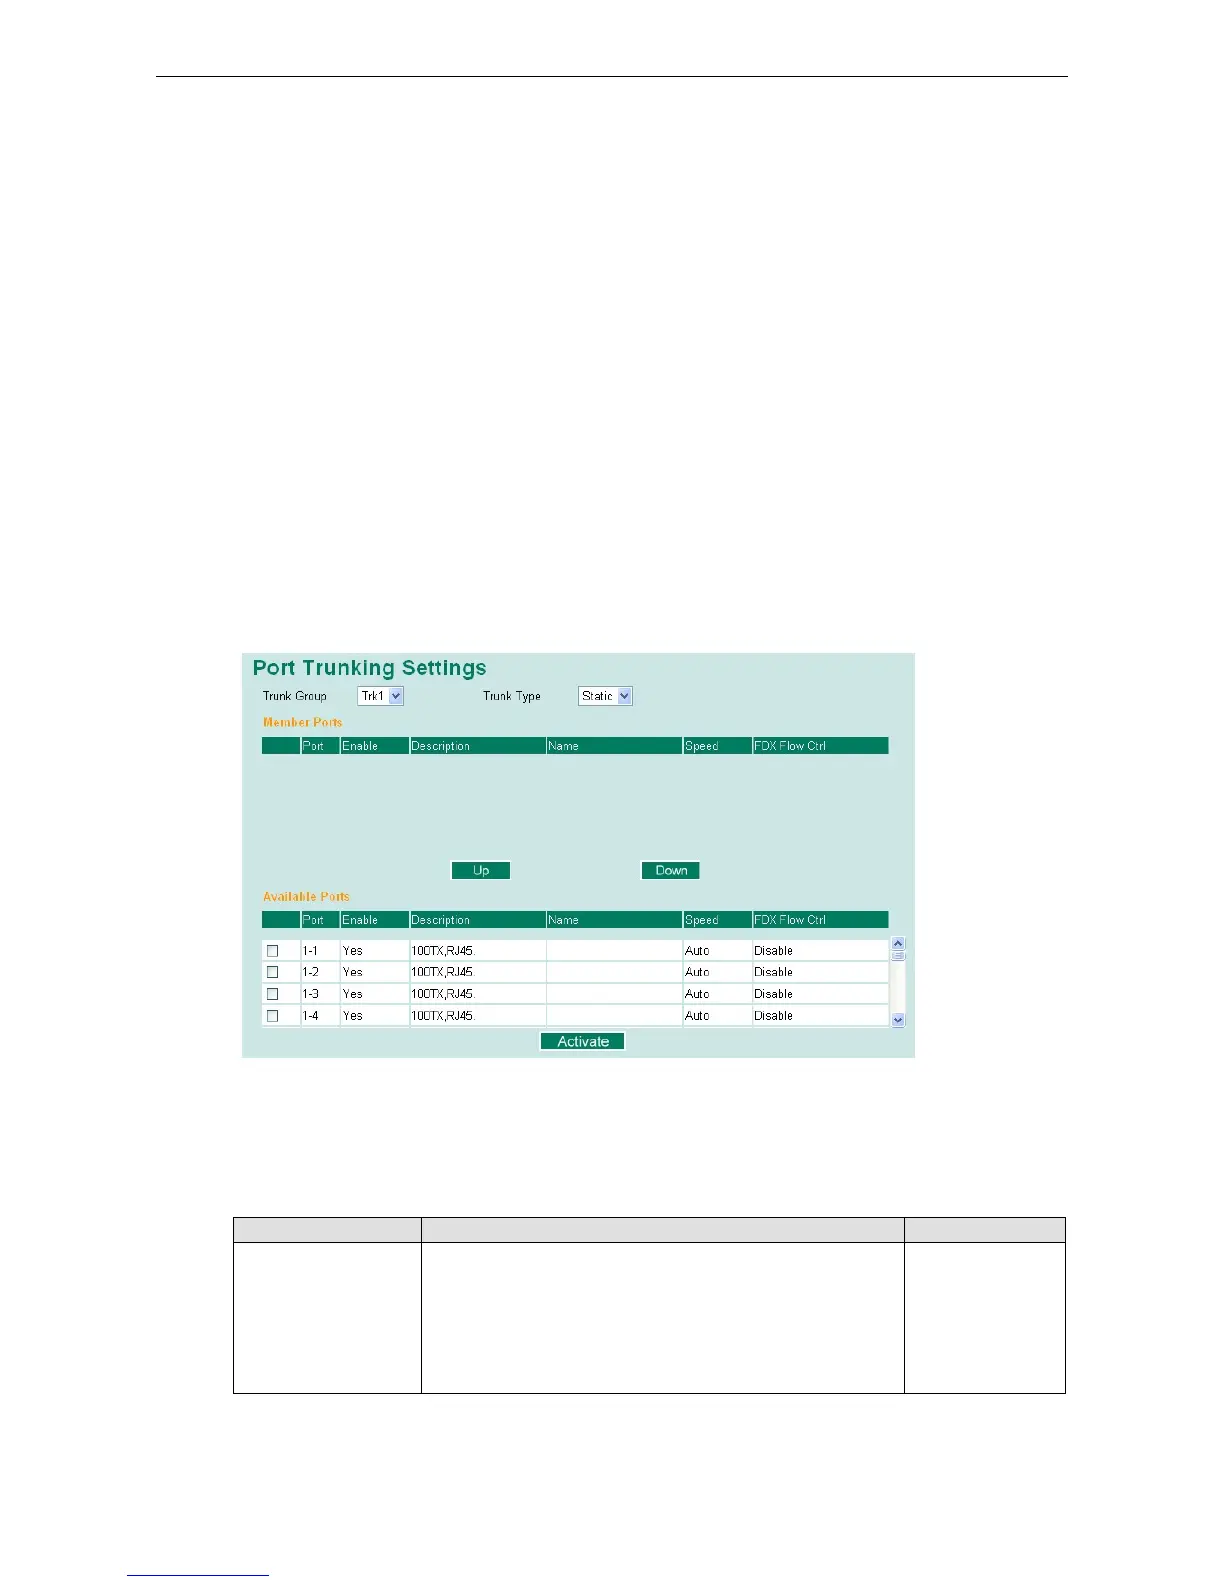
Port Trunking Settings
The Port Trunking Settings page is where ports are assigned to a trunk group.
Step 1: Select the desired Trunk Group
Step 2: Select the Trunk Type (Static or LACP).
Step 3: Select the desired ports under Available Ports and click Up to add to the Trunk Group.
Step 4: Select the desired ports under Member Ports and click Down to remove from the group.
Trunk Group (maximum of 4 trunk groups)
Setting Description Factory Default
Trk1, Trk2, Trk3, Trk4
(depends on switching
chip capability; some
Moxa switches only
support 3 trunk
groups)
Specifies the current trunk group. Trk1