7
Configuring the terminal in the Service application
Activating the "Diagnostics" function
36 Copyright © Müller-Elektronik GmbH & Co.KG
⇨ The line will be highlighted with a frame.
6. Select "USB" to save screenshots on the USB flash drive.
7. Select "Portal" to send screenshots to the FarmPilot portal.
Creating screenshots
You have configured the "Screenshots" function.
If you want to save the screenshots to the USB flash drive, you will already have inserted the
USB flash drive into the terminal.
1. Open any screen.
2. Press and hold the following keys briefly in the order depicted:
⇨ While the screenshot is being captured, the icon of a photo camera will be displayed in the
centre of the display:
⇨ When the camera icon disappears, the screenshot has been created.
⇨ You will find the screenshot you captured in the location you specified as the "Storage location".
The USB flash drive saves the screenshots in the folder "ScreenCopy".
Activating the "Diagnostics" function
To activate the "Diagnostics" function, you must first activate its driver.
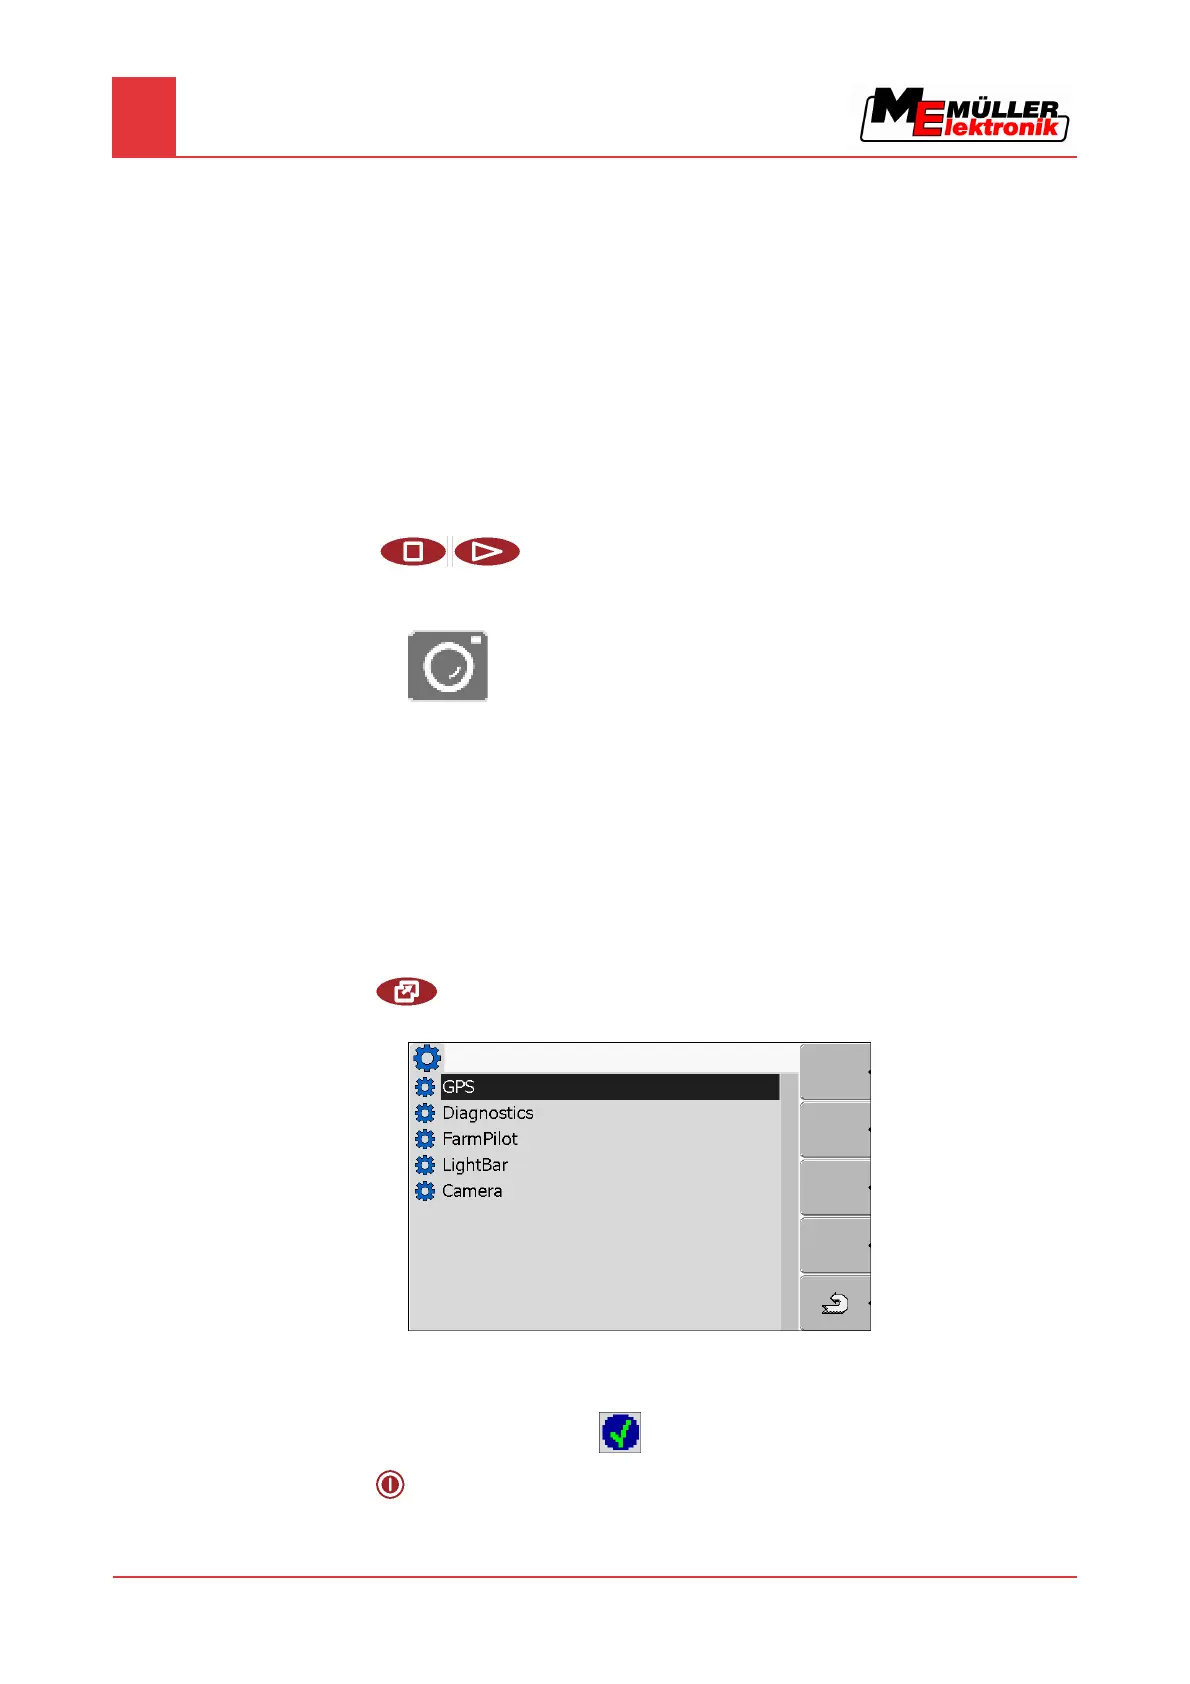
1. Switch to the "Driver settings" screen:
| Service | Driver settings
⇨ The following screen will appear:
2. Click on "Diagnostics".
3. Click on the "DiagnosticsServices" driver.
⇨ Next to the driver the icon
will appear.
4.
- Restart terminal.
7.12.2
Procedure
7.13
Procedure