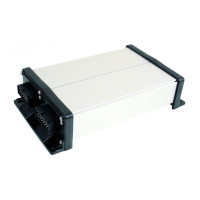
Configuring the job computer
Configuring sections
▪ “None” - The job computer should not expect a reverse driving signal. Even if a reverse driving
signal is transmitted through the ISOBUS, the job computer will ignore the signal.
▪ “ISOBUS” - The reverse driving signal is sent by the tractor or a different job computer through
the ISOBUS.
▪ “Sensor” - A reverse driving sensor is connected to the junction box or cable harness of the job
computer.
To select the reverse signal source:
1. Switch to the “SPEED” screen:
> .
2. Select the box below the “Reverse drive sensor” parameter.
⇨ The available signal sources appear. See the description at the beginning of this section.
3. Select the signal source.
4. Restart the job computer.
“Simulated Speed” function
The simulated speed function is only used during tests and when looking for faults. It simulates the
movement of the implement when the implement is at a standstill.
You can also use this function for technical inspection of field sprayers.
By activating the “Simulated speed” function, it is possible for customer service employees to check
the correct functioning of a sensor.
By default, the value is set at 0 km/h and the function is switched off.
After restarting the computer, the function is always deactivated.
The most recently set value is saved and used for the next activation.
1. Switch to the “Speed” screen:
> .
2. - Activate the simulated speed. By pressing again, you can deactivate the function.
⇨ The “Simulated speed” line appears.
3. Enter the speed to be simulated on the “Simulated speed” line.
4. - Exit the screen.
⇨ The set speed and the flashing icon appear on the work screen.
Configuring sections
Entering the number of nozzles per section
You must enter the number of nozzles installed on each section.
▪ Prior to initial start-up.
▪ If the number of nozzles in a section changes.

 Loading...