Printing in the Windows Environment 2-129
2.8 Appendix: Manual Installation Process of the Printer Driver
2
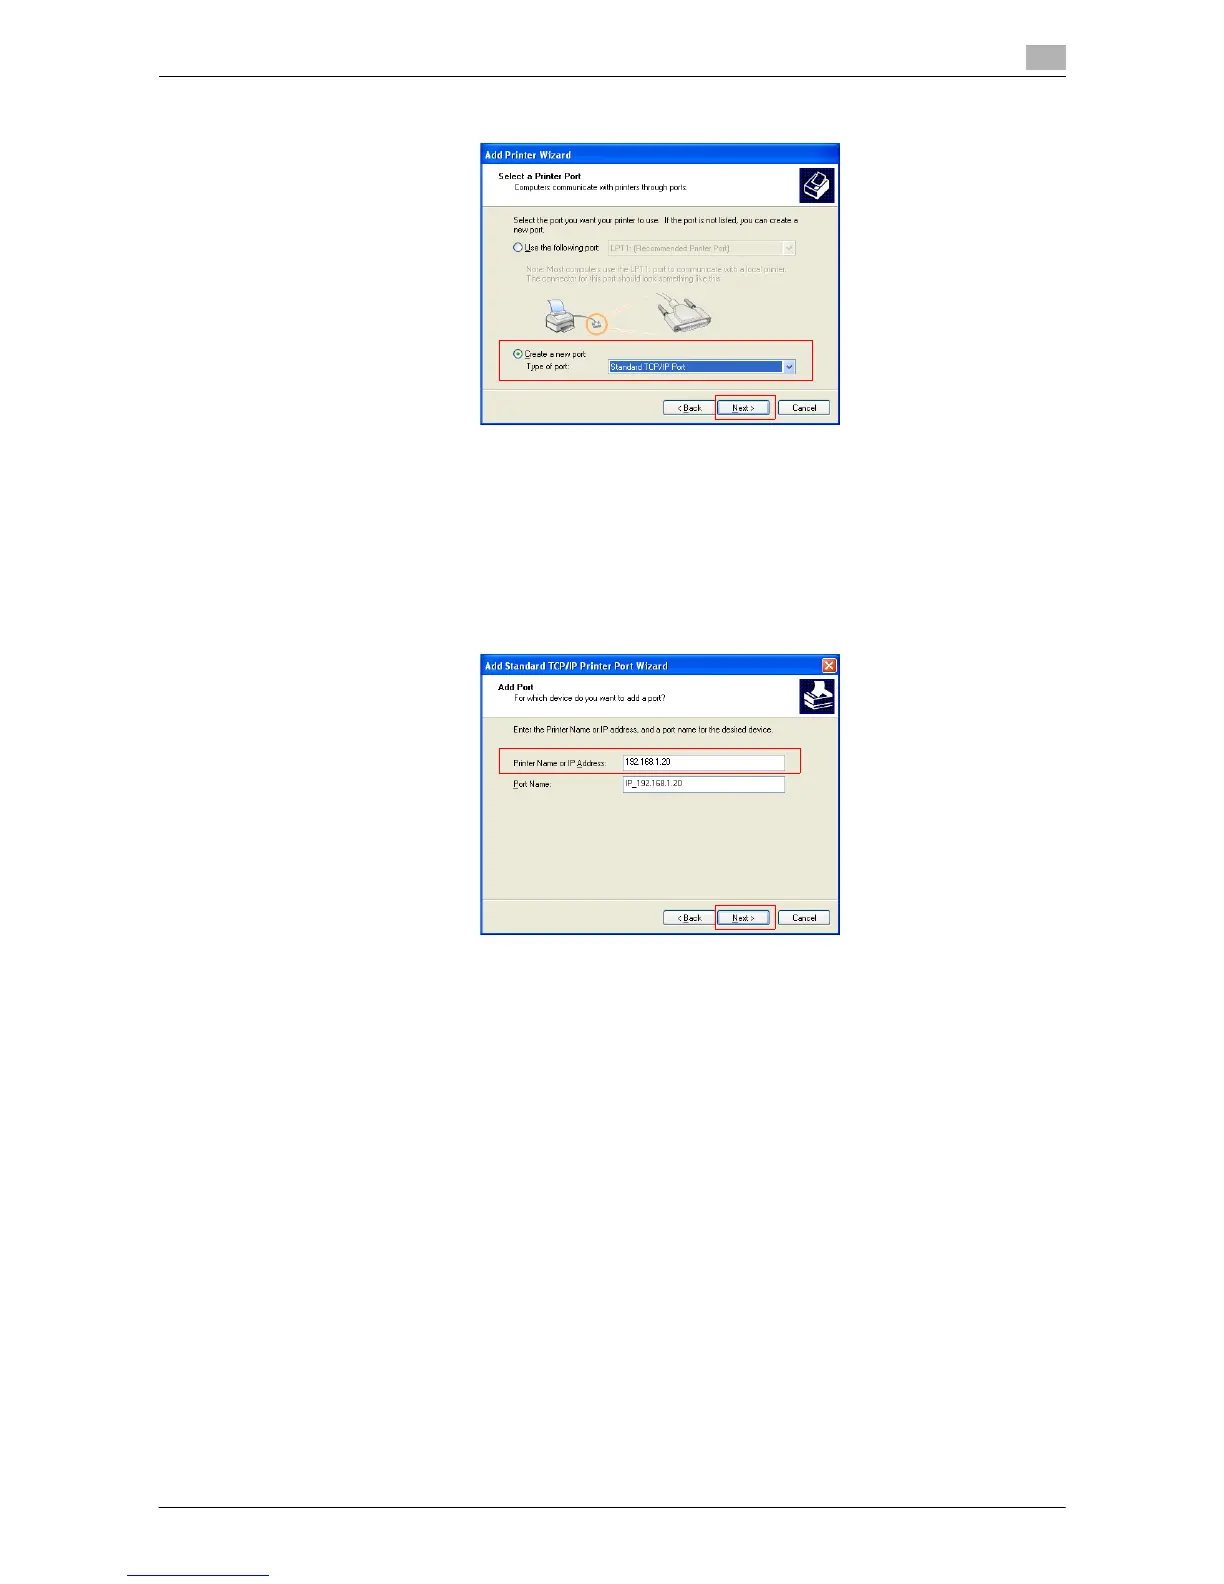
6 Click [Create a new port:], then select [Standard TCP/IP Port] as the [Type of port:].
7 Click [Next >].
[Add Standard TCP/IP Printer Port Wizard] starts.
8 Click [Next >].
9 In the [Printer Name or IP Address:] box, enter the IP address for the machine, and then click [Next >].
% If the [Additional Port Information Required] dialog box appears, go to Step 10.
% If the [Finish] screen appears, go to Step 13.
10 Select the [Custom] check box, then click [Settings:].
11 Change the settings according to the port, and then click [OK].
% For an LPR connection, select the [LPR] check box, then enter "Print" in [Queue Name:]. You must
discriminate between upper and lower case letters when entering it.
% For Port 9100 connection, select the [Raw] check box, and then enter a RAW port number (initial
setting: [9100]) in [Port Number:].
12 Click [Next >].
13 Click [Finish].
[Add Printer Wizard] appears.
14 Click [Have Disk...].
15 Click [Browse...].
16 Select the folder on the CD-ROM containing the desired printer driver, then click [Open].
% Select the folder according to the printer driver, operating system, and language to be used.
Selectable printer drivers: PCL driver and PS driver
 Loading...


