Chapter 2: Setting Up and Using the Printer 7197 Owner’s Guide
February 2002
12
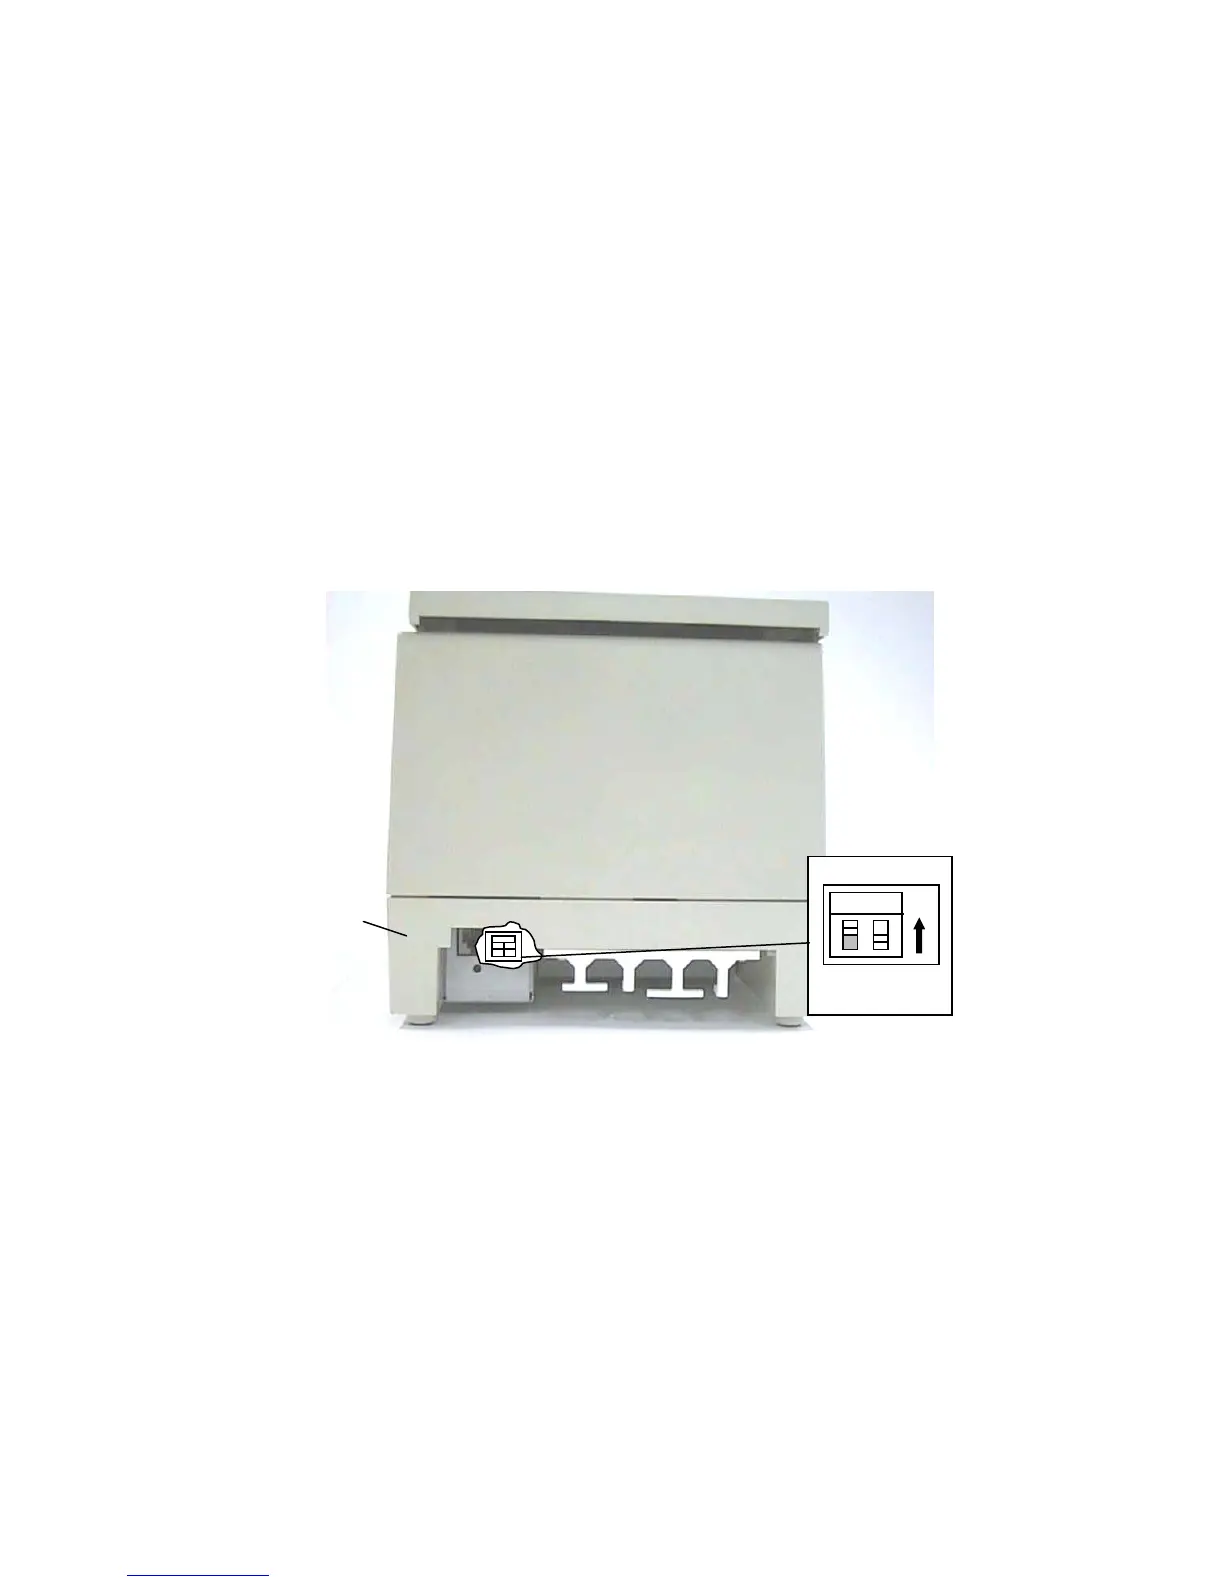
Setting Switches
The DIP switches, located at the back of the printer, are used for two purposes:
• To set variables for several printer functions (see the sections for the various printer
functions in “Level 1 Diagnostics” in “Chapter 4: Diagnostics” for Setting Up the
Printer)
• To perform diagnostic tests (see the sections for the various diagnostic tests in “Level
1 Diagnostics” in “Chapter 4: Diagnostics” for Setting Up the Printer)
Caution: The DIP switches are set at the factory to predetermined settings and should
not be changed unless to change parameters or to reflash the firmware.
Note: Switch 1 is shown in the Off position for reference.
Use a paper clip or other pointed object to set the switches.
1. Set the switches to the desired settings shown in the table.
2. Reset the printer by disconnecting and reconnecting the power to the
printer.
Switch 1 is shown in
the OFF
ositio
Back of Printe
Bottom
Cover