Chapter 4: Diagnostics 7197 Owner’s Guide
DFebruary 2002
46
• Setting Emulation/Software Options
• Emulation
• Printer ID
• Default Lines Per Inch
• Carriage Return Usage
• Asian Mode
• Receipt Synchronization
• Setting Hardware Options
• Print Density
• Maximum Power Option
• Paper Low Sensor
• Paper Width
• Set Knife Option
• Color Paper Option
• Setting Default Code Page
• Setting EEPROM to default settings
Configuring the Printer
Use the Configuration Menu to select functions or change various settings as indicated in
the preceding sections. The Configuration Menu prints instructions and setting options
interactively as the user goes through the configuration process.
Caution: Be extremely careful in changing any of the printer settings to avoid changing
settings that might affect the performance of the printer.
1. Set DIP Switch 1 to On, Switch 2 to Off.
2. Reset the printer while holding the Paper Feed Button, the printer will print the
current configuration, then cuts the paper to print the Configuration Menu.
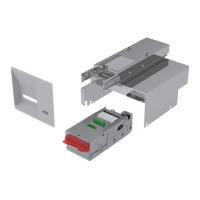
Bottom
Cover
 Loading...