Virtual Private Networking
131
N300 Wireless ADSL2+ Modem Router DGN2200v3
4. Click Apply. The VPN Policies screen displays:
5. Repeat these steps for the DGN2200v3 on LAN B. Pay special attention to the following
network settings:
• General, Remote
Address Data (for example, 14.15.16.17)
• Remote LAN, Start IP
Address
- IP
Address (for example, 192.168.0.1)
- Subnet Mask (for example, 255.255.255.0)
- Pre-shared Key (for example, 12345678)
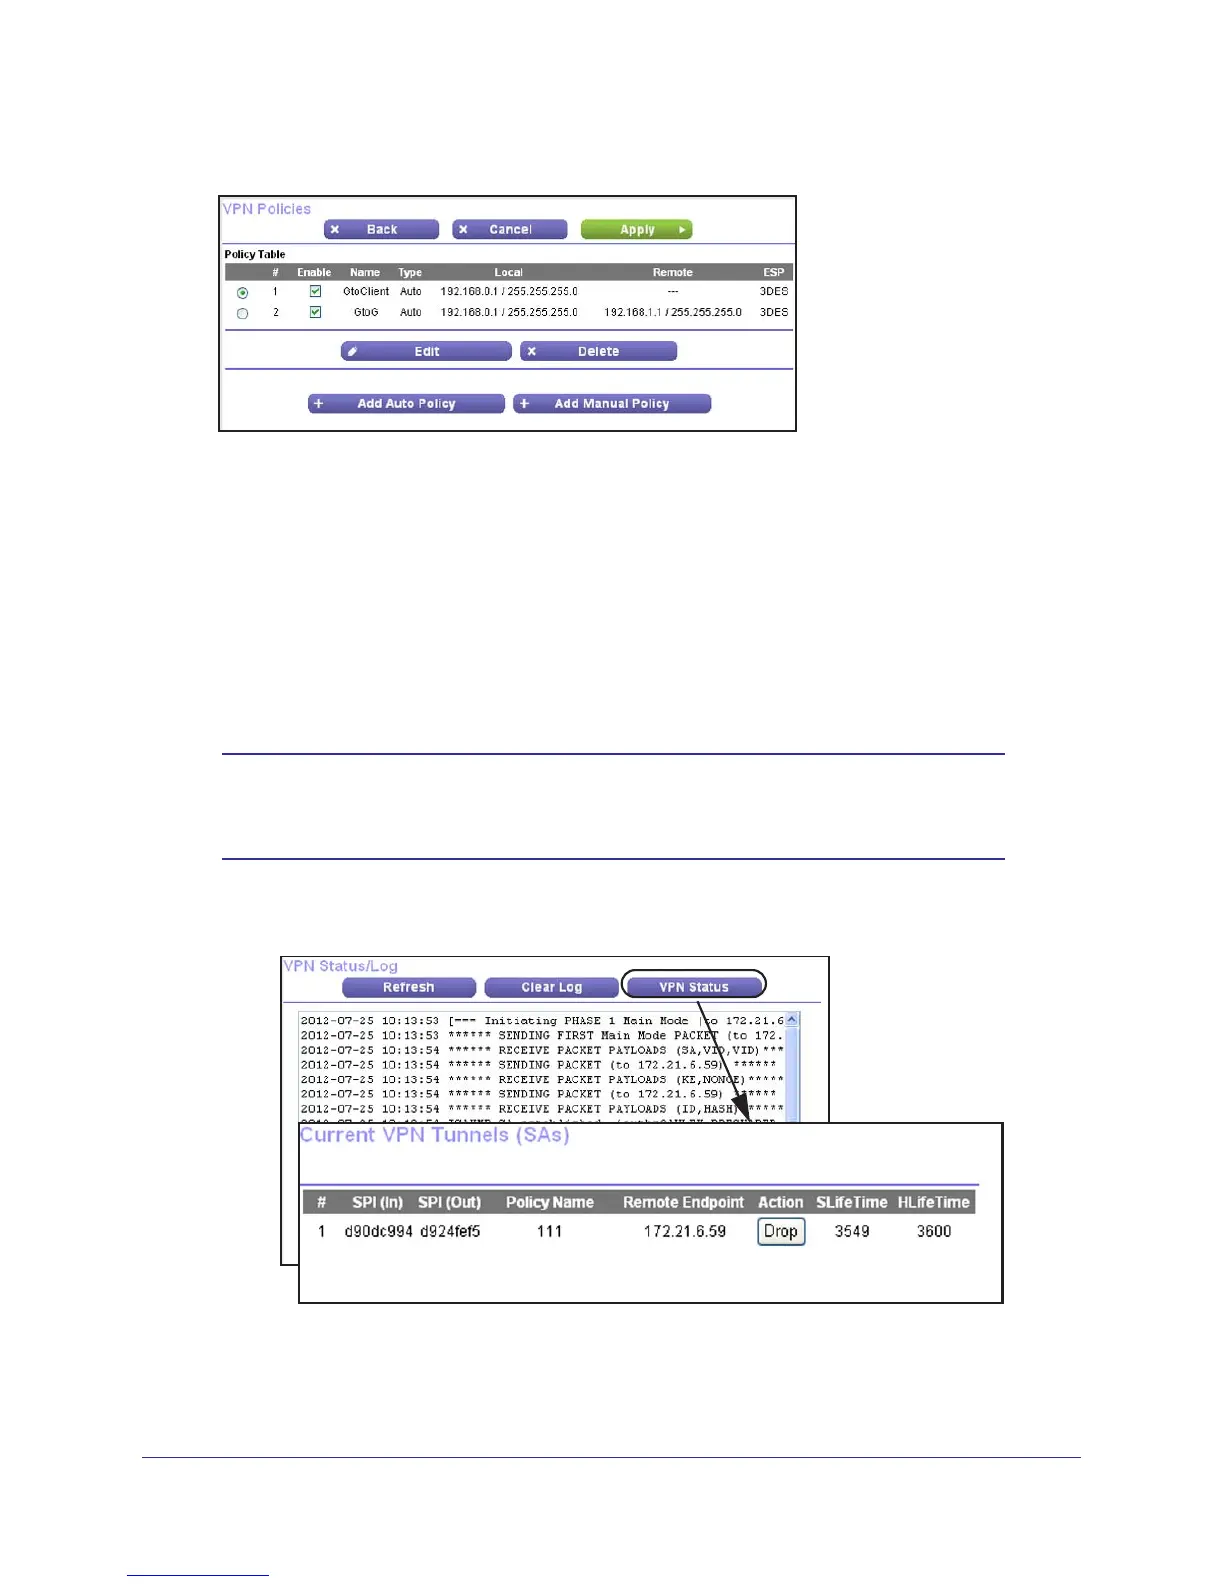
6. Use the VPN Status screen to activate the VPN tunnel:
Note: The VPN Status screen is only one of three ways to active a VPN
tunnel. See Activate a VPN Tunnel on page 121 for information
about the other ways.
a. Select VPN > VPN Status to display the VPN Status/Log screen.
Then click VPN
Status to display the Current VPN Tunnels (SAs) screen:
b. Click Connect for the VPN tunnel that you want to activate. Review the VPN
Status/Log screen to verify that the tunnel is connected.
 Loading...