VPN Configuration
156
N300 Wireless ADSL2+ Modem Router DGN2200v3
e. Double-click the system tray icon to open the Security Policy Editor.
toGW_A
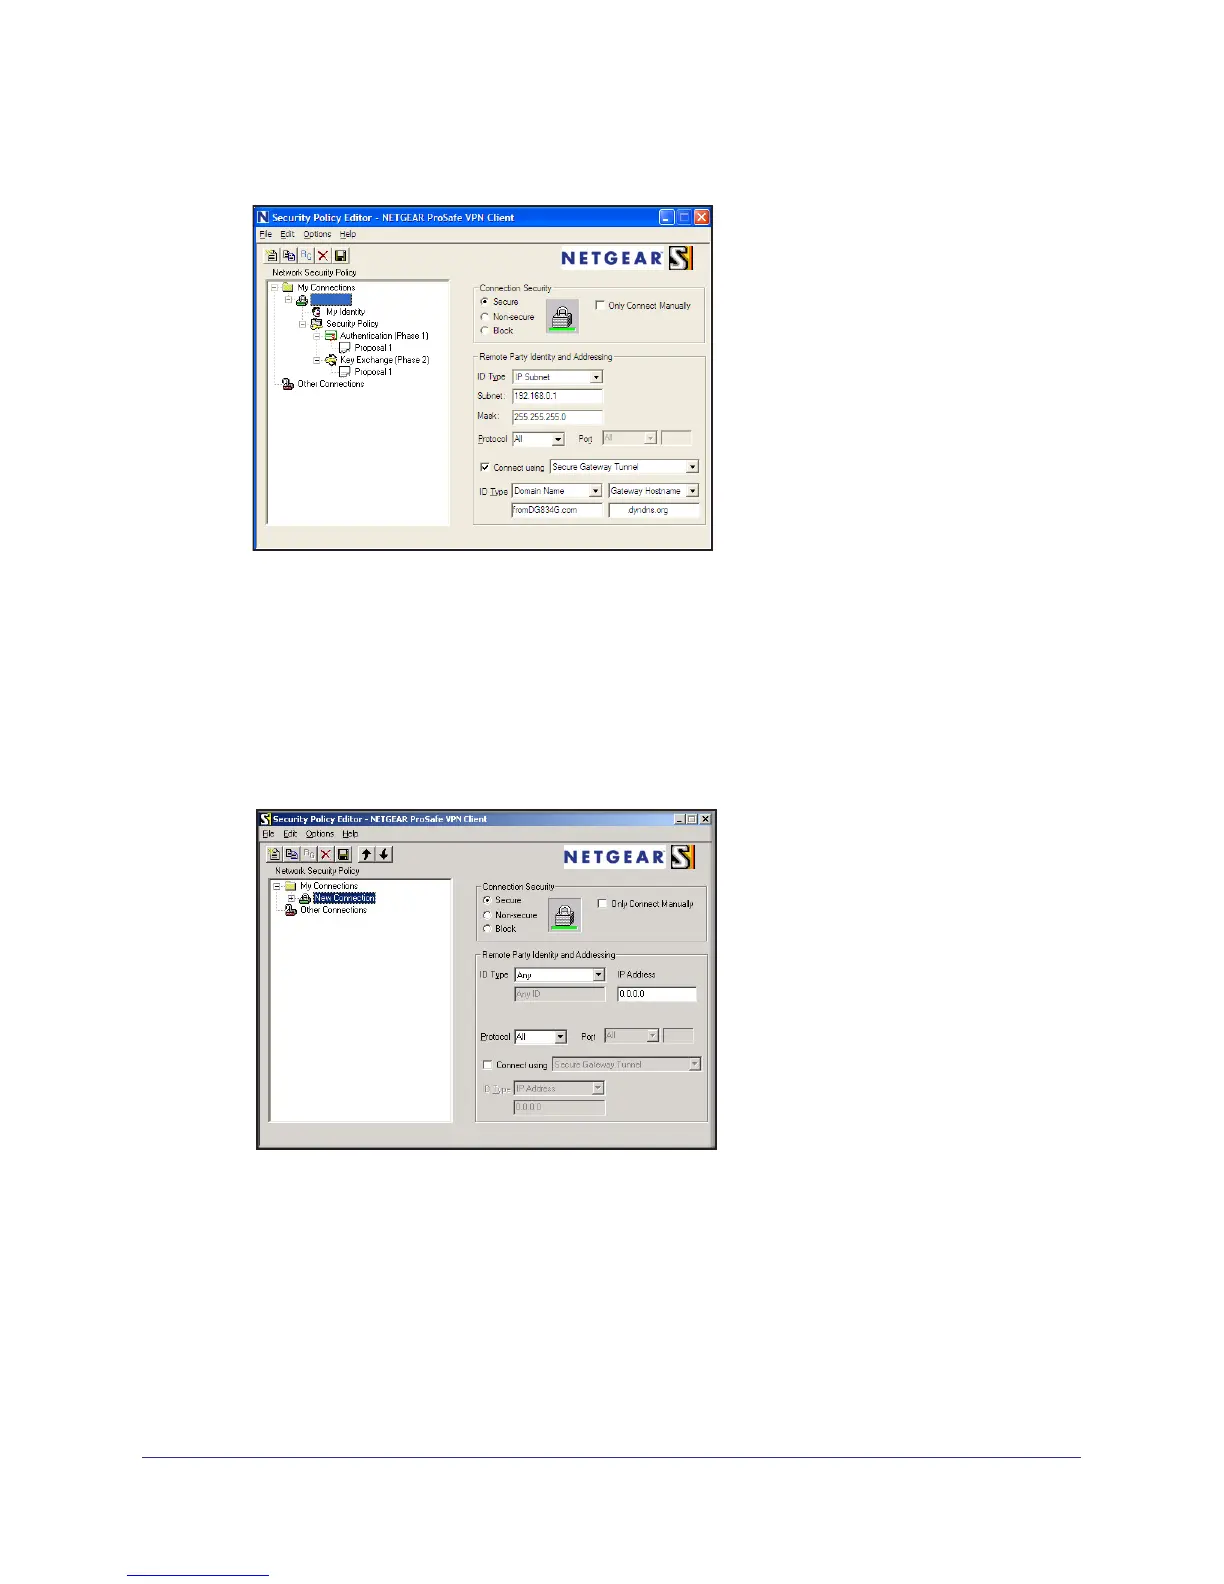
2. Add a new connection.
a. Run the NETGEAR ProSafe Security Policy Editor program, and create a VPN
Connection.
b. From the Edit menu of the Security Policy Editor
, select Add > Connection. A New
Connection listing appears in the list of policies.
c. Rename the new connection to match the connection name you entered in the VPN
settings of Gateway
A. Choose connection names that make sense to the people
using and administrating the VPN.
Note: In this example, the connection name on the client side of the VPN
tunnel is toGW_A. It does not have to match the VPN_client connection name
used on the gateway side of the VPN tunnel because connection names do not
affect how the VPN tunnel functions.
d. Select Secure in the Connection Security section.
e. Select IP Subnet in the ID T
ype drop-down list.
 Loading...