BTS User Manual
Neware Technology Ltd.
http://www.newarebattery.com
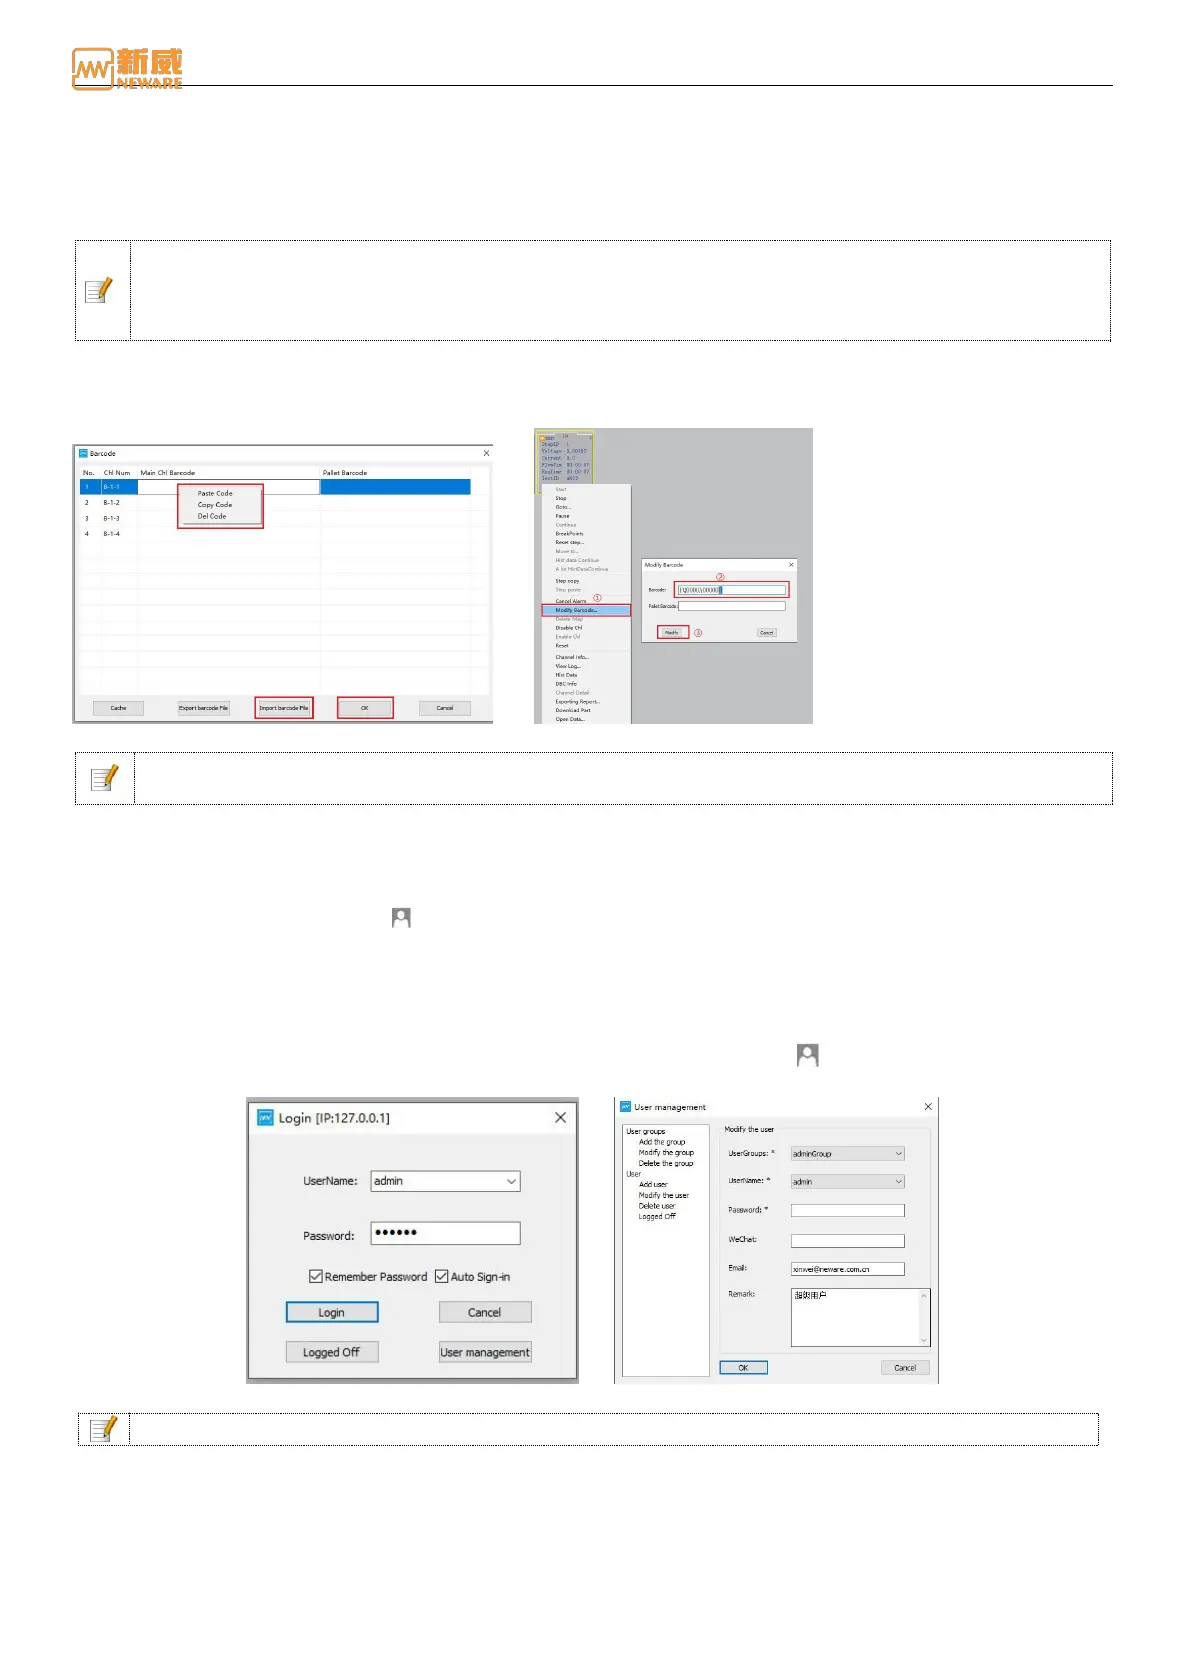
In the barcode entry configuration configured on the client, set the value of "barcode entry" to "Yes." Start the channel. In
the dialog box that appears, enter the barcode for batteries or trays. You can import the barcode from a file or copy and
paste the barcode, as shown in Figure 4-49:
Figure 4-49 Barcode entry window
Notice: Battery bar code input can be divided into keyboard input, USB input, and SMBUS
communication automatic code reading. Before USB insert, connect the wired scanner to the PC through a
serial port or USB port. Automatic code reading for SMBUS communication depends on the battery bar
code configured in the test.
Barcode Editing
In barcode entry configuration, set Value in Modify Barcode to Yes. Right-click channel → Modify bar code to modify bar
code, as shown in Figure 4-50:
Figure 4-49 Barcode loading Figure 4-50 Barcode editing
Notice: In barcode entry configuration, you can set the barcode length, special symbols allowed to be
entered, and the line height of the barcode entry list. For details, see barcode Entry Configuration.
4.9. User Management
User Login
Users must log in to the client software to perform related operations. The operations are as follows:
Click “Authority management”button on the menu bar, Enter the "user name" and "password" (the default user name is
"admin" and the password is "xinwei"). You can click Modify User to change the current password, as shown in Figure
4-51. You can set a record password and automatic login to facilitate your next login.
Modify Password
You can change the current device password for better storage of your account and password.
The operation is as follows: In a login state, click the user rights management button → click "Modify User" → Select
user group → Select user name → Enter a new password → click "Submit," as shown below:
Figure 4-51 User login Figure 4-52 User management
Notice: You must be a valid user to change the password of this account.
Add User
To add users with different permissions, practice the following operations:
1. Add a user group: Select Add Group, enter the name of the user group, and select Permissions.
2. Add a new user: Select "Add User", select an existing user group name from the "User Group" drop-down list, fill in