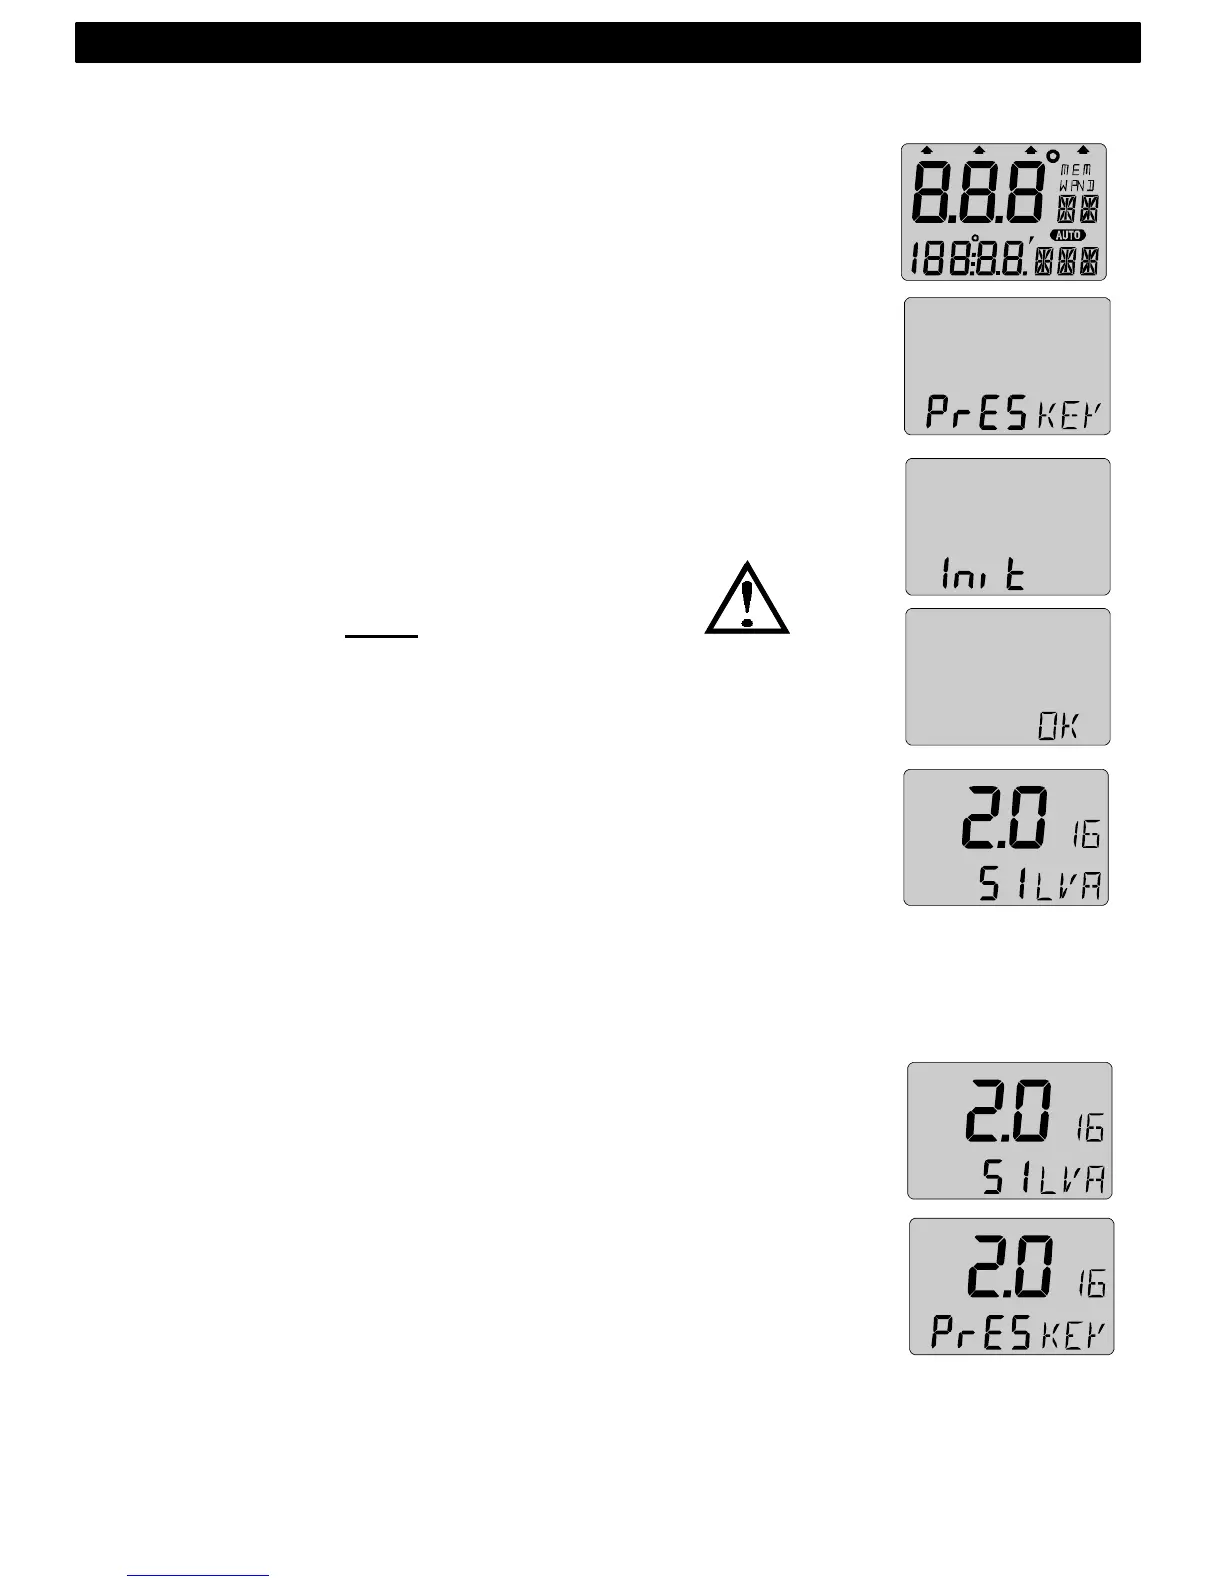
21
3 First start
3.1 Initialising the instrument
At power on, the instrument will perform a self test. The display
will first show all segments, then the software version number and
the Nexus Network ID number.
At first power on after installation, you will be asked to press KEY
(PrESkey). This will give the instrument a logical ID number on the
Nexus Network.
To initialise the instrument, press KEY on all installed digital
instruments, one at the time.
Note: Always wait for the text ”Init OK”
to be displayed, before you press KEY
on the next instrument!
The Server automatically gives the first unit ID number 16, then 17
and so on. The order in which you press KEY is the same order as
the instruments will be given a logical ID number on the Nexus
Network.
The example shows that the instrument version number is 2.0 and
the given logical ID number is 16.
3.2 Re-initializing the instrument
If two instruments by mistake have the same ID number, this can
cause disturbance and block the information on the Nexus data
bus.
To re-initialise the instrument, press DOWN and UP together
during the power up sequence when version and ID numbers are
displayed.
The display self test is then re-started on all instruments and you
will be asked to press KEY on each instrument as explained
above.
Note! If you do not succeed to re-initialise, we suggest you
disconnect all but one instrument with the same ID number, then
repeat the above procedure.
FIRST START