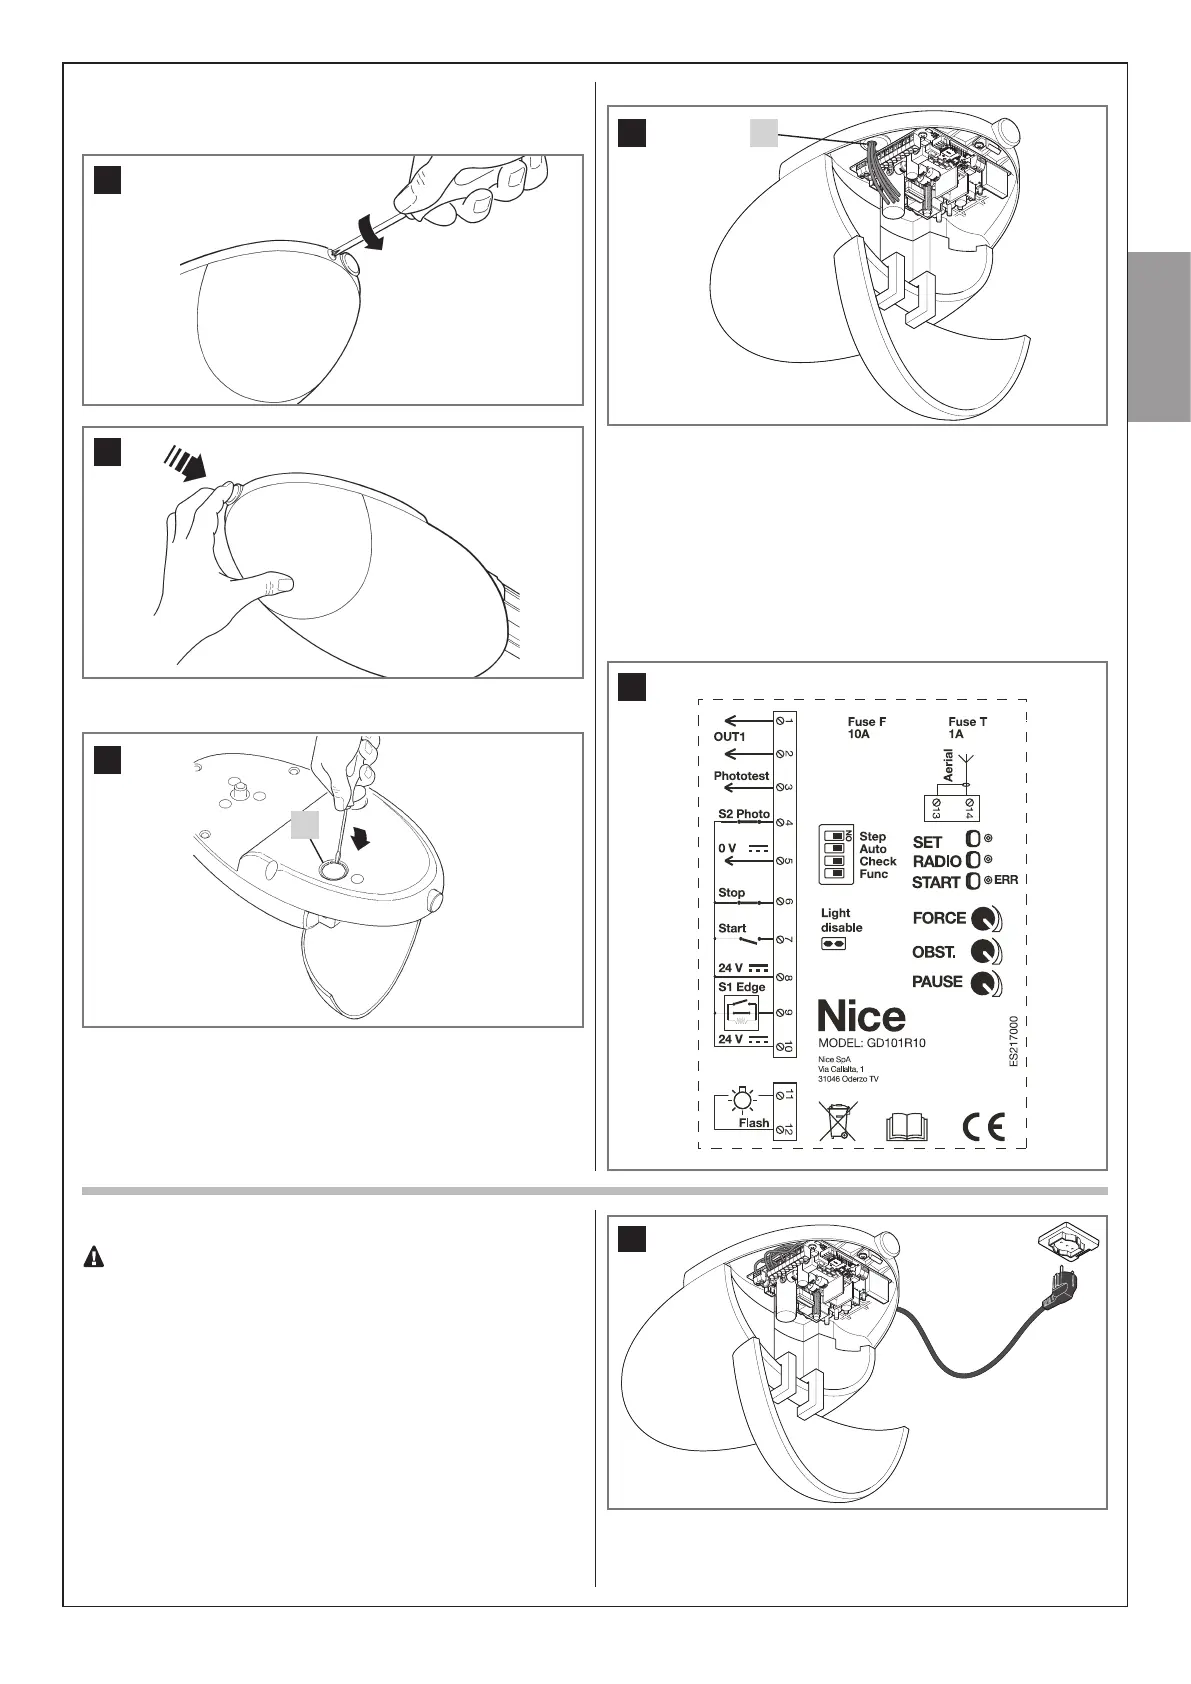
3.3 – ELECTRICAL CONNECTIONS
01. Openthecoverbylooseningthescrew(g. 25)andpushing
thebutton(g. 26).
25
26
02. Removethesmalldisc[S]withascrewdriver(g. 27).
S
27
03. Feedthecablesthroughthehole[S](g. 28).
S
28
04. Refer to g. 29andtheconnectiondescriptionsintable5
(par.3.5)whenmakingtheconnections:
-ifusingtheashinglightaerial,removethewireclip(connected
toterminal14asstandard)andconnecttheRG58shieldedcable.
05. Onceyouhaveconnectedupallthecables,securethemus-
ingcableclips.
06. To close the cover (only if the control unit is already pro-
grammed-Step4),rotatethecoverandpushituntilyouheara
“click”.Thentightenthescrew.
29
3.4 – CONNECTING AVIO500 TO THE MAINS
CAUTION!
- Never cut or remove the cable supplied with AVIO500.
-
If not already available, a power socket for connecting
AVIO500
to the mains must be made by qualied and expe-
rienced personnel in strict observance of current legislation,
standards and regulations.
AVIO500 must be connected to the supply mains by a quali-
ed electrician.
TotestAVIO500,justinserttheplugintoapoweroutlet,usingan
extensioncordifnecessary(g. 30).
30
English–13
English