Français – 11
Français
Ø = 6 mm
x4
05. B
Ø = 6 mm
x4
05. A
2
1
(aerial)(flash)
2
1
06. 07.
08. 09.
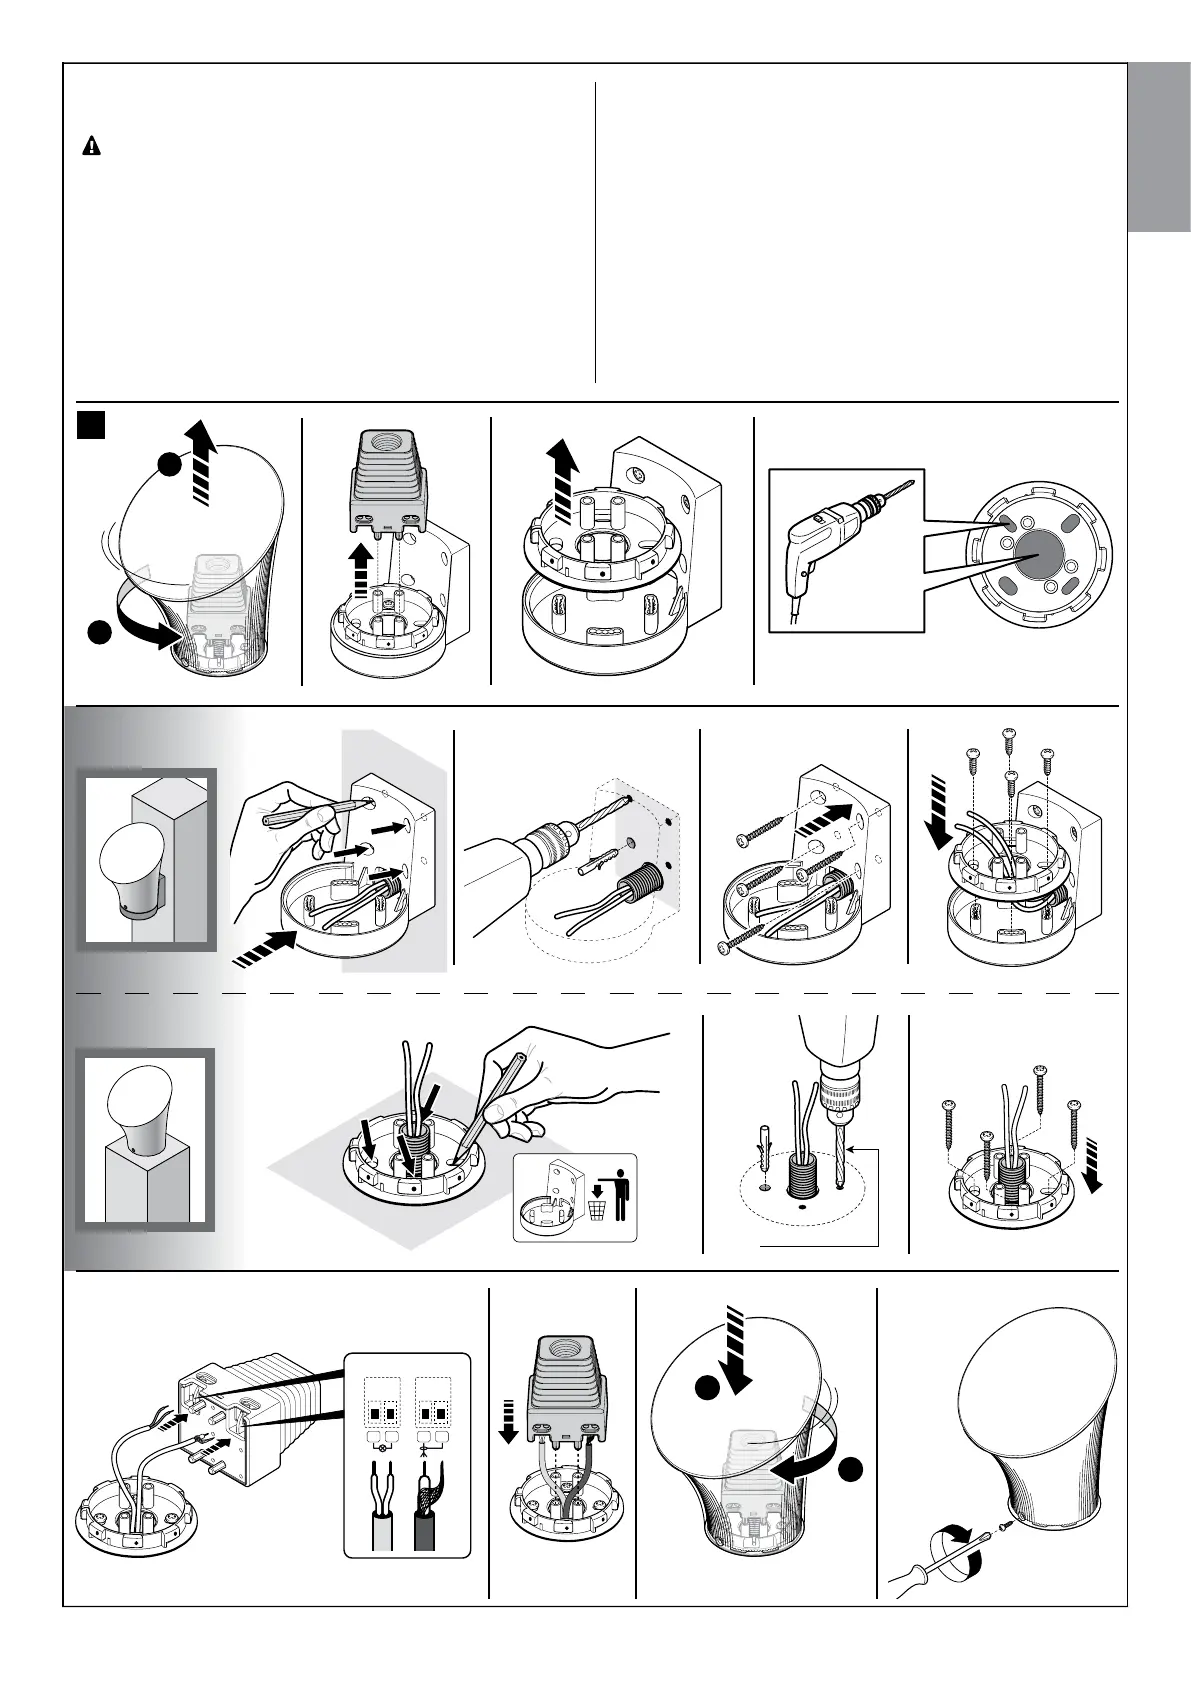
6.2 - INSTALLER ET CONNECTER LE FEU CLIGNOTANT
FL200 (fig. 15)
• Le clignotant doit être placé près du portail et doit être facile-
ment visible. Il est possible de le fixer sur une surface horizontale
ou sur une surface verticale. • PourlaconnexionàlaborneFlash
iln’estpasnécessairederespecterlapolarité;Enrevanchepourla
connexion du câble blindé de l’antenne, il faut connecter le câble et la
gaine, comme indiqué dans la fig. 12.
Choisirlapositionlaplusadaptéepourinstallerlefeuclignotant:ildoit
êtreplacéprèsduportailetdoitêtrefacilementvisible.Ilestpossibledele
fixersurunesurfacehorizontaleousurunesurfaceverticale.
Pour la procédure d’installation, voir la fig. 15.
02. 03. 04.01.
15