Construction Mode
2-10 Manual # 42-02-7223 C1
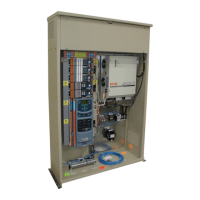
DC Hoist Motor, Brake, and Encoder/Tachometer
This section describes:
• Checking the hoist motor for insulation breakdown or shorts
• Wiring the hoist motor to the controller
• Wiring the iField motor field module
• Verifying brake resistance and wiring the brake
• (Optional) brake pick switch installation and wiring
• Installing the velocity encoder
Checking the Hoist Motor
If this job reuses existing rotating equipment, the equipment must be checked for insulation
breakdown.
1. Disconnect all motor and brake wiring.
2. Perform an insulation test between these wires and the frame of the related equipment
using a Megohm meter to subject the insulation to the same high voltages that would be
present during operation.
3. Minimum insulation resistance of 100k Ohms is required.
4. Correct any insulation problems before proceeding. Insulation problems may indicate a
serious problem in the equipment.
Wiring the Hoist Motor to the Controller
Incoming power to the controller and outgoing power wires to the motor must be in their
respective grounded conduit.
Keep DC motor wires separate from control wires both inside and outside the controller cabi-
net. Encoder or tachometer wiring must use a separate grounded conduit.
1. Refer to job print drawing -D1 for DC drive connections to rotating equipment.
2. Make connections as shown:
• on the System 12 SCR Drive - be certain to follow schematic notes regarding wire size
and specific motor connections.
• on the Quattro DC Drive - follow the instructions in the section titled EMC Compliance
in the appendix of the drive technical manual.
Wiring the iField Motor Field Module
(Quattro DC Drive: Refer to job print drawing -D1 for motor field wiring)
1. Measure the resistance of RM in the iPower box (the enclosure the iBox is mounted to).
Verify that it is set according to the job prints.
2. Connect motor field leads from the motor to MF1 and MF2 terminals below the iBox as
shown in the job prints.