13
3. You can set the ID number in the printer by accessing the User Mode Menu. Press and
hold the Menu button on the LCD panel until it displays “User Mode”.
4. Press the EXE button several times until the SCSI ID sub menu is displayed. Press the
Menu button to enter this menu and select the appropriate ID number using the EXE
button. The numbers can be between 0-7.
5. Select “Return to Normal Mode” with the MENU button and press the EXE button to
return to the “Ready to Print” display.
6. Depending where your printer exists on the SCSI chain will determine the selection of the
terminating switch. If the printer is in the middle of the chain, the terminating switch
should be in the “Off” position. If the printer is at the end of the chain, then the
terminating switch should be set to “On”.
7. Insert the power cord into the power receptacle on the rear of the printer. Plug the other
end into an available wall outlet.
Note The SCSI ID cannot be the same as any other device in your system. SCSI ID 0
is reserved for boot devices and is therefore not recommended for use. The SCSI
interface allows for very high-speed data transmissions. To ensure error free data
transmissions, use the shortest cable possible.
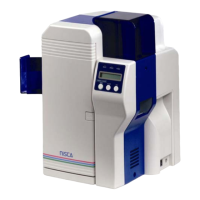
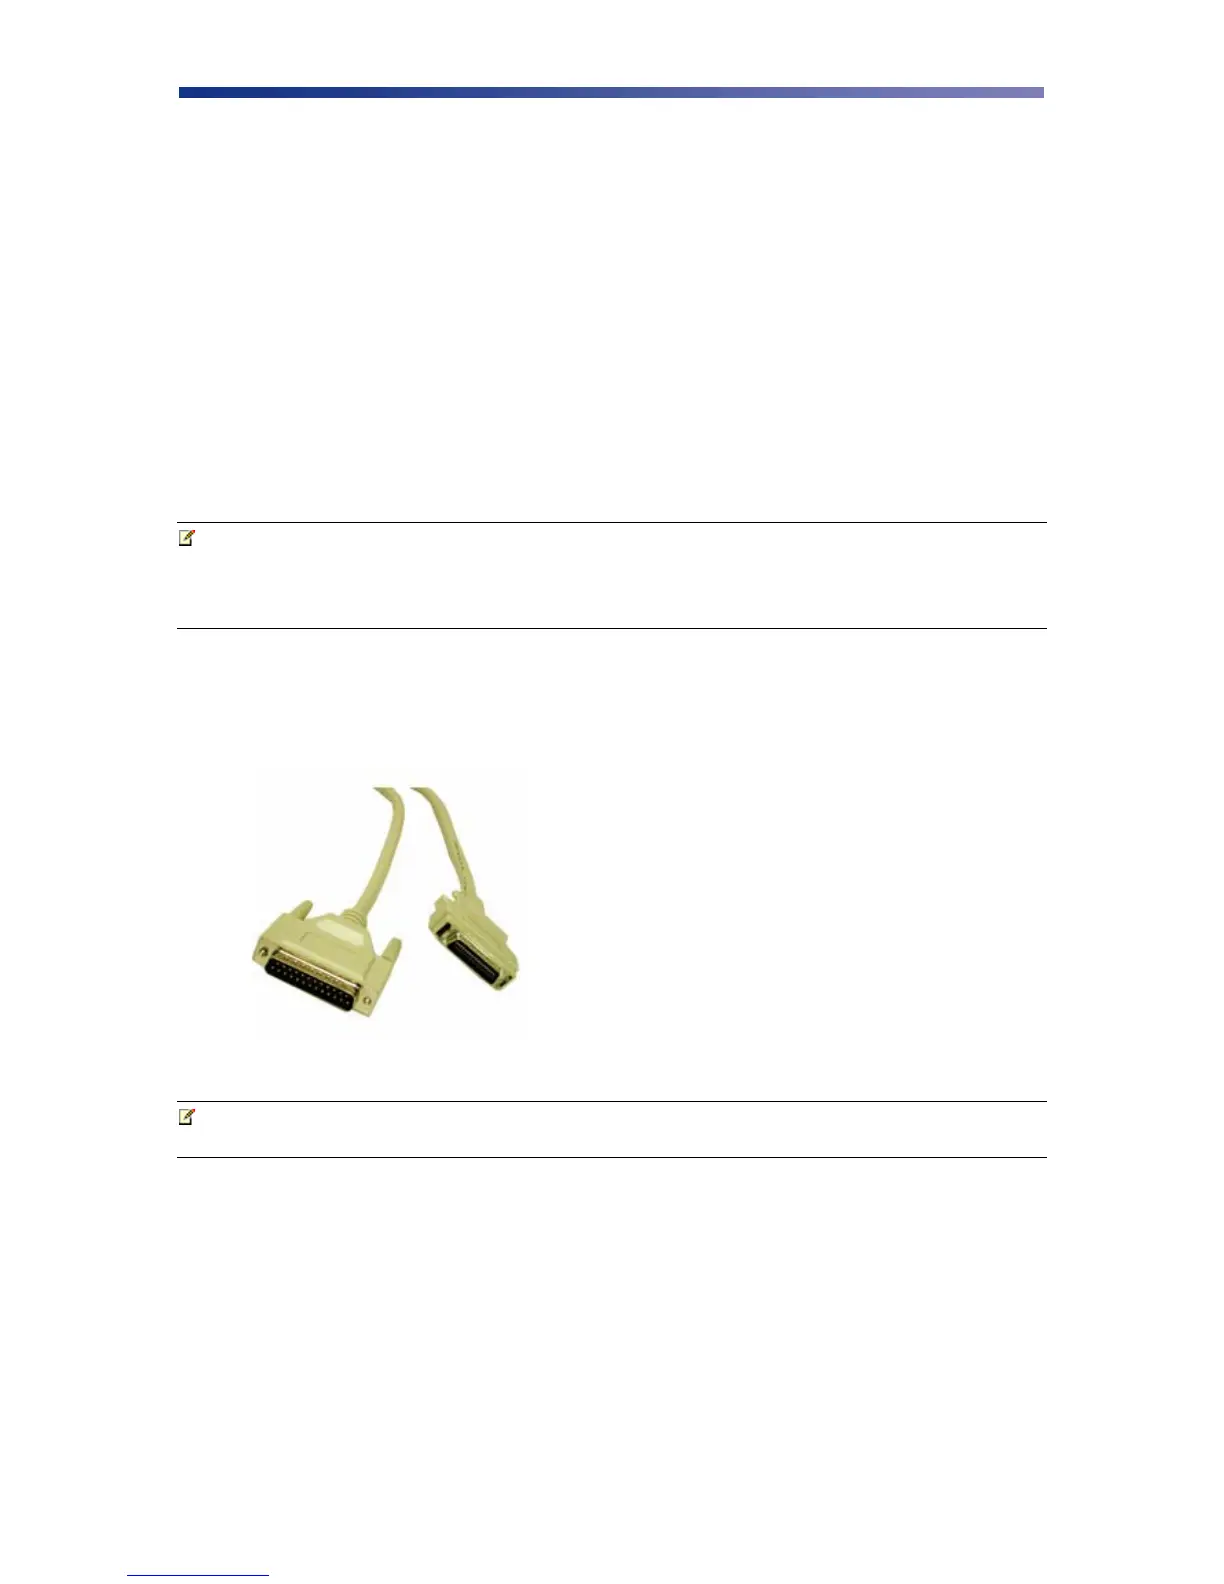
2.4.2 Parallel Connection
To connect the printer to your computer, obtain the appropriate interface cable. A printer to PC
interface cable is a non standard accessory.
Note Use only a shielded, Type C, IEEE 1284 parallel port cable up to a maximum of
6.5 feet long.
1. Make sure the printer and computer are turned off.
Figure 2-14: Parallel cable