15
3. Plug the other end of the USB cable into the computer.
4. Insert the power cord into the power receptacle on the rear of the printer. Plug the other
end into an available wall outlet.
2.5 Loading Cards
Before you begin printing, you must load blank cards into the printer’s card feeder. You may
load cards while the printer’s power is either on or off. You may also load cards while the printer
is printing. The printer is factory configured to feed and print standard size CR-80 card stock at
30 mil. To adjust the card thickness, see Chapter 2.6: Card Thickness Adjustment. To load
cards, follow these steps:
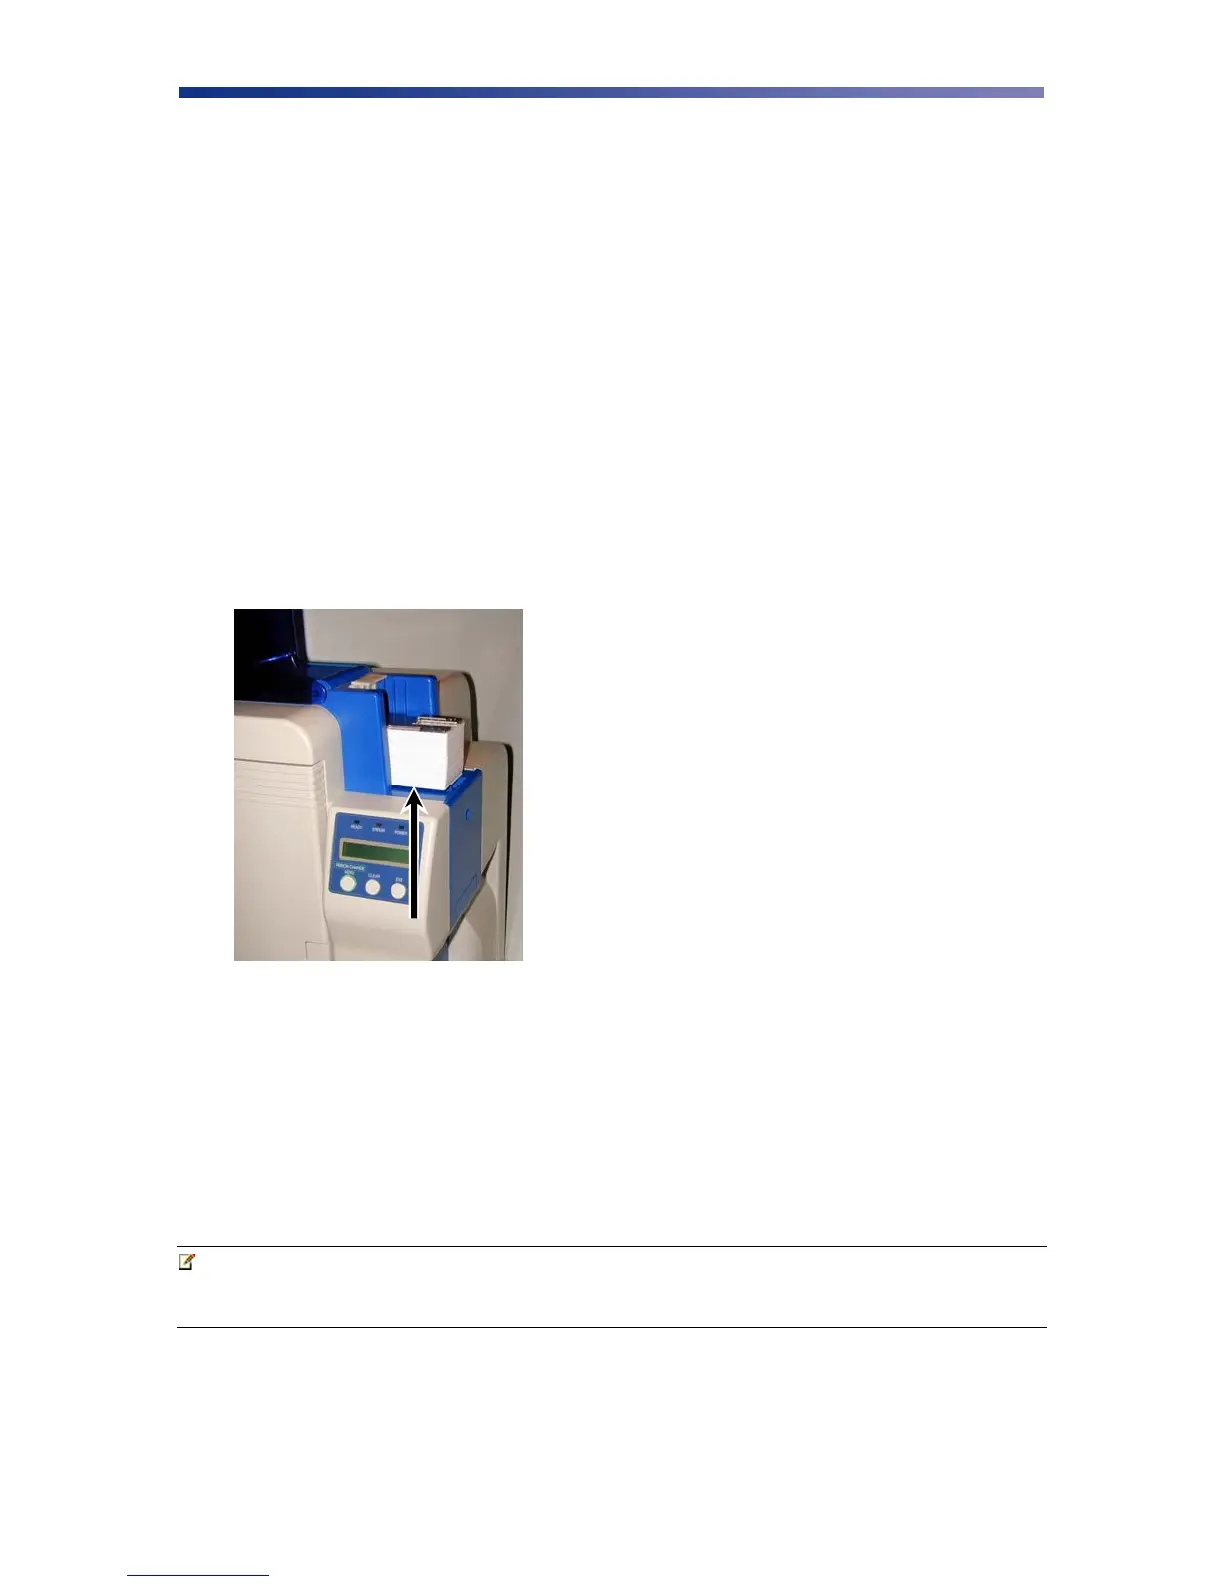
1. Lift the card feeder door and remove the card weight.
2. Remove a new stack of cards from their packaging. Shuffle the cards but be cautious not to
touch the card surface as dirt from your hands could impair the print quality.
3. Holding the stack of cards by their edges, place the cards into the card feeder between the
guides.
4. Always load cards with the primary print side facing up. If inserting cards with a magnetic
stripe, ensure the magnetic stripe is positioned on the bottom and towards the back.
Incorrect positioning will result in encoder write errors.
5. Once the cards are loaded, place the card weight on top of the card stack with the raised
bevel handle facing away from the printer. The card weight increases feeding reliability
primarily when only a few cards are in the card feeder.
6. Close the card feeder door. The cards will automatically feed from the bottom first.
Note Stack the cards evenly to prevent the printer from reporting a “pick up error”.
Always store your card stock in its original packing or in a clean, dust-free
container. Ideally, use cards as soon as possible.
Figure 2-18: Stack cards