UDO LP400 User Guide
_____________________________________________________________________________________________________
LP400 User Guide (11/07)
30
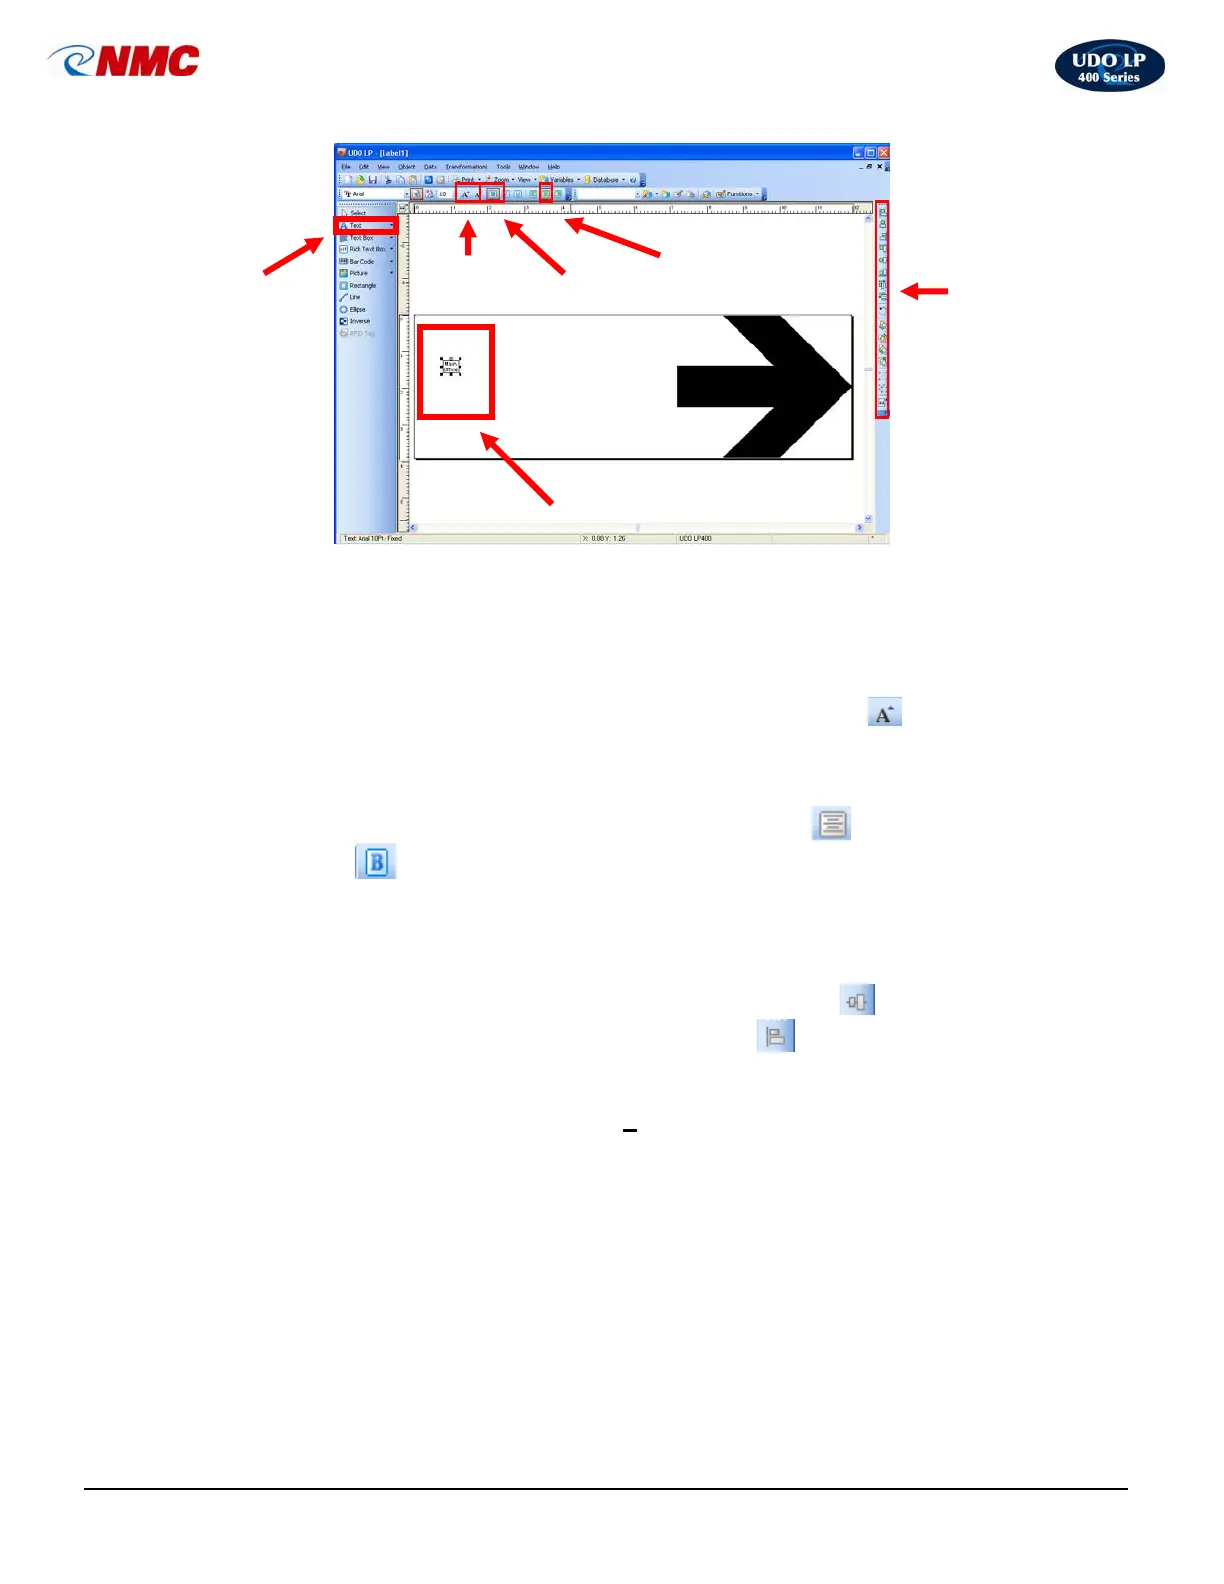
6. Select the ‘Text’ tool (Fig. 4) from the toolbox toolbar located on the left side
of the screen. Position the cursor on the label and click. (Note: The ‘A’ will
appear next to the cursor.) Type in the text “Main Office” on two lines. Click
the text box or the label to select the text box (Fig. 4).
7. With the Text Box selected, Click the ‘Increase Font Size’
icon from the
text toolbar (Fig. 4). You may also change the font size from the pull down
menu or type in the size. Increase the font size to 104.
8. With the Text Box selected, Click the ‘Center’ button
icon. Click the
‘Bold’
icon (Fig. 4) (just as you would if you were using MS Word) from
the Text Toolbar at the top of the screen (Fig. 4).
9. With the Text Box selected, hold down the ‘Ctrl’ button and align the text
box to the label using the Design/Alignment toolbar on the right side of the
screen (Fig. 4). Click on the icons to ‘Vertically Center’
the text box and
‘Left Align’ the text box to the edge of the label
(Fig. 4).
10. The label should look like the label in Fig. 5. The label is now ready to print.
Click on the ‘Print’ icon or select ‘F
ile’ from the top menu, and then choose
‘Print’.
Fig. 4
Center
Align Text
Bold Text
Increase
Font Size
Selected
Text Box
Text
Design /
Alignment
Toolbar
 Loading...