IP390 Security Platform Installation Guide 23
2 Installing the Nokia IP390 Appliance
This chapter describes how to install the Nokia IP390 appliance. The following topics are
covered:
Before You Begin
Rack Mounting the Appliance
Connecting Power
Connecting to the Console or Auxiliary Port
Connecting to Network Interfaces
Before You Begin
To rack-mount the appliance, you need:
Phillips-head screwdriver
Grounding wrist strap
Suitable, grounded work surface on which to place the chassis tray assembly
Caution
To help guard against electrostatic discharge damage, make sure you are properly
grounded by using a grounding wrist strap and following the instructions provided with
the wrist strap before you handle the components or open the appliance.
Rack Mounting the Appliance
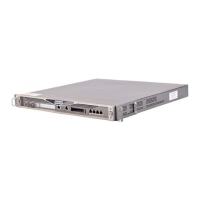
The IP390 appliance mounts in a standard 19-inch rack with four mounting screws as Figure 5
shows.
Note
To avoid damaging your equipment, Nokia recommends that you use all four rack-mounting
screws when you install your appliance on the rack.